SeaLand 8900 Series MasterFlush Installation User Manual
Page 10
10
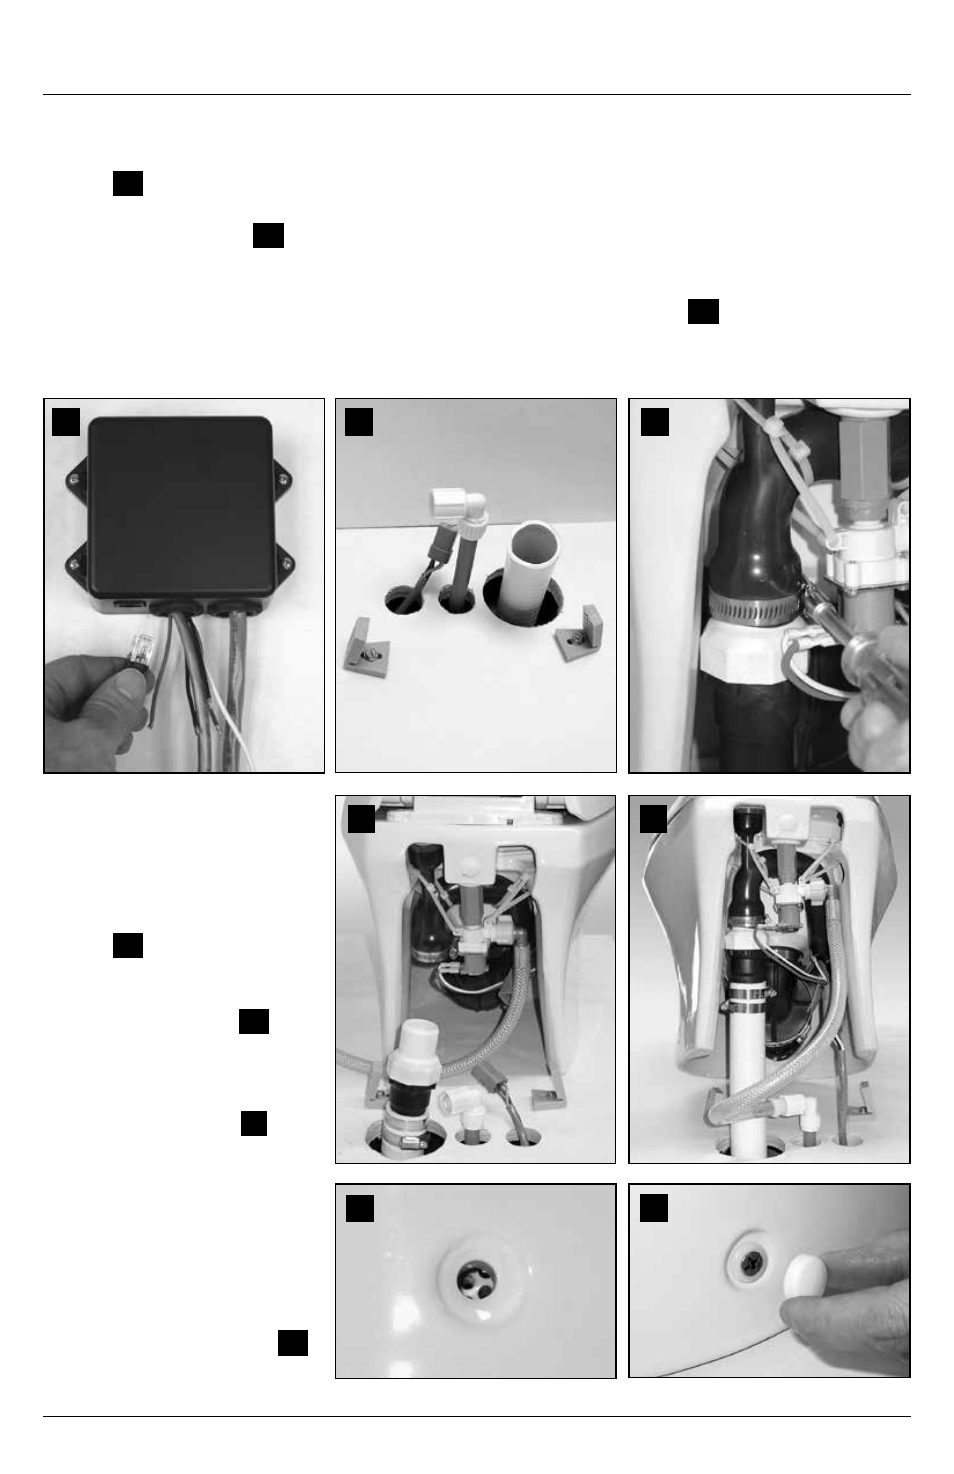
15 . Position toilet over floor
brackets and tilt toilet up
from back . Push discharge
assembly fitting and hose up
into discharge loop outlet,
and tighten band clamp
(fig .
17
) .
16 . Lower toilet down so that
floor brackets show through
fastener holes (fig .
18
) .
17 . Turn on water supply and
electrical power to toilet,
and check for leaks . Press
“Flush” switch (fig .
3
2,
page 2) . If leak occurs,
tighten connection .
18 . Insert plastic adapters from
Floor Bracket Kit into fas-
tener holes . Fasten toilet to
brackets with short screws
provided in kit .
19 . Cover floor bracket screws
with plastic covers (fig .
19
) .
11 . Route water supply and discharge plumbing to toilet according to system requirements (Section
4.2) . Make sure to provide extra discharge hose length to assure easy connection to toilet
(fig .
14
) .
12 . Loosen band clamp on discharge loop outlet and remove discharge adapter fitting/hose
fitting assembly (fig .
15
) .
13 . Lubricate discharge fitting assembly and inside end of discharge hose with liquid dishwashing
soap . Push discharge fitting assembly into discharge hose and connect with two hose clamps .
Be sure to position hose clamp screws 180° apart from each other (fig .
16
) . Place toilet near
access holes and floor brackets .
14 . Connect toilet water line to water supply line and 4-pin connector to control module cable .
13
14
17
18
19
16
15
Installation
SeaLand MasterFlush Toilet