Reznor R6GP Option - Installation - LP Conv User Manual
Page 7
7
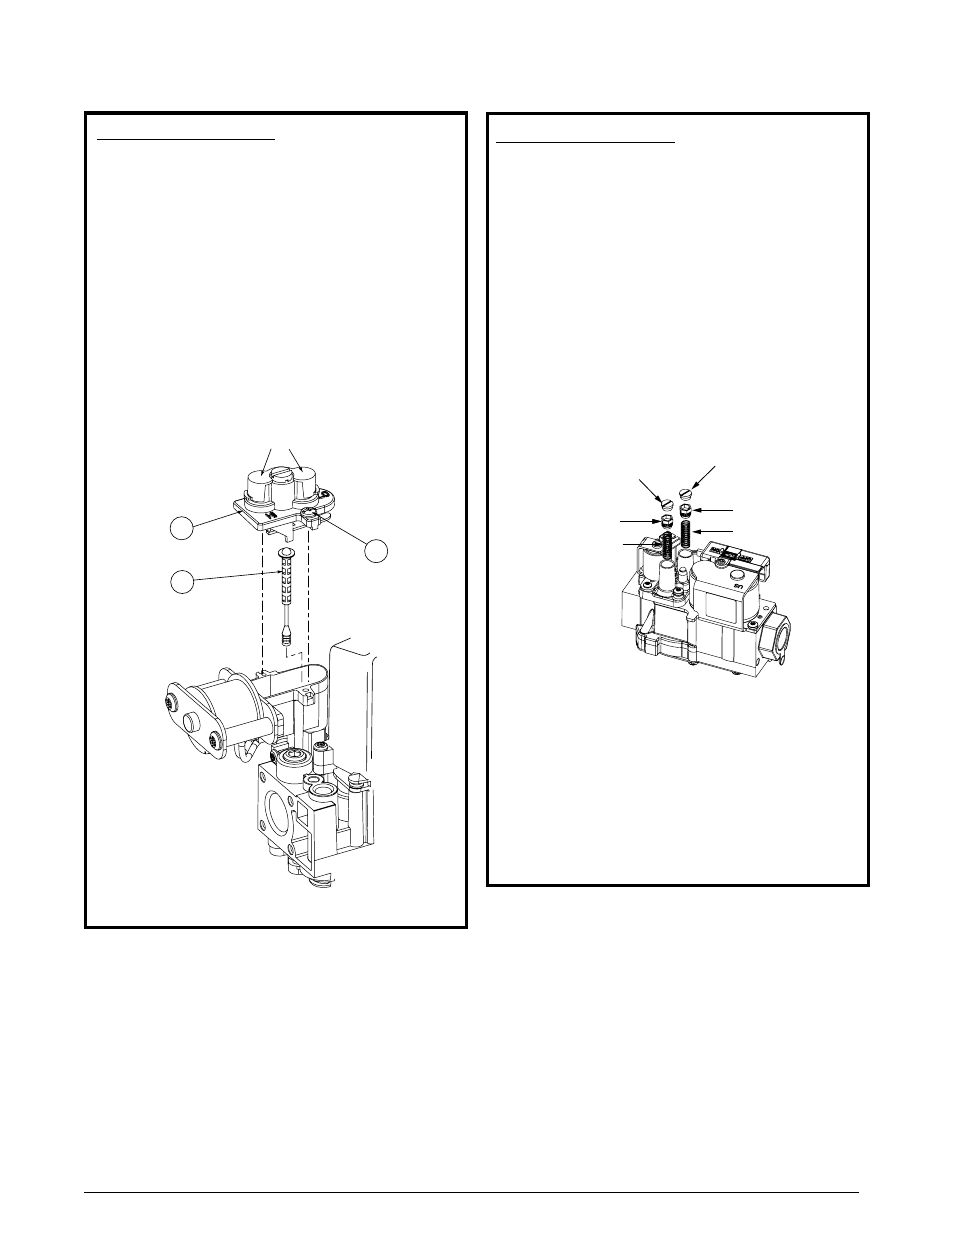
2 - Stage honeywell valves
Model VR9205Q1127
IMPORTANT NOTES:
•
When converting to LP/Propane gas from natural
gas, the springs from gas valve must be replaced
by the larger springs from the kit. The LP/Propane
springs for both HIGH & LOW fire are the same size,
shape and color.
• Use only a Torx-25 or 3/16” flathead screwdriver when
removing adjustment screws or during pressure
adjustment.
1. Remove the HIGH fire cap screw. See Figure 5.
2. Remove and discard the HIGH fire adjustment screw from
the gas valve.
3. Remove the spring from the gas valve and discard.
4. Install a larger spring from the conversion kit.
5. Install a new adjusting screw from the kit.
6. Repeat steps 1 - 5 for replacement of the LOW fire spring
and adjustment screw.
7. Check and adjust the regulator setting. See Gas Pressure
Adjustment Section.
8. Reinstall the cap screws on the HIGH and LOW regulators.
Plastic replacement cap screws are provided in the
conversion kit.
9. Affix the label from the conversion kit to the gas valve.
High Fire
Cap Screw
High Fire
Adjustment Screw
Low Fire
Cap Screw
Low Fire
Adjustment Screw
Spring
Spring
Figure 5. Pressure Regulator Spring &
Adjustment Screw Removal
P/N - 624787
1
2
3
2 Adjustment Screws
(beneath cap)
Figure 4. Spring / Stem Assembly Removal
P/N - 624652
Model VR8205Q2381
ImPORTANT NOTE: When converting to LP/Propane
gas from natural gas, the white stem/spring assembly
in the gas valve must be replaced by the black stem/
spring assembly in the kit.
1. Remove two screws (1) securing the pressure regulator
cover assembly (2) to the gas valve. See Figure 4.
2. Remove the pressure regulator cover assembly (2) from
the gas valve.
3. Remove and discard the existing stem/spring assembly
(3) from the gas valve.
4. Install the replacement stem/spring assembly (3) from
the conversion kit.
5. Reinstall the pressure regulator cover assembly (2) onto
the gas valve.
6. Install the two screws (1) and tighten.
7. Affix the label from the conversion kit to the gas valve