Adding or deleting scenes – PRG Mbox Director User Manual v3.6.1 User Manual
Page 42
36
MBOX
®
DIRECTOR USER MANUAL
+
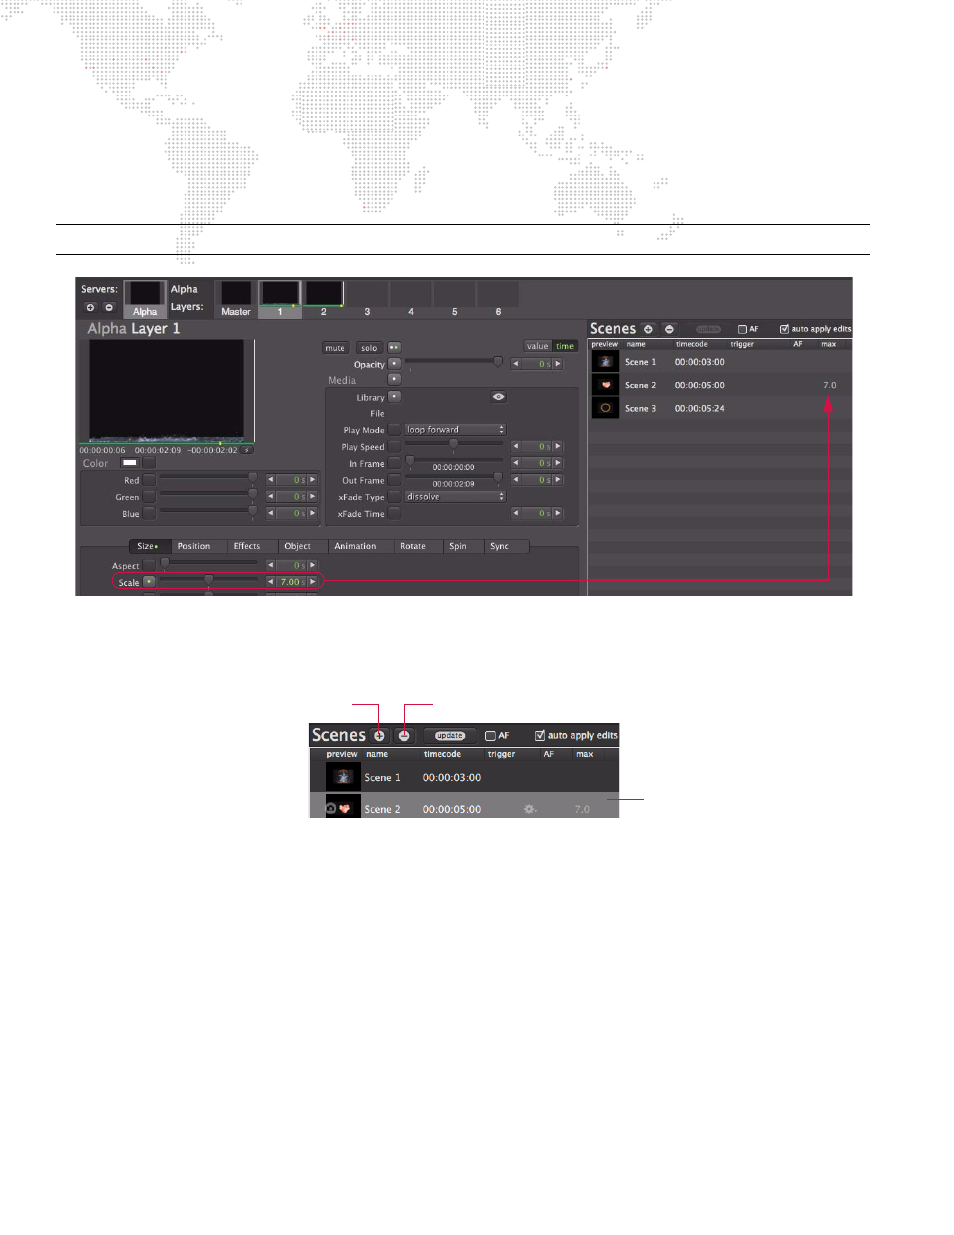
AF (AutoFollow) - Specifies an autofollow time. To enter a time, click in the AF field. Format:
Minutes:Seconds
+
max - This is the computed maximum time-fade of all parameters in the scene, in seconds. If there are no timed
fades, this will be blank. This field in not editable at the Scene List, but if the scene’s xFade (crossfade) Time is
changed it will change the max time. For example, if you have an xFade time of 5 seconds and a Scale change of
7 seconds, then the 7 second time would be used/displayed in the max field.
Note: xFade Time is a DMX512 value with a finite range between 0 and 310 seconds.
Adding or Deleting Scenes
By default, the Scene List starts with one scene labeled "1st Scene." This scenes can be renamed or deleted as
desired.
To add a scene:
Step
1. At Scene List, uncheck "Auto Apply Edits" box or click somewhere in the list to deselect current scene.
Step
2. Select a fixture and configure layers as desired. (Refer to
Step
3. At Scene List, click Add [+] button to add new scene. All current layer information will be stored.
Step
4. Click inside Name field to enter a custom name.
To delete a scene:
Step
1. At Scene List, select scene to be deleted.
Step
2. Click Delete [-] button. Scene will be removed from the list.
To add a preview thumbnail:
The preview thumbnail will be the same as the currently displayed thumbnail in the selected server’s icon box.
+
Click the + icon at the left of the scene name to add thumbnail.
Add Scene
Delete Scene
Selected Scene