Oberon 1020-RAB User Manual
Installation instructions, Model number 1020-rab
Installation Instructions
Model Number 1020-RAB
(877) 867-2312 • www.oberonwireless.com
P/N 2316 – Rev. 01/22/2015
Oberon, Inc. •••• 1315 South Allen Street •••• State College, PA 16801
Copyright 2014
Figure 1
Assembly Components:
- Right angle wall mount – 1 each
- M4 x 8 screw (for attaching Model 1020-00 enclosure) – 4 each
- Model 1020-00 Assembly with instructions – 1 each
- Installation Instructions – 1 each
If any of these items are missing, contact your Oberon representative.
Find a flat work surface to prep the Model 1020-00 enclosure for installation. Make any modifications before mounting to the
wall.
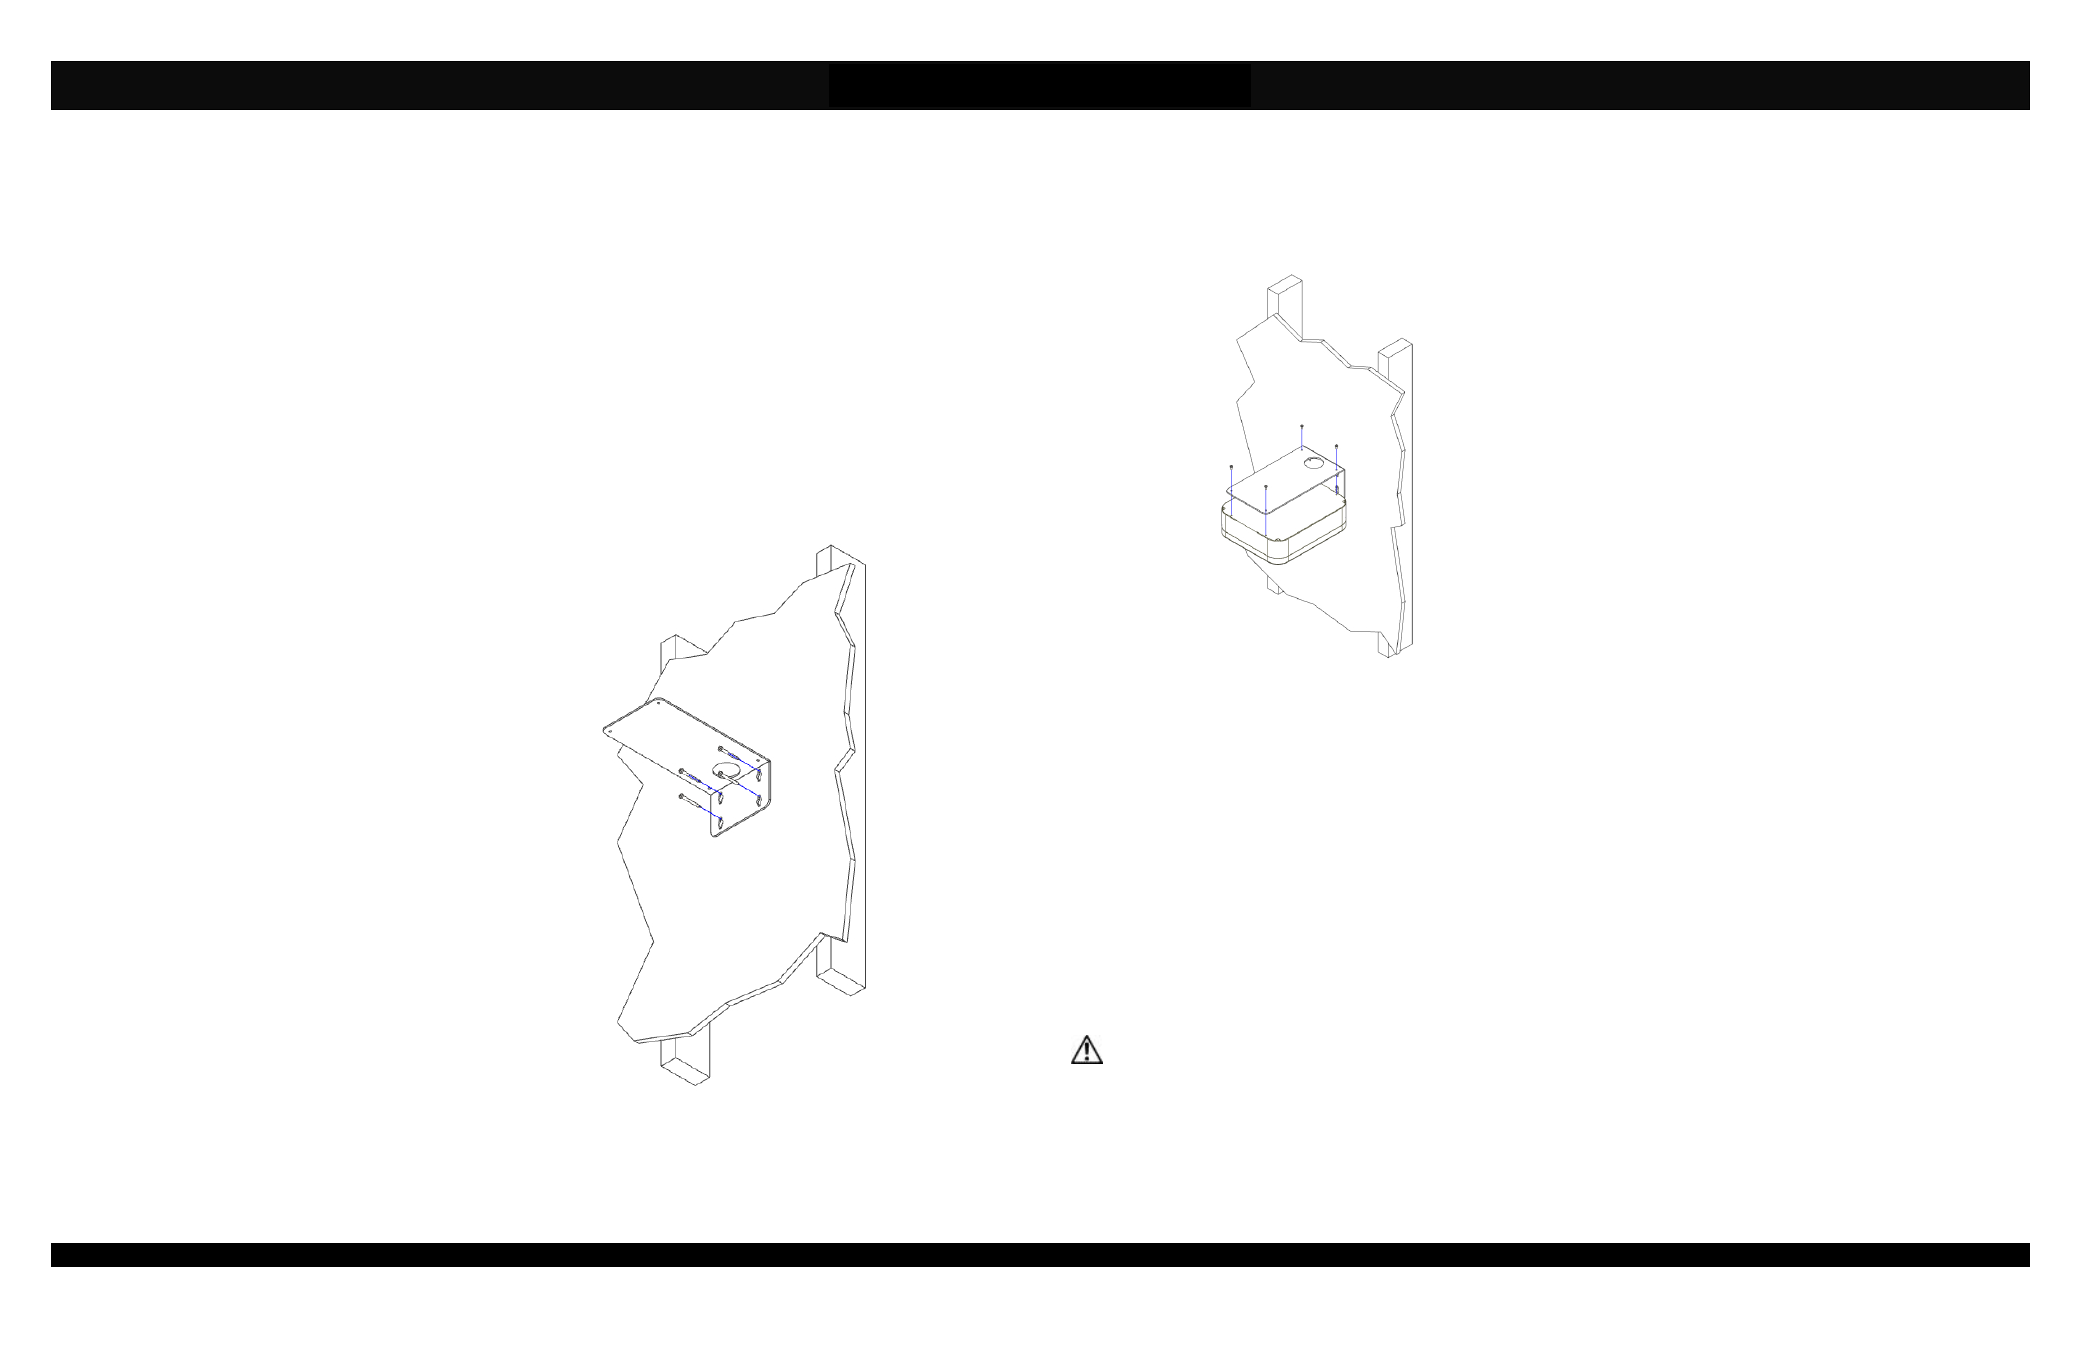
Step 1 – Place the bracket mount on the wall
where it is to be installed (it is recommended that
you mount directly to a stud if possible) and mark
the screw locations. Use a minimum of two (2) #10
x 2” or larger screws (not included) to secure the
mount in place. However, if there is no stud at the
mounting location, it is recommended that you use
a minimum of 4 suitable anchors to secure the
mount in place (Figure 1).
Step 2 – Cut/Drill any holes needed in the Model
1020-00 enclosure for cable pass through.
Page 2
Step 5 – Attach the data and power cables to the access point. After the access point is secured to the mounting bracket,
attach antennas to the access point if required.
**IMPORTANT** - It is important that the mount is securely fastened to the wall to prevent human injury or
damage to the access point.
Page 3
Figure 3
Step 3 – Fasten the enclosure to the bracket
using the provided M4 screws, so the openings
for the cable align (Figure 2).
Step 4 – Follow the Model 1020-00 installation
instructions for fastening access points and
hardware inside the enclosure.