Analog essentials, Getting started guide – Maxim Integrated Analog Essentials Getting Started Guide for LX9 and Nexys3 User Manual
Page 11
Analog Essentials
Getting Started Guide
11
For LX9 and Nexys-3
5.
Running the demonstration programs
Peripheral modules can now be placed into the appropriate PMOD port (Ports A..D) and a menu selection made
to exercise the module’s functionality. For example, place the MAX31723 module into the PMOD B port*. When
prompted for a Pmod port, select “B”.
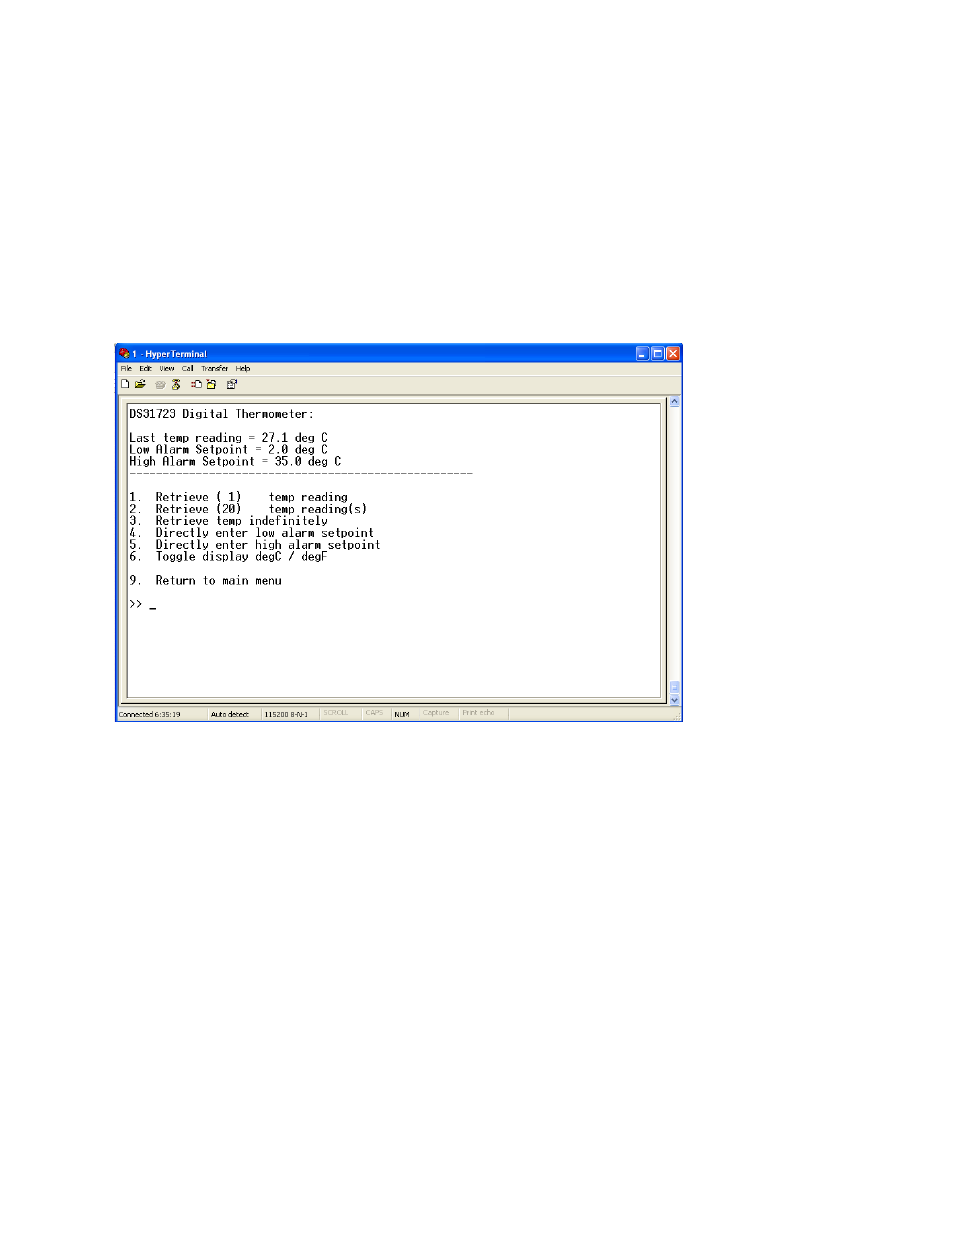
The submenu for the MAX31723 peripheral module will appear and the module may be exercised using the
appropriate keyboard-selected commands. The submenu for the MAX31723 is shown below.
Important note
when running the demo programs
:
Many of the programs allow incrementing and decrementing the primary registers or program values using the
arrow keys. In these cases, the Up and Down arrows will increment and decrement the value in small steps
(generally, but not always by an increment of one). The left and right arrow keys will increment and decrement
the value in larger steps. This option is not indicated on the submenus.
*Note: The Nexys-3 board uses all 4 available Pmod ports which are considered PortA - PortD running left to
right across the top of the board. The LX9 board only uses the Pmod port labeled “J5” so the port selection step
does not apply when using this board.