Removing the main tray assembly – HP C240 User Manual
Page 140
122
Changing Your Workstation’s Hardware Configuration
Removing the Main Tray Assembly
Removing the Main Tray Assembly
Perform the following steps to remove the main tray assembly:
1
Power off the system, the monitor, and any peripheral devices. Unplug the system
unit power cord and the power cord of any peripheral devices from ac wall out-
lets. Disconnect the power cord from the system unit.
NOTICE:
There is no need to manually shut down the HP-UX operating system on
your workstation before powering it off. When you turn off the power
switch, your workstation automatically shuts down the operating system
before terminating the power.
2
Disconnect cables from any peripheral devices.
3
Attach a static-grounding wrist strap to bare metal on the back panel of the system
unit.
4
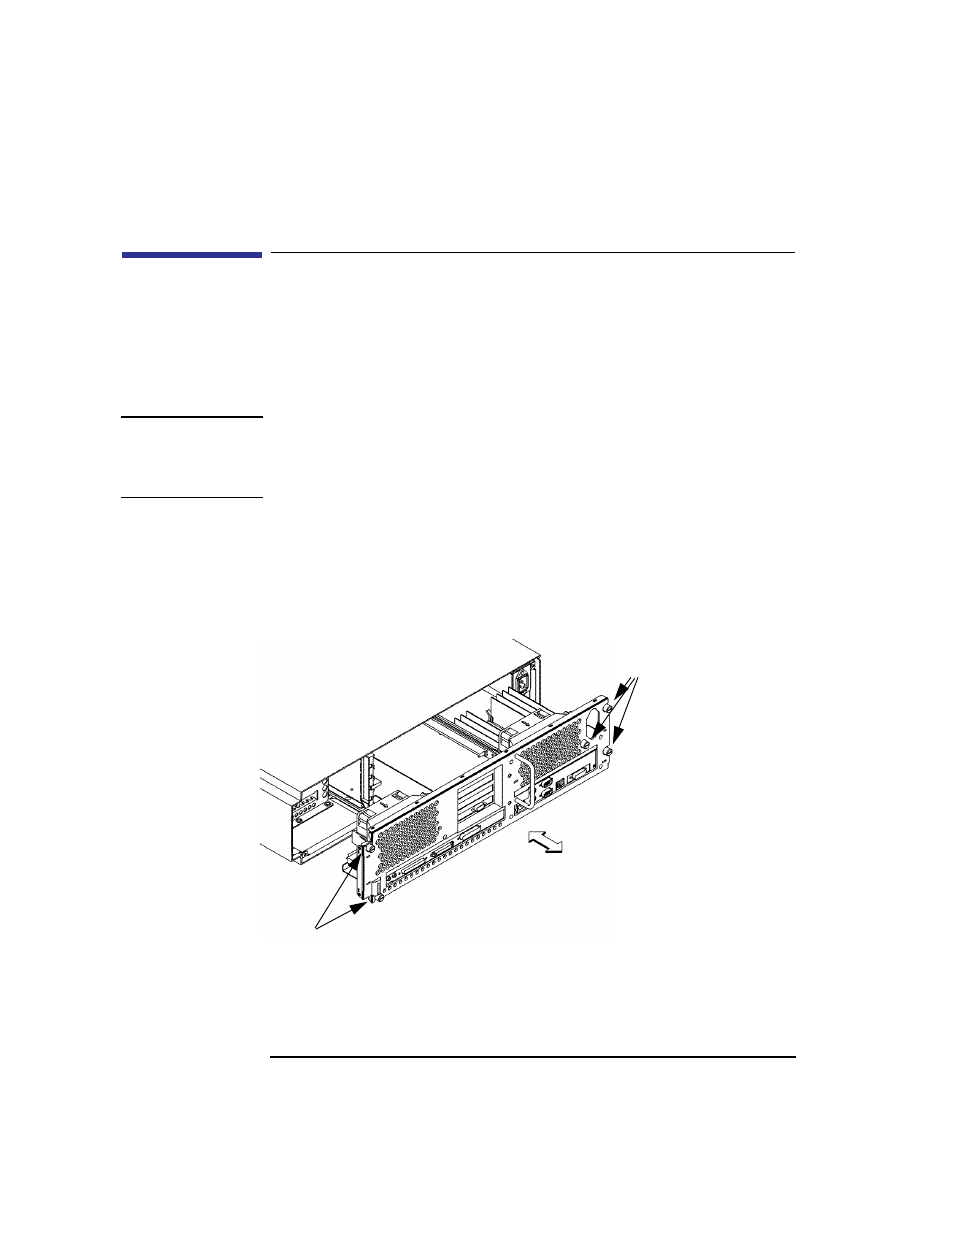
Completely loosen the five thumb screws on the rear of the system unit, as shown
in Figure 38.
Figure 38
Removing Main Tray Assembly
Thumb Screws
Thumb
Screws