Apply the decals – Great Planes Z526 Zlin Akrobat GP/EP ARF - GPMA1024 User Manual
Page 32
32
o
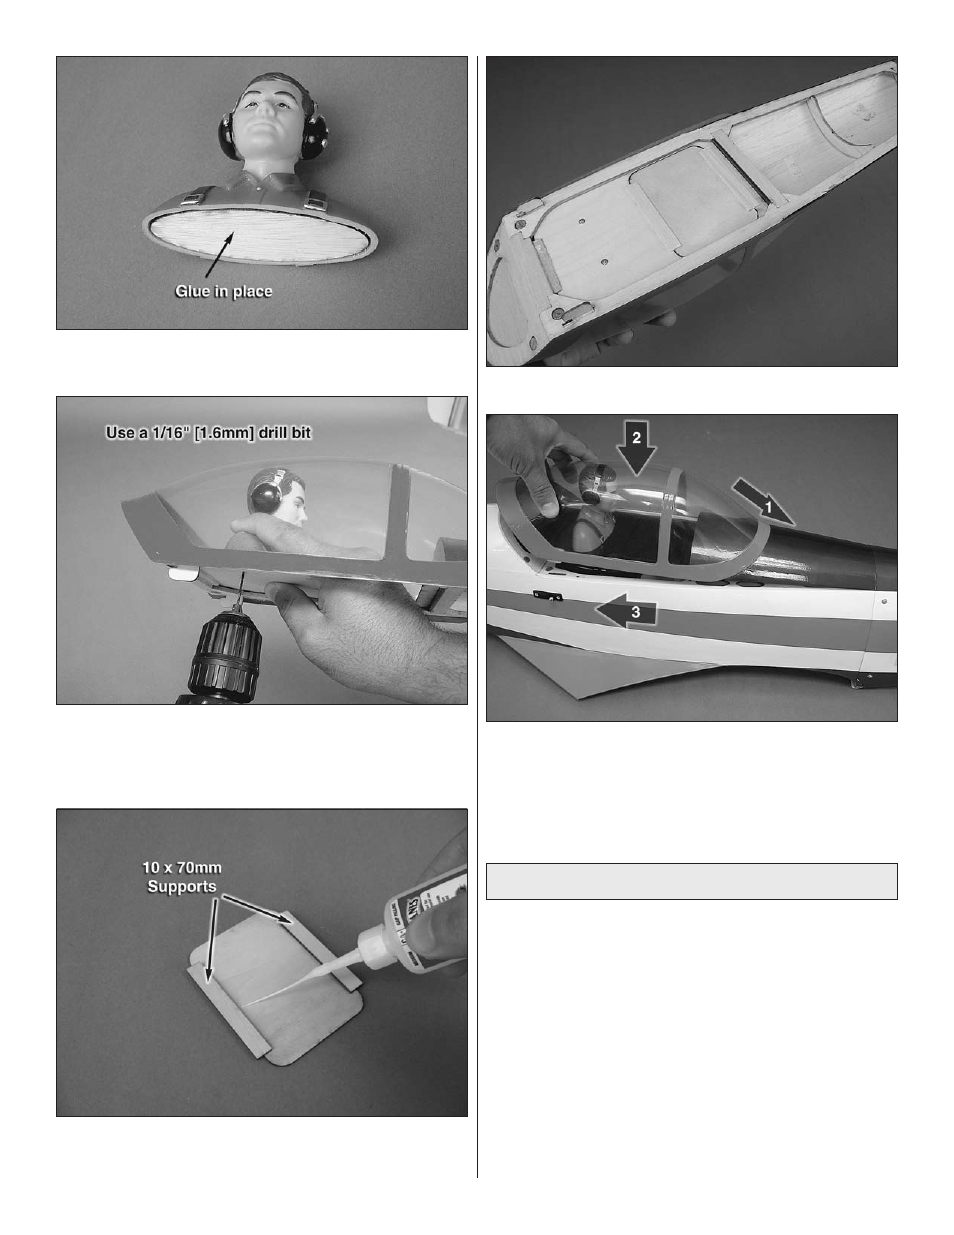
2 . Locate the oval shaped piece of wood supplied in this
kit . Use epoxy to glue this into the base of the pilot figure .
o
3 . Position the pilot figure under the canopy and drill at
least two holes through the canopy floor and pilot figure base
using a 1/16" [1 .6mm] drill bit . Use sheet-metal screws or
servo screws (not included) to attach the pilot figure .
o
4 . Glue the two 10 x 70mm plywood support pieces to the
bottom of the cockpit floor filler plate as shown .
o
5 . Turn over the hatch and glue the filler plate in place .
o
6 . Install the canopy / hatch to the fuse first by sliding the
two dowels into the holes in the forward former and then
dropping down and sliding back the canopy . The two hooks
under the canopy should engage in the fuselage . Magnets
will keep the hatch back and locked .
Apply the Decals
1 . Use scissors or a sharp hobby knife to cut the decals from
the sheet .
2 . Be certain the model is clean and free from oily fingerprints
and dust . Prepare a dishpan or small bucket with a mixture
of liquid dish soap and warm water—about one teaspoon of
soap per gallon of water . Submerse the decal in the soap
and water and peel off the paper backing . Note: Even though
the decals have a “sticky-back” and are not the water transfer
type, submersing them in soap & water allows accurate
positioning and reduces air bubbles underneath .
3 . Position decal on the model where desired . Holding the
decal down, use a paper towel to wipe most of the water
away .