Cowl installation – Great Planes Z526 Zlin Akrobat GP/EP ARF - GPMA1024 User Manual
Page 30
30
Cowl Installation
Several spots must be trimmed out on the cowl if using a
glow engine . If you’re using the electric motor, no trimming
is necessary .
o
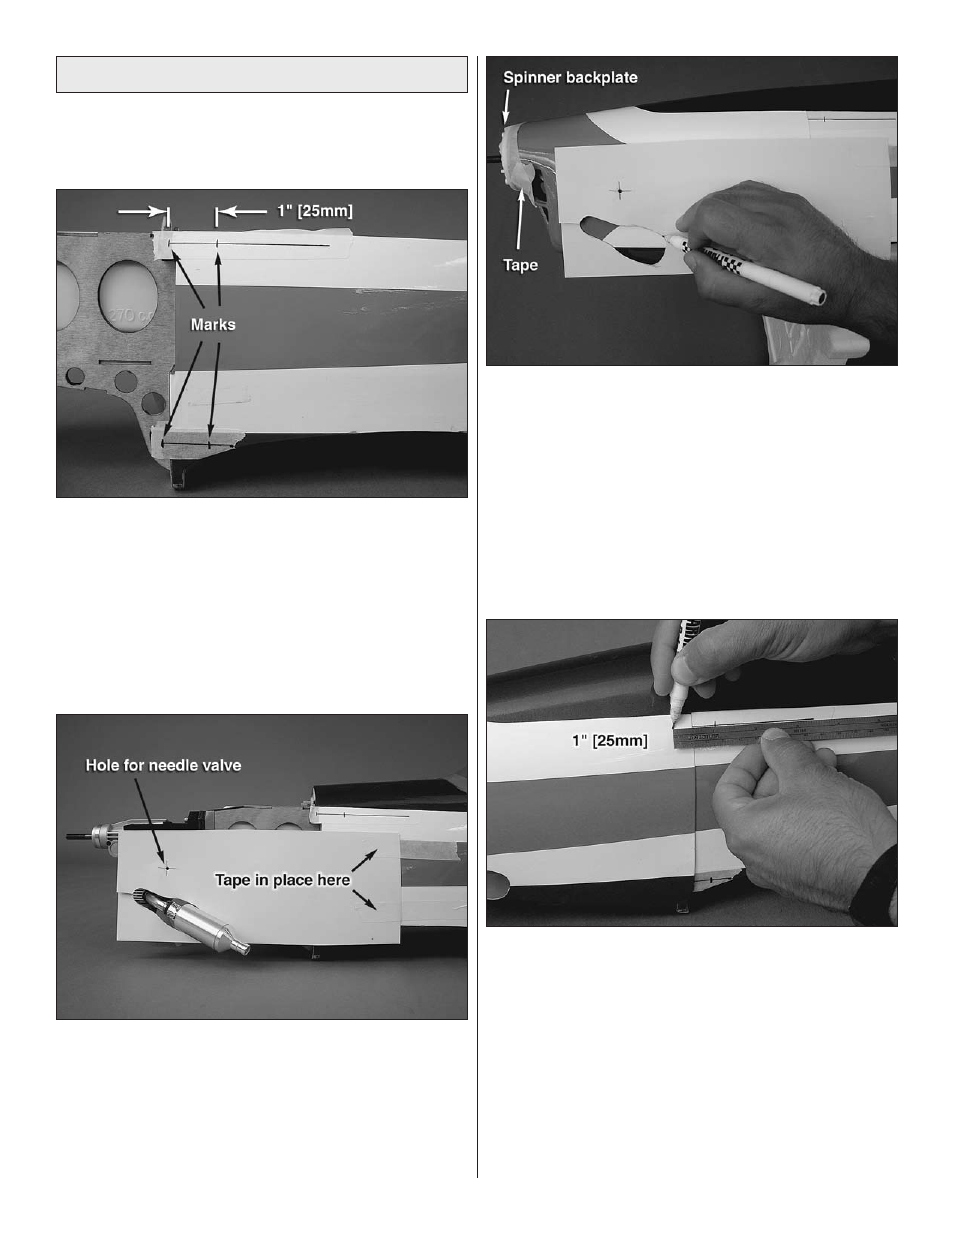
1 . Cut four pieces of masking tape about 4" [102mm] long .
Apply the tape to the fuselage in the locations shown (two
per side) so that they are centered with the hardwood cowl
mounting blocks . Using a ruler, draw a line from the center
of the block back as far as you can . Make a vertical mark at
the center of each cowl mounting block . Measure 1" [25mm]
back and make a second vertical mark .
o
2 . Cut several pieces of card stock to shape to use as
cowl trimming templates for the cylinder head, needle valve,
glow plug, and muffler . Tape each piece to the fuselage aft
of where the edge of the cowl will be . Trim holes in the card
stock to clear any parts that will interfere with the cowl .
o
3 . Fit the canopy and hatch assembly to the fuselage .
Remove your muffler or anything that will interfere with the
cowl . Fit the cowl . Fit the backplate of the spinner to the
crankshaft of the engine . Slide the cowl back so that there is
at least 1/8" [3 .2mm] of clearance between the cowl ring and
the spinner backplate . Wrap tape around the backplate and
the front of the cowl ring so that the cowl stays aligned with
the backplate . Trace the outline of the templates onto the
cowl using a felt-tip pen .
o
4 . With the cowl still in position, align the ruler with the
lines you drew and make marks on the cowl that are 1"
[25mm] forward of the vertical marks you drew . Use a 1/16"
[1 .6mm] drill bit to drill four holes to mount the cowl . Remove
the cowl and cut out the clearance holes . Refit the cowl and
check your work . Re-trim if necessary .