Balance the model laterally, Preflight identify your model – Great Planes Z526 Zlin Akrobat GP/EP ARF - GPMA1024 User Manual
Page 35
35
o
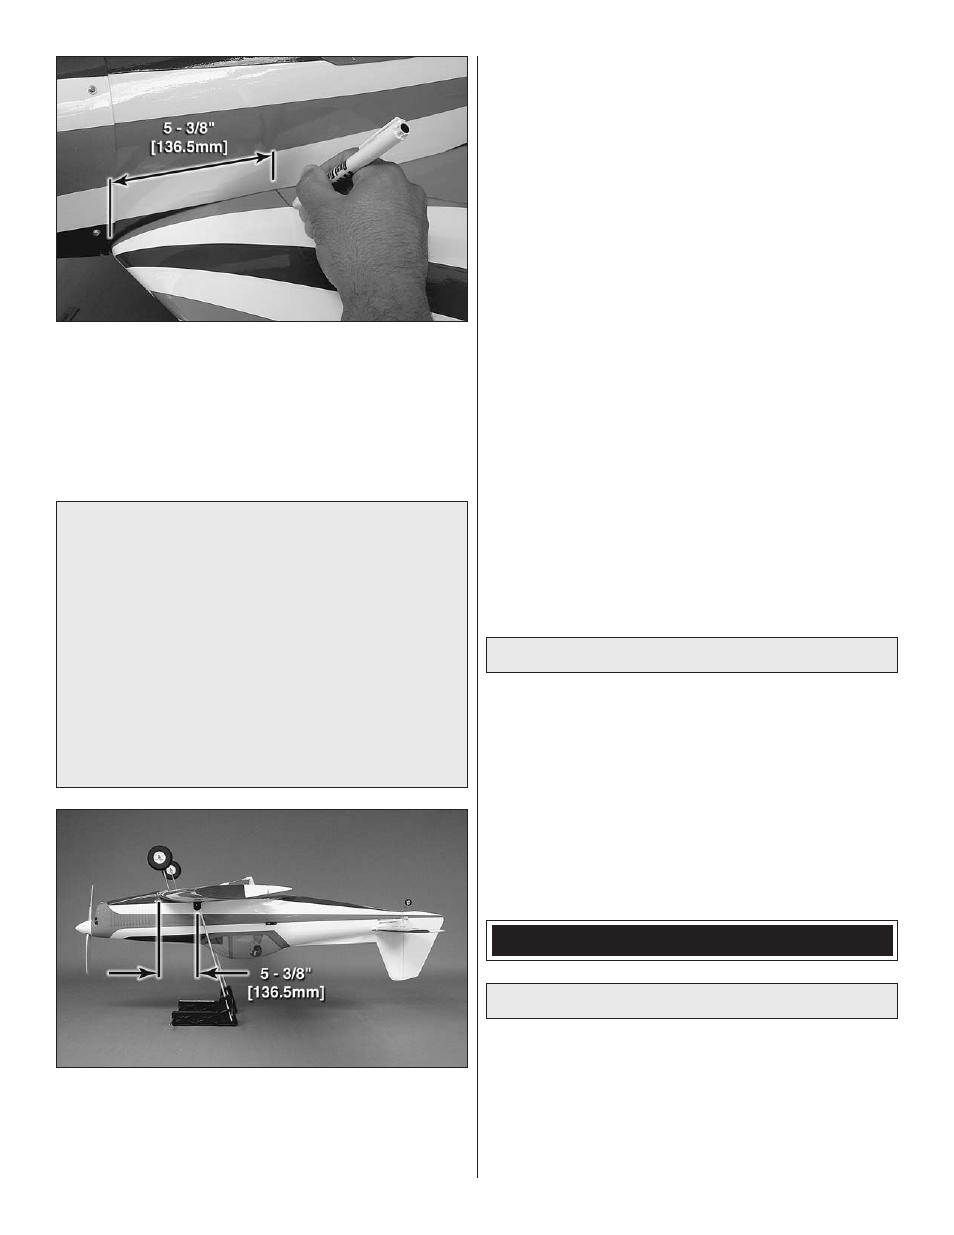
2 . Use a felt-tip pen or 1/8" [3mm]-wide tape to accurately
mark the C .G . on the top of the wing on both sides of the
fuselage . The C .G . is located
5-3/8" [136.5mm] back
from the leading edge of the wing at the wing root . Note:
It is permissible to fly the airplane with the C .G . up to 1/2"
[12 .7mm] forward or 3/8" [9 .5mm] aft of this mark, but for the
first flights set the C .G . for the recommended location . Do not
fly outside of the listed C .G . range!
To ensure a successful first flight, fly your Zlin 526
Akrobat set up only according to the C .G . and control
surface throws specified in this manual . The throws
and C .G . are not arbitrary, but have been determined
through extensive testing and accurate record-keeping .
This provides you with the best chance for success
and enjoyable first flights that should be surprise-free .
Additionally, the throws and C .G . shown are true, real
data which will allow the model to perform in the manner
in which it was intended when flown by a pilot of the skill
level for which it was intended .
DO NOT OVERLOOK
THESE IMPORTANT PROCEDURES. A model that
is not properly setup will be dangerous, unstable, and
possibly unflyable .
o
3 . With the wing attached to the fuselage, all parts of the
model installed (ready to fly), all batteries (electric), and an
empty fuel tank (glow), place the model upside-down on
a Great Planes CG Machine, or lift it upside-down at the
balance point you marked .
o
4 . If the tail drops, the model is “tail heavy” and the battery
pack and/or receiver must be shifted forward or weight must
be added to the nose to balance . If the nose drops, the
model is “nose heavy” and the battery pack and/or receiver
must be shifted aft or weight must be added to the tail to
balance . If possible, relocate the battery pack and receiver
to minimize or eliminate any additional ballast required . If
additional weight is required, nose weight may be easily
added by using a “spinner weight” (GPMQ4645 for the 1 oz .
[28g] weight, or GPMQ4646 for the 2 oz . [57g] weight) . If
spinner weight is not practical or is not enough, use Great
Planes (GPMQ4485) “stick-on” lead . A good place to add
stick-on nose weight is to the structure around the firewall
(don’t attach weight to the cowl—it is not intended to support
weight) . Begin by placing incrementally increasing amounts
of weight on the bottom of the fuse over the firewall until the
model balances . Once you have determined the amount of
weight required, it can be permanently attached . If required,
tail weight may be added by cutting open the bottom of the
fuse and gluing it permanently inside .
Note: Do not rely upon the adhesive on the back of the lead
weight to permanently hold it in place . Over time, fuel and
exhaust residue may soften the adhesive and cause the
weight to fall off . Use #2 sheet-metal screws or epoxy to
permanently hold the weight in place .
o
5 .
IMPORTANT: If you found it necessary to add any weight,
recheck the C .G . after the weight has been installed .
Balance the Model Laterally
o
1 . With the wings level, have an assistant help you lift the
model by the engine propeller shaft and the bottom of the
fuse under the TE of the fin . Do this several times .
o
2 . If one wing always drops when you lift the model, it
means that side is heavy . Balance the airplane by adding
weight to the other wing tip .
An airplane that has been
laterally balanced will track better in loops and other
maneuvers.
PREFLIGHT
Identify Your Model
No matter if you fly at an AMA sanctioned R/C club site
or if you fly somewhere on your own, you should always
have your name, address, telephone number and AMA
number on or inside your model . It is
required at all AMA
R/C club flying sites and AMA sanctioned flying events .
Fill out the identification tag on page 39 and place it on
or inside your model .