Great Planes Z526 Zlin Akrobat GP/EP ARF - GPMA1024 User Manual
Page 14
14
o
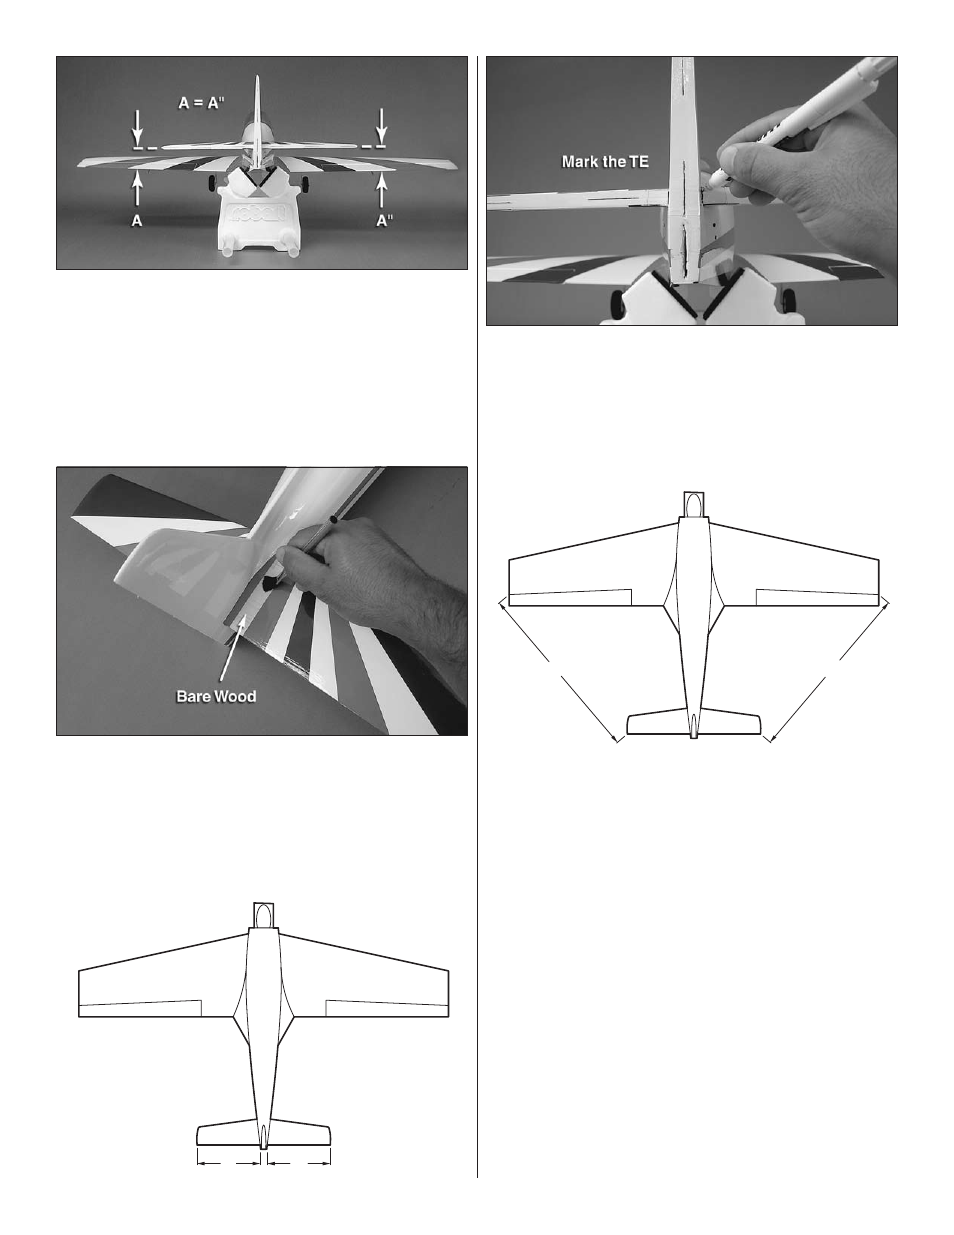
2 . Test fit the horizontal stabilizer in the fuselage . Be
careful to install it so that the red, white and blue trim is
facing up . Check to see that the stab is parallel with the
wings . Distance A must equal distance A" . If one side of the
stab is slightly higher than the other, try adding a few ounces
of weight to the high side to see if this will make the stab
parallel . If this does not work, gently sand the stabilizer slot
in the fuse using 150-grit sandpaper . Sticking the sandpaper
to a 1/2" [13mm] wide stick is helpful .
o
3 . Mix up a generous-sized batch of epoxy (about the same
amount you used when you joined your wings) . Thoroughly
coat the uncovered center section of the stabilizer with
epoxy . Paying attention to the trim scheme, carefully slide
the stabilizer into the slot in the fuselage . Slide the stab past
center and re-coat the top and bottom of the stab center
section . Proceed immediately to the next step .
B = B'
B
B'
o
4 . Re-center the stab by measuring the distance along
the TE from the tip of the stab to the fuselage side . Do this for
both sides of the stab, making B = B' . With the stab centered,
use a felt-tip pen to mark the TE of the stab on both sides .
Proceed to the next step .
C = C'
C
C'
o
5 . Using the marks you made to keep the TE of the stab
centered, measure from the tip of the stab to the TE of the
wing (not the aileron) . Adjust the position of the stab until
distance C = C' . Check to see that your stab is properly
leveled and parallel with the wing, adding weight to the high
side (see step 4 above) .
o
6 . Clean up the excess epoxy using denatured alcohol
and paper towels . Set the airplane aside and allow the epoxy
to fully cure .