Assemble the battery holder – Great Planes Spirit of St. Louis ARF - GPMA1151 User Manual
Page 7
❏
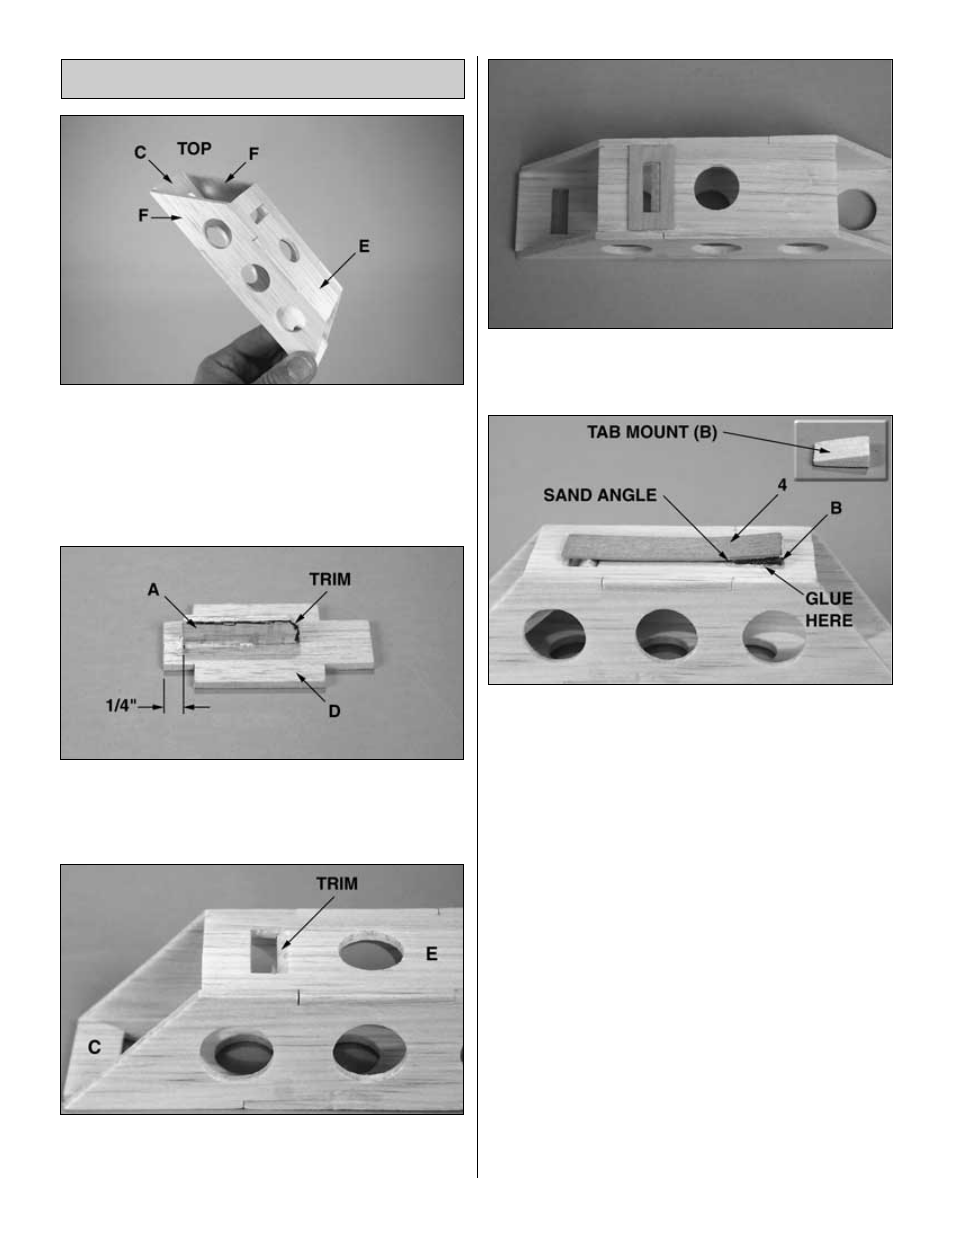
1. Without using any glue, assemble the 1/8” balsa parts
of the battery holder (C, E, F, F) as shown in the photo.
Once all the parts are joined, use medium CA to
permanently hold them together. Be sure the parts are
square to each other, not twisted.
Note: The cutouts in C and E are at the top. Parts F are
oriented with the end that has the steeper slope at the top.
❏
2. Build the battery holder cover from parts A and D.
Glue A ¼” from the end of D as shown in the photo. Note:
You may need to trim the end of A to get it to fit into the
battery holder properly.
❏
3. The cutouts in C and E may need to be trimmed at an
angle to allow the battery holder cover to fit properly in the
battery holder.
❏
4. Glue the two 1/32” x 11/16 x 1-3/8” [1 x 18 x 34mm] ply
battery holder reinforcement (5) around the cutouts in
parts C and E as shown in the photo.
❏
5. Fit the battery holder cover into the battery holder. Glue
the tab (4) and the tab mount (B) to the holder as shown.
The tab will hold the cover in position, until removal or
installation of the battery is required. Note: Sanding the tab
mount at an angle as shown in the photo will increase the
pressure on the cover.
Assemble the Battery Holder
7