Great Planes Spirit of St. Louis ARF - GPMA1151 User Manual
Page 17
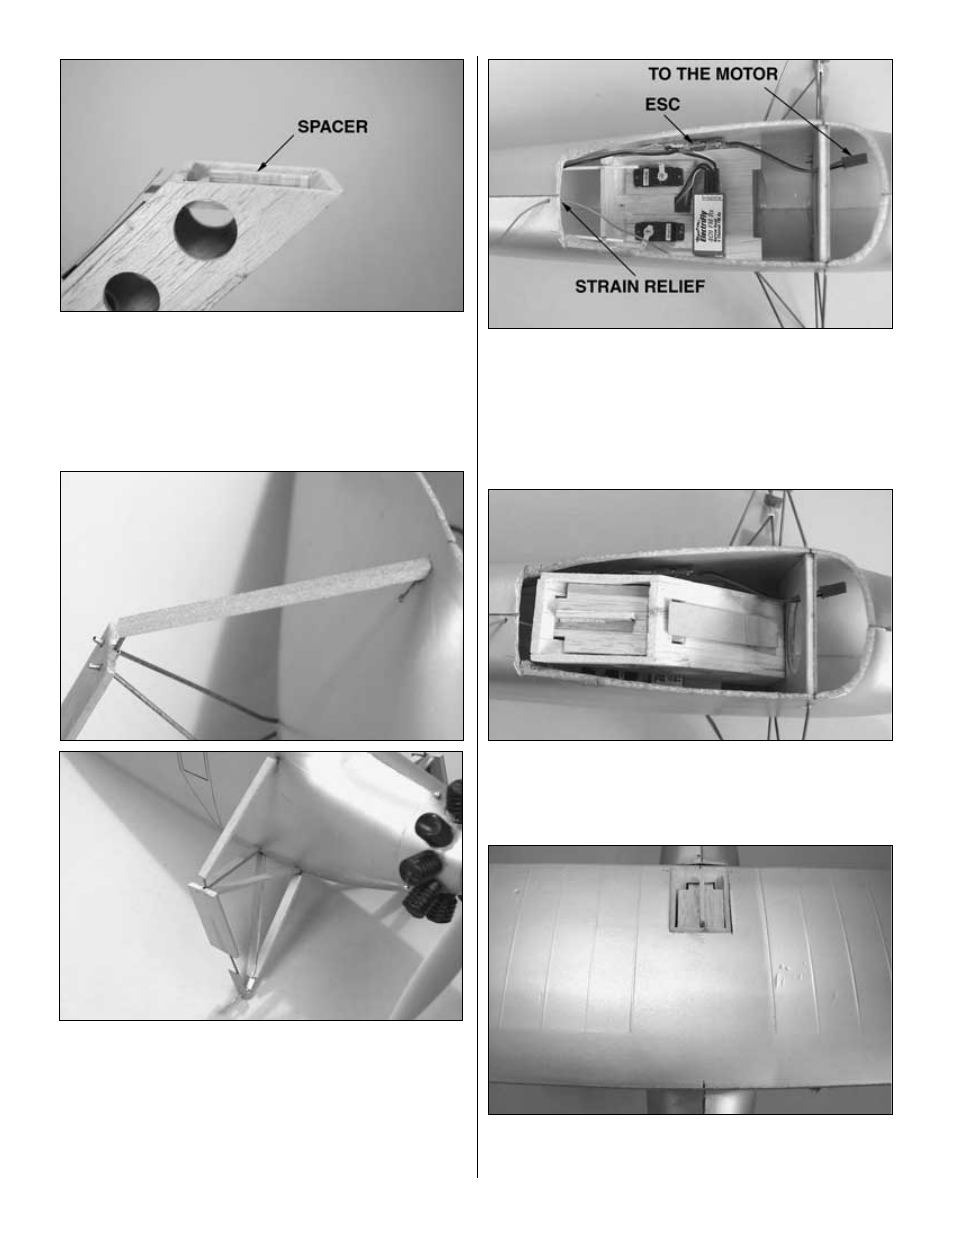
❏
6. Remove the wing and battery holder and install the
battery holder cover on the battery holder. Trim the spacer on
the cover so that it is flush with the top of the battery holder.
Before the wing can be glued into place the receiver and
speed controller must be installed. In addition, you should
glue the fairings to the landing gear at this time.
❏
7. Using the patterns on page 24 as a guide, cut the
landing gear fairings from the grooved 1/8” x 1/4” [3.2 x
6.4mm] balsa stick. Cut one end of each fairing strip to the
angle on the pattern, but verify that the length is correct
before cutting the strip to length. Glue the fairing strips to
the landing gear wires with medium CA being careful not to
let any CA to drip onto the fuselage. Note that we used a
panel line pen to outline the door and window.
❏
8. Plug the servos and ESC into the receiver and install it in
the model. Double sided tape works well to hold the receiver in
place. Use double sided tape to also hold the ESC to the
fuselage side. Plug the motor into the ESC. Drill a hole in the
top of the fuselage aft of the wing and route the receiver
antenna through the hole. Use a cut off servo arm to make a
strain relief for where the antenna exits the fuselage.
❏
9. Position the battery holder in the fuselage. Glue it in
place with some medium CA. Do not glue it too solidly in
place as you will have to remove it if you need to access the
receiver or servos later.
❏
10. Measure and mark the center of the wing at the
leading and trailing edges. Position the wing on the fuselage
using the marks to center the wing.
17