Great Planes Spirit of St. Louis ARF - GPMA1151 User Manual
Page 21
❏
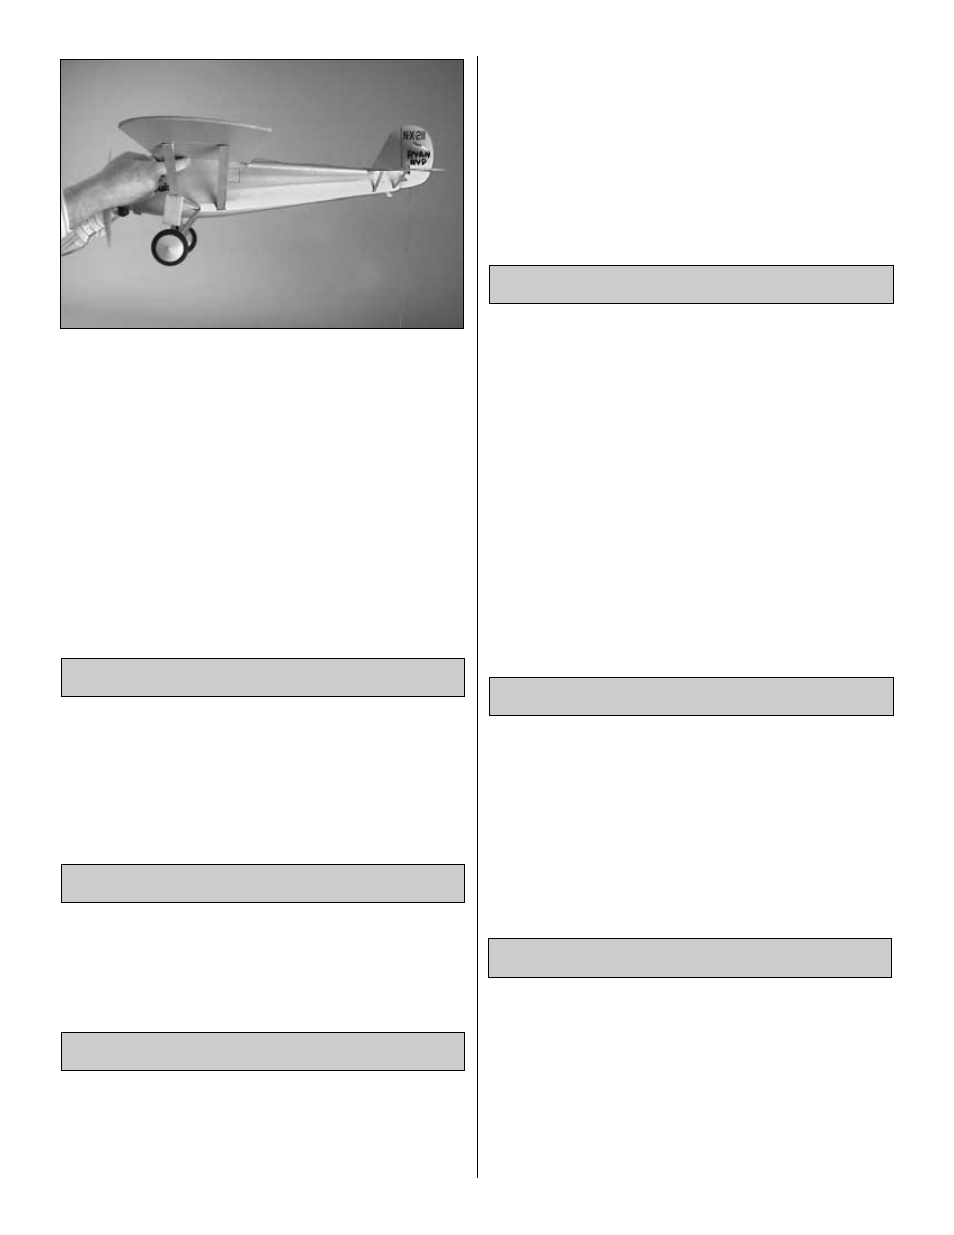
2. Lift the model right-side up at the balance point you
marked on the bottom of the wing. If the nose drops the
model is nose-heavy and you must add weight to the tail. If
the tail drops the model is tail-heavy and you must add
weight to the nose.
❏
3. If additional weight is required to balanced the model,
use small pieces of Great Planes stick-on weight
(GPMQ4485). If weight is required in the nose, do not stick
weight to the cowl. Remove the cowl and stick the weight to
the firewall. If weight is required in the tail, it can be stuck to
the top or bottom of the stab next to the fuselage.
❏
4. After placing weight on the model where necessary,
recheck the C.G. to confirm that it is correct.
No matter if you fly at an AMA sanctioned R/C club site or if you
fly somewhere on your own, you should always have your
name, address, telephone number and AMA number on or
inside your model. It is required at all AMA R/C club flying sites
and AMA sanctioned flying events. Fill out the identification tag
on page 24 and place it on or inside your model.
Be certain the transmitter batteries are fully charged. Follow
the battery charging instructions that came with your radio
control system to charge the batteries or replace if using
alkaline batteries.
Before you fly you should perform one last overall inspection
to make sure the model is truly ready to fly and that you
haven’t overlooked anything. If you are not thoroughly
familiar with the operation of R/C models, ask an
experienced modeler to perform the inspection. Check to
see that you have the radio installed correctly and that all
the controls are connected properly. The motor must also be
checked by confirming that the prop is rotating in the correct
direction and the motor sounds like it is reaching full power.
Make certain the elevator and rudder are secure, the
pushrods are connected, the controls respond in the correct
direction, radio components are securely mounted, and the
C.G. is correct.
Ground check the operational range of your radio before the
first flight of the day. With the transmitter antenna collapsed
and the receiver and transmitter on, you should be able to
walk at least 100 feet away from the model and still have
control. Have an assistant stand by your model and, while
you work the controls, tell you what the control surfaces are
doing. Repeat this test with the motor running at various
speeds with an assistant holding the model, using hand
signals to show you what is happening. If the control
surfaces do not respond correctly, do not fly! Find and
correct the problem first. Look for loose servo connections
or broken wires, corroded wires on old servo connectors,
poor solder joints in your battery pack or a defective cell, or
a damaged receiver crystal from a previous crash.
·
Using multiple battery packs for successive flights may
cause the motor to become excessively hot, thus causing
damage. Allow the motor to cool for at least 10 minutes
between flights.
·
Keep epoxy use to the “useful minimum”. Less weight will
make for better flight performance.
Note: Failure to follow these safety precautions may result
in severe injury to yourself and others.
Get help from an experienced pilot when learning to
operate motors.
Use safety glasses when running motors.
Do not run the motor in an area of loose gravel or sand; the
propeller may throw such material in your face or eyes.
Motor Safety Precautions
Performance Tips
Range Check
Ground Inspection
Charge the Transmitter Batteries
Identify Your Model
21