Balance the model (c.g.), Radio setup, Set the control throws prepare for flying – Great Planes Spirit of St. Louis ARF - GPMA1151 User Manual
Page 20
IMPORTANT: Whenever connecting the battery always hold
onto the fuselage in case the motor accidentally comes on
and the propeller turns.
❏
1. Turn on the transmitter and connect the battery to the
speed control in the model. Be certain the rudder, elevator
and motor respond as shown in the chart. If required, use
the reversing function in the transmitter to reverse any
controls necessary so they respond correctly.
❏
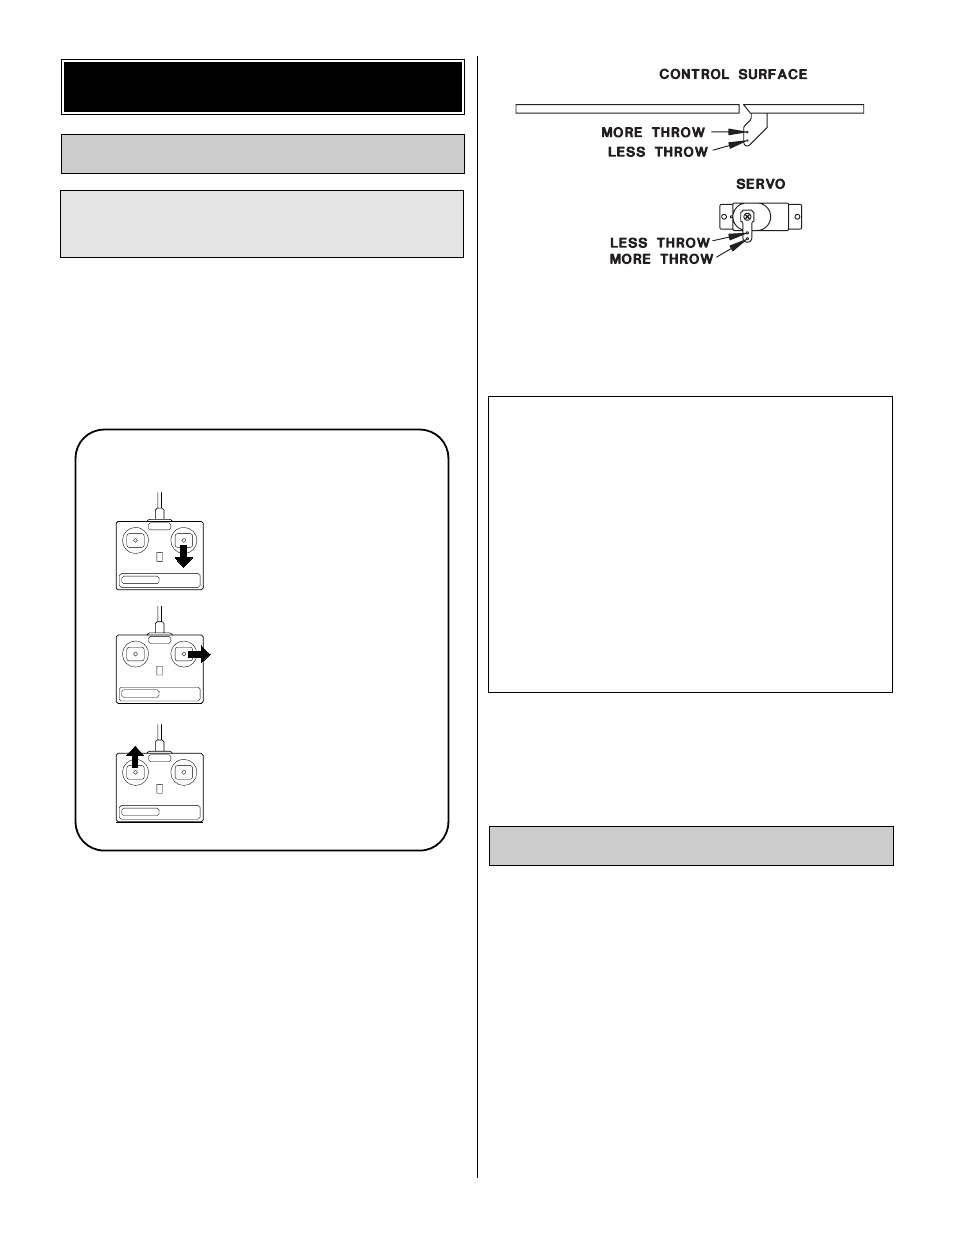
2. Use the ATV function in the transmitter or adjust the
position of the pushrods on the servo arms or the control
horns on the elevator and rudder to get the control surface
throws shown in the chart that follows. The throws are
measured at the widest part of the control surface.
❏
To increase the control surface throw, move the pushrod
to the hole that is closer-in on the control horn on the control
surface, or move the pushrod to the hole that is farther out
on the servo arm. To decrease the control surface throw, do
the opposite.
IMPORTANT: The C.G. (center of gravity), or balance point
has the greatest effect on how a model flies. Do not overlook
this important procedure. Modelers who do so often find that
the airplane is difficult to control, or out of control after it is
too late. Preserve your model and insure that the first flight
won’t be the last by balancing the model according to the
following instructions.
The C.G. (center of gravity) must be checked when the
model is ready to fly with the propeller and battery installed.
❏
1. Use a felt-tip pen or narrow strips of tape to mark the
balance point on the bottom of the wing 1-5/8” [41.3mm]
rearward from the leading edge of the wing on both sides of
the fuselage.
Balance the Model (C.G.)
Set up the Spirit of St. Louis so it has the following
control surface throws:
ELEVATOR:
5/8” up
5/8” down
[15.9mm]
[15.9mm]
RUDDER:
1-1/4” right 1-1/4” left
[31.8mm]
[31.8mm]
Second to the C.G., the control throws have the greatest
effect on the way a model flies. Set the throws as close to
these settings as possible. If you have too much control
throw the model may respond too quickly. If you do not have
enough throw you may not be able to maneuver the model
or have enough control to land it when the motor is off.
MOTOR TURNS
RUDDER MOVES RIGHT
ELEVATOR MOVES UP
4-CHANNEL
TRANSMITTER
RADIO SETUP
TRANSMITTER
4-CHANNEL
TRANSMITTER
4-CHANNEL
NOTE: Unless you are specifically checking the operation
of the motor, for safety remove the propeller from the
model while setting it up on your workbench.
Set the Control Throws
PREPARE FOR FLYING
20