Great Planes Reactor 3D EP ARF - GPMA1540 User Manual
Page 8
❏
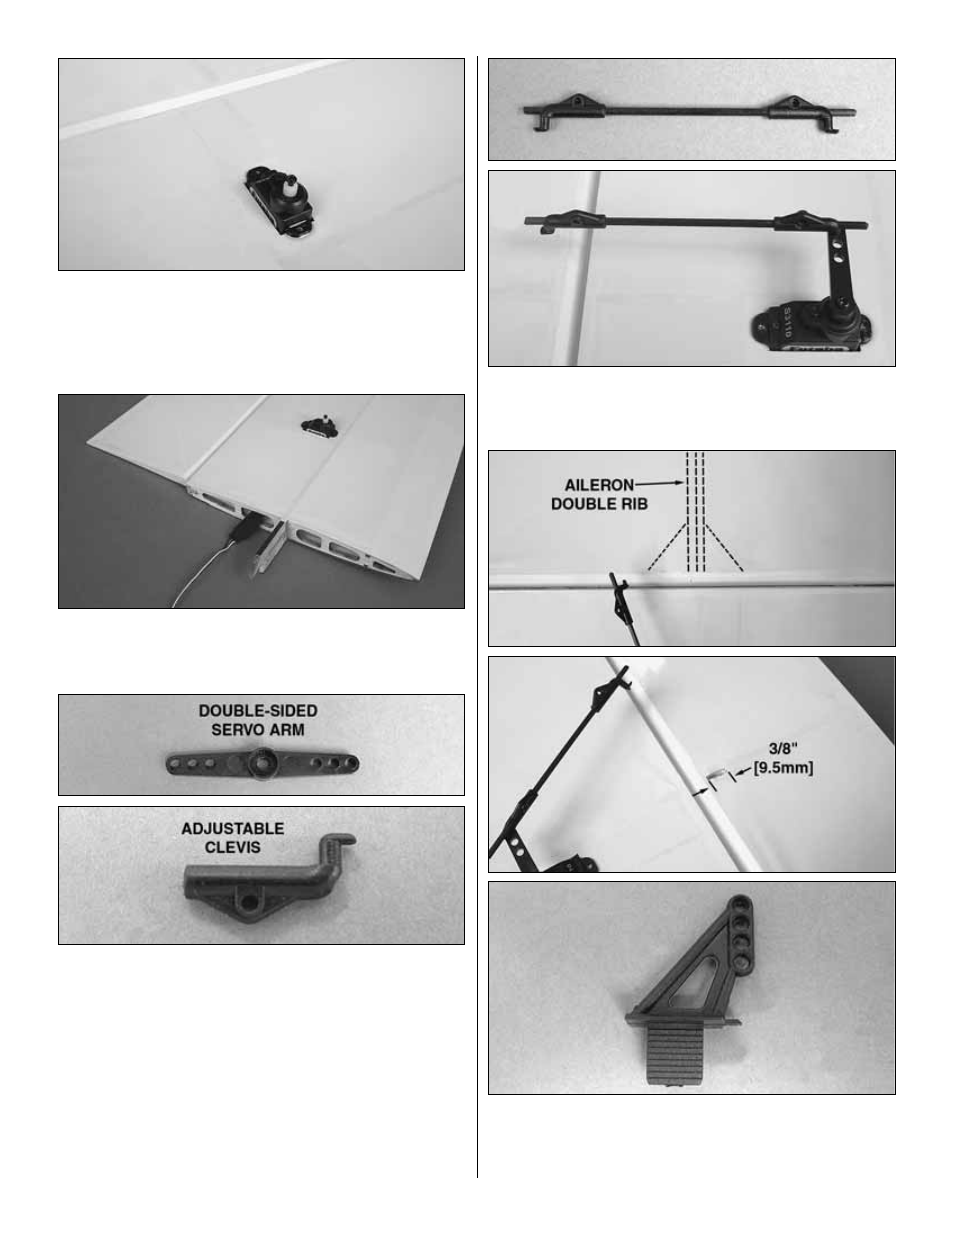
5. Insert the servo leads into the servo bays and pull them
through the wing ribs. Glue the aileron servos into the servo
bays using epoxy or CA glue. After the glue has cured,
confirm that the servos are properly secured to the wings
and reinforce with extra glue if necessary.
❏
6. Attach a 6" [152mm] servo extension to each aileron
servo and wrap the connection with transparent tape or
heat-shrink tubing.
❏
7. Locate two double-sided servo arms that fit the output
splines of your aileron servos and four adjustable clevises.
❏
8. Temporarily connect your aileron servos and battery
pack to your radio and center the servos and trim levers on
the transmitter. Test fit the double-sided servo arms
perpendicular to the servo case. If the servo arm does not fit
onto the servo spline at a 90° angle to the case, remove it
from the servo and rotate it 180°. Decide which way fits best
(closest to perpendicular) and cut off the arm that isn’t used.
Be sure to make a left and right servo arm.
❏
9. Fit two adjustable clevises onto both 2 x 85mm aileron
pushrods. Push one of the clevises from each pushrod into
the outer holes of the servo arms
❏
10. Locate the aileron double rib that has triangle blocking
at the LE. Use a hobby knife to cut a slot 3/8" [9.5mm] long
just behind the bevel of the LE of aileron for each control
horn in the center of the double rib. The slot only needs to
8