Install the cowl, canopy & spinner – Great Planes Reactor 3D EP ARF - GPMA1540 User Manual
Page 17
❏
5. Test fit your battery into place and adjust the battery
strap as necessary. When you balance the model, the exact
position of the battery pack must be determined. When you
know where the battery pack will need to be to balance the
model, mark its position onto the battery tray and put a piece
of adhesive-backed hook and loop material onto the battery
pack and battery tray to hold it in place during flight.
❏
6. Glue a magnet into the battery hatch door and one in
the fuselage in the location shown. Be sure that you glue the
magnets with the correct side facing out so the magnets will
attract each other when the hatch door is installed.
❏
1. Prepare the inside of the cowl by lightly scuffing it with
220-grit sandpaper. When satisfied, clean the inside of the
cowl with alcohol.
❏
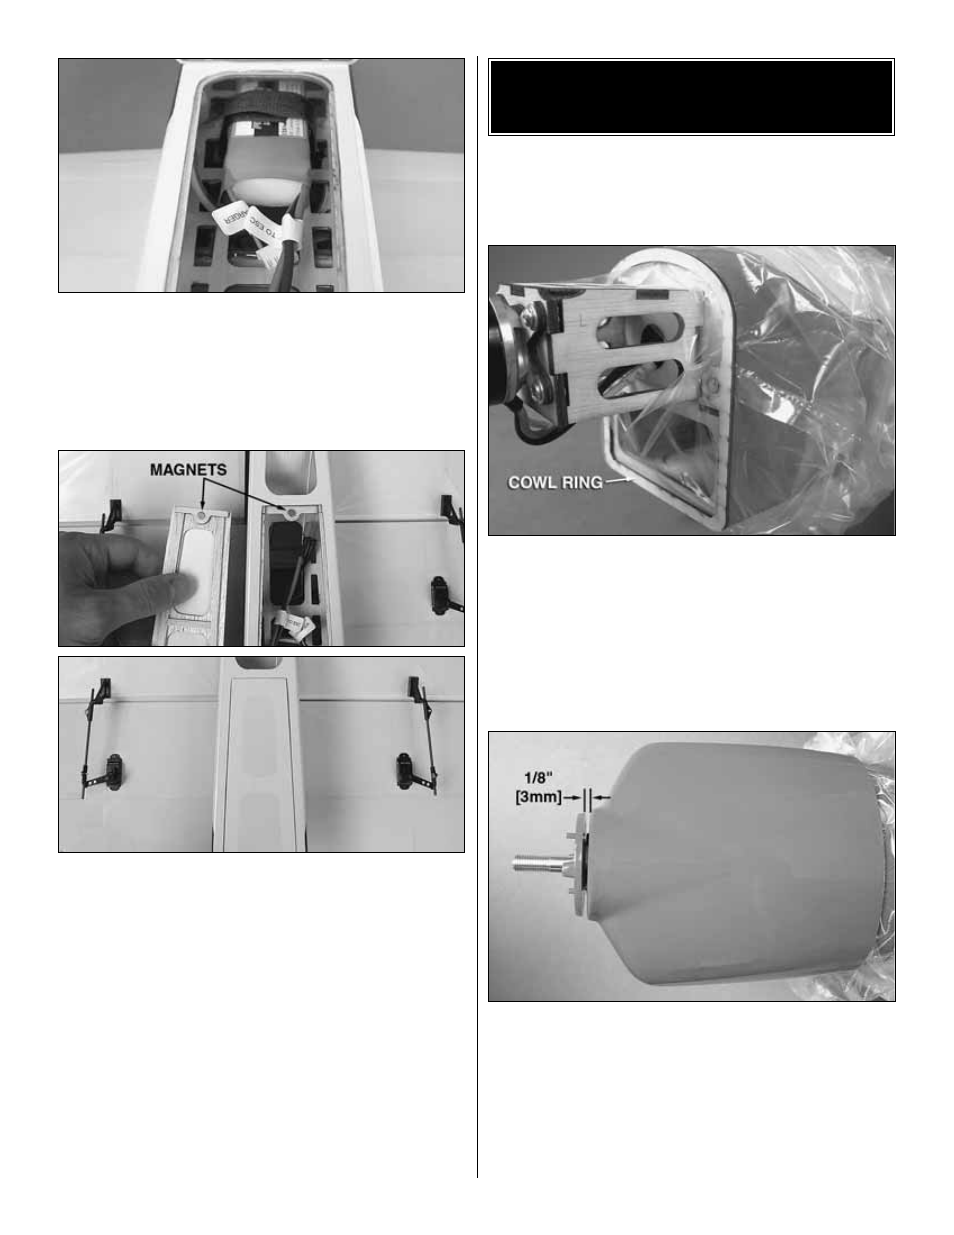
2. Glue the remaining magnets into the cowl ring and
firewall, being sure that the magnets are aligned correctly so
that they attract each other when the ring is installed. Cut a
slit in the end of the bag that the fuselage was packaged in.
Slide the bag over the motor and mounting box. Attach the
cowl ring to the fuselage, sandwiching the bag in place. The
bag is there to prevent epoxy from sticking to the fuselage in
the next step.
❏
3. Confirm that your spinner backplate properly fits your
motor shaft. If not, ream or drill it to the correct diameter.
Carefully apply several dots of epoxy around the inside
perimeter of the cowl approximately 3/8" [9.5mm] from the
back. Slide the cowl over the cowl ring onto the fuselage. Put
the spinner backplate onto the motor shaft and align the
front of the cowl even with the spinner backplate and
allowing a 1/8" [3mm] gap between the cowl and backplate.
Let the cowl sit undisturbed while the epoxy cures.
INSTALL THE COWL, CANOPY
& SPINNER
17