Great Planes Reactor 3D EP ARF - GPMA1540 User Manual
Page 10
❏
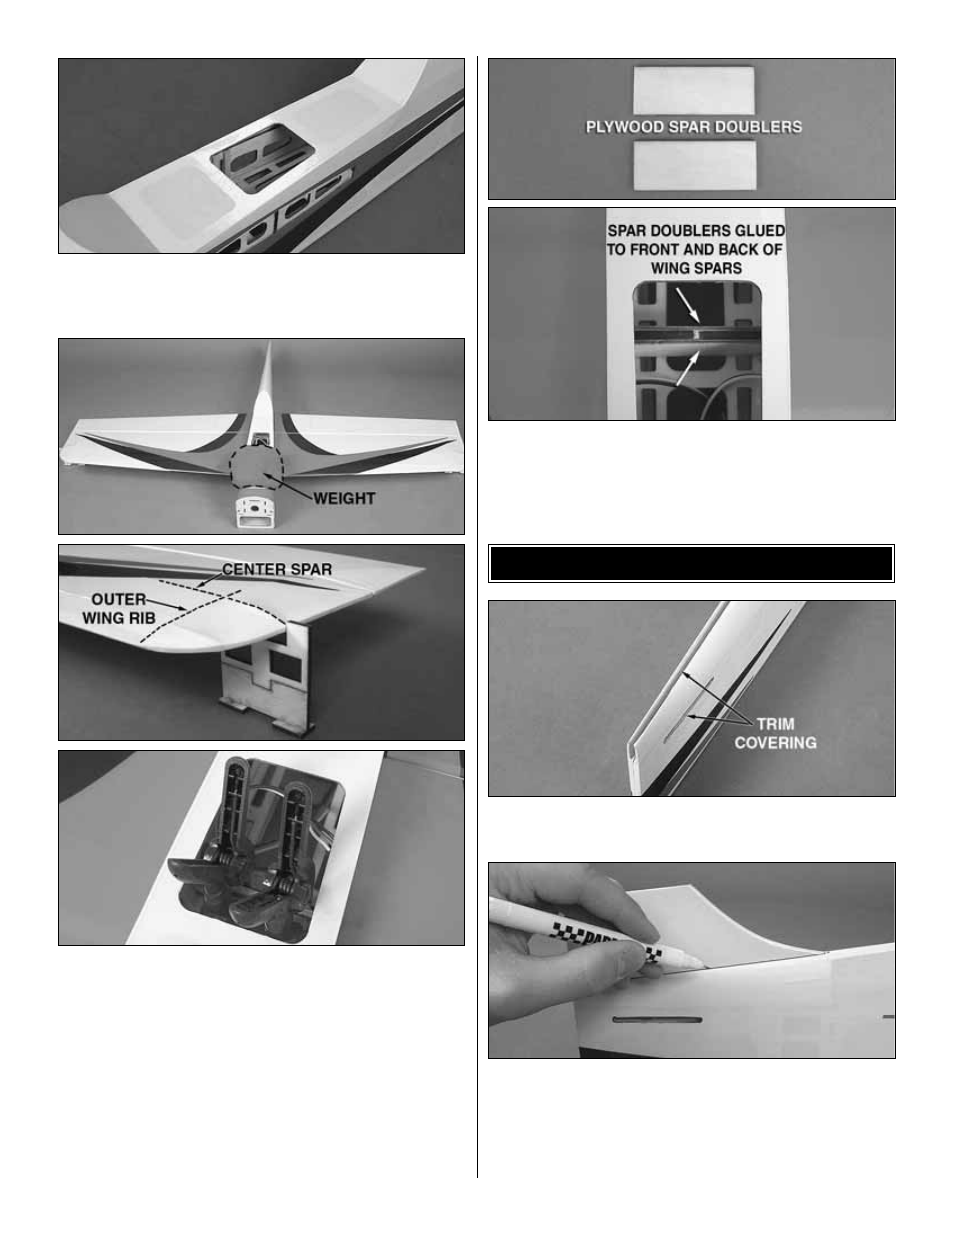
4. Trim the covering from the center lightening hole in the
cockpit area of the fuselage as well as the covering that
overlaps onto the root ribs of the wing panels.
❏
5. Place a weight onto the fuselage at a location that will
not interfere with the wings or the cutout in the cockpit.
Thoroughly coat the root ribs of the wing panels and the
wing pockets in the fuselage with 30-minute epoxy and slide
them into place. Do not put epoxy on the center spars at this
time. Use the wing alignment jigs you constructed in step 1
to support the wing tips at the intersection of the center spar
and the outer wing rib as shown. Being sure that the wing
panels are fully seated into the wing pockets, use clamps to
hold the center spars together while the epoxy on the root
ribs cures. Clean up any excess epoxy with a paper towel
dampened with denatured alcohol.
❏
6. Coat one side of each plywood spar doubler with epoxy
as well as the front and back sides of the spars. Position a
doubler against each side of the spars and use clamps to
hold doublers in place while the epoxy cures.
❏
1. Trim the covering from the tail of the fuselage for the
vertical fin and the horizontal stabilizer.
❏
2. Fit the vertical fin into place and use a felt-tip pen to
trace around the fin where it meets the fuse. Remove the fin
from the fuse and trim the covering away 1/16" [1.6mm]
below the line that you made. Be careful not to cut through
the wood as this will weaken it. See the
Expert Tip that
follows for removing the covering.
ASSEMBLE THE TAIL SECTION
10