Join the wing panels, Add wing sheeting – Great Planes Dazzler 40 Kit - GPMA0480 User Manual
Page 9
9
❏
10. Remove the wing panel from the plan and set it
aside. Follow steps 2 - 9 to build the left wing panel using
the extra pieces you cut previously.
Join the Wing Panels
❏
1. Pin both wing panels down onto the plan, checking the
alignment of each panel. Test fit the die-cut 1/8" ply leading
and trailing edge joiners and the four 1/16" x 1/4" x 6-1/2"
ply main spar joiners in the wing. Test fit the die-cut
plywood servo tray between the R1 ribs. Use a metal
straightedge to make sure the spars, leading edge and
trailing edge are aligned and straight. When everything fits
well, glue the servo tray to both R1 ribs, then remove the
joiner pieces in preparation for gluing.
❏
2. Be sure the wing is right-side up and flat on the
workbench. Use 30-minute epoxy to glue the leading and
trailing edge joiners in position. Next, install the top and
bottom main spar joiners, also using 30-minute epoxy.
Double check that there is no twisting or bowing and that
everything is straight before the epoxy cures.
Add Wing Sheeting
Be sure the wing is pinned flat on your work surface
from the spar to the trailing edge before you begin
sheeting.
❏
1. Glue a 1/16" x 1-1/8" x 24" trailing edge sheet to the
top of both wing panels.
❏
2. Trim the four 1/16" x 3" x 30" balsa leading edge
sheets to 24". Save the leftover 6" pieces for use later
during construction. Cut the 3" x 24" pieces down to 2-3/8" x
24". Save the 5/8" x 24" sticks to make the R1 cap strips.
❏
❏
3. Align a leading edge sheet with a wing tip, then
hold it tightly against the leading edge while using thin CA
to glue it to the sub-leading edge. (See photo at step 5.)
❏
❏
4. Carefully lift up the leading edge sheet, away from
the ribs. Working quickly, apply a bead of medium or thick
CA to each rib, then roll the sheet into contact. Hold the
sheet until the CA cures. Wick some thin CA between the
sheet and the spar to glue the aft edge of the sheet to
the spar.
❏
❏
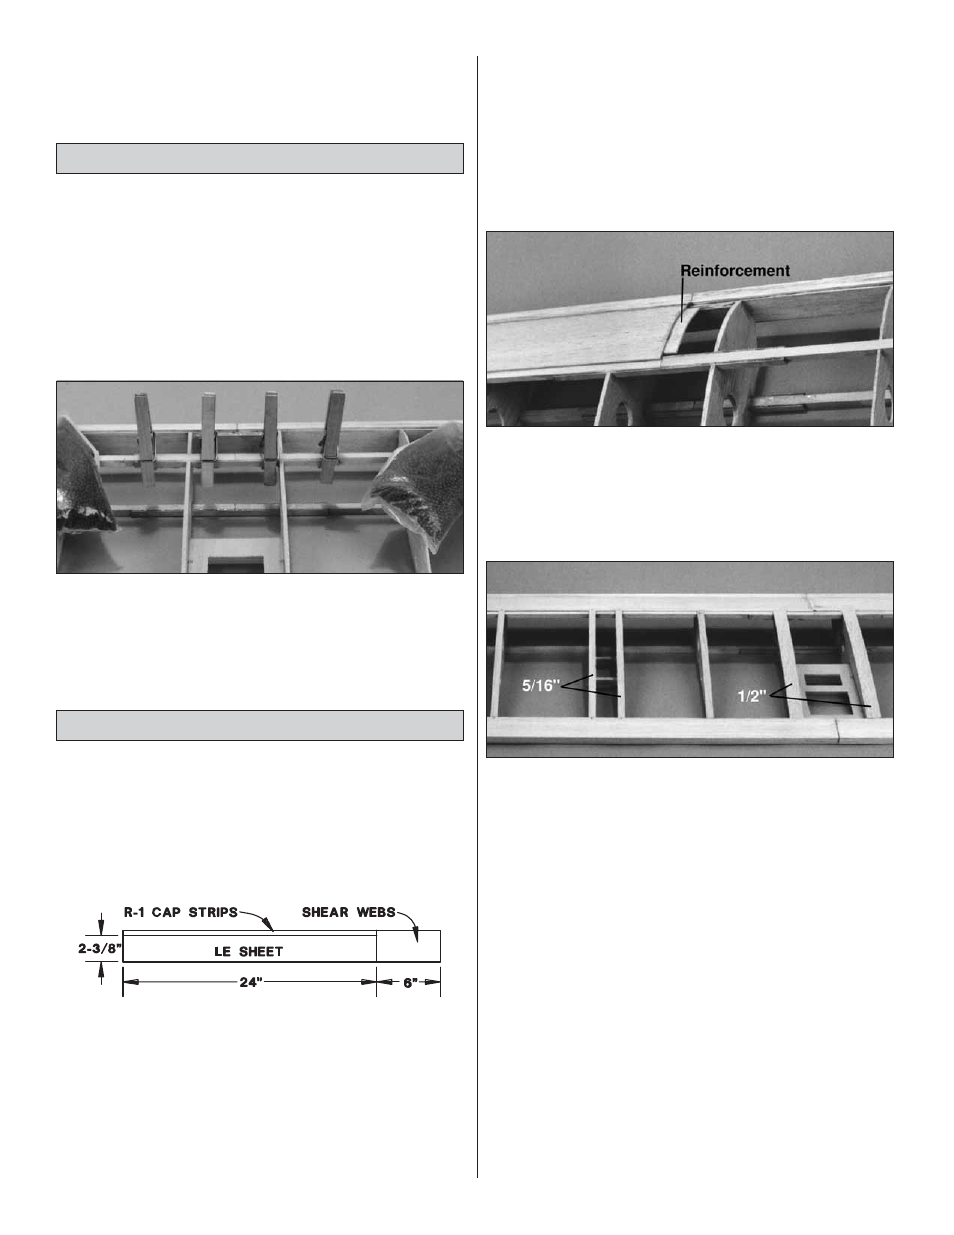
5. Glue a scrap piece of 1/16" x 1/2" x 2" balsa to the
bottom edge of the leading edge sheet at the root end to
reinforce the joint between the leading edge sheets. Sheet
the other top leading edge by repeating steps 3 and 4.
❏
❏
6. Cut and install cap strips for the top of each R2
and R3 rib from 1/16" x 5/16" x 30" balsa sticks. Use the
1/16" x 1/2" x 24" balsa left over from the leading edge
sheeting to make the R1 cap strips. Refer to the photo and
plan for the correct position of the root and tip cap strips.
❏
❏
7. Use the leftover 1/16" x 3" x 6" leading edge
sheeting to cut and install shear webs on the aft edge of the
spars as shown on the plan.
❏
❏
8. Remove the wing from your work surface. Pin it
back to your building board, upside-down, making sure it’s
straight without any twists.
❏
9. Repeat steps 3 - 8 to sheet the bottom of the wing.
❏
10. Use the leftover cap strip balsa to frame the servo
openings on the bottom of the wing as detailed on the plan.