Great Planes Dazzler 40 Kit - GPMA0480 User Manual
Page 8
8
❏
❏
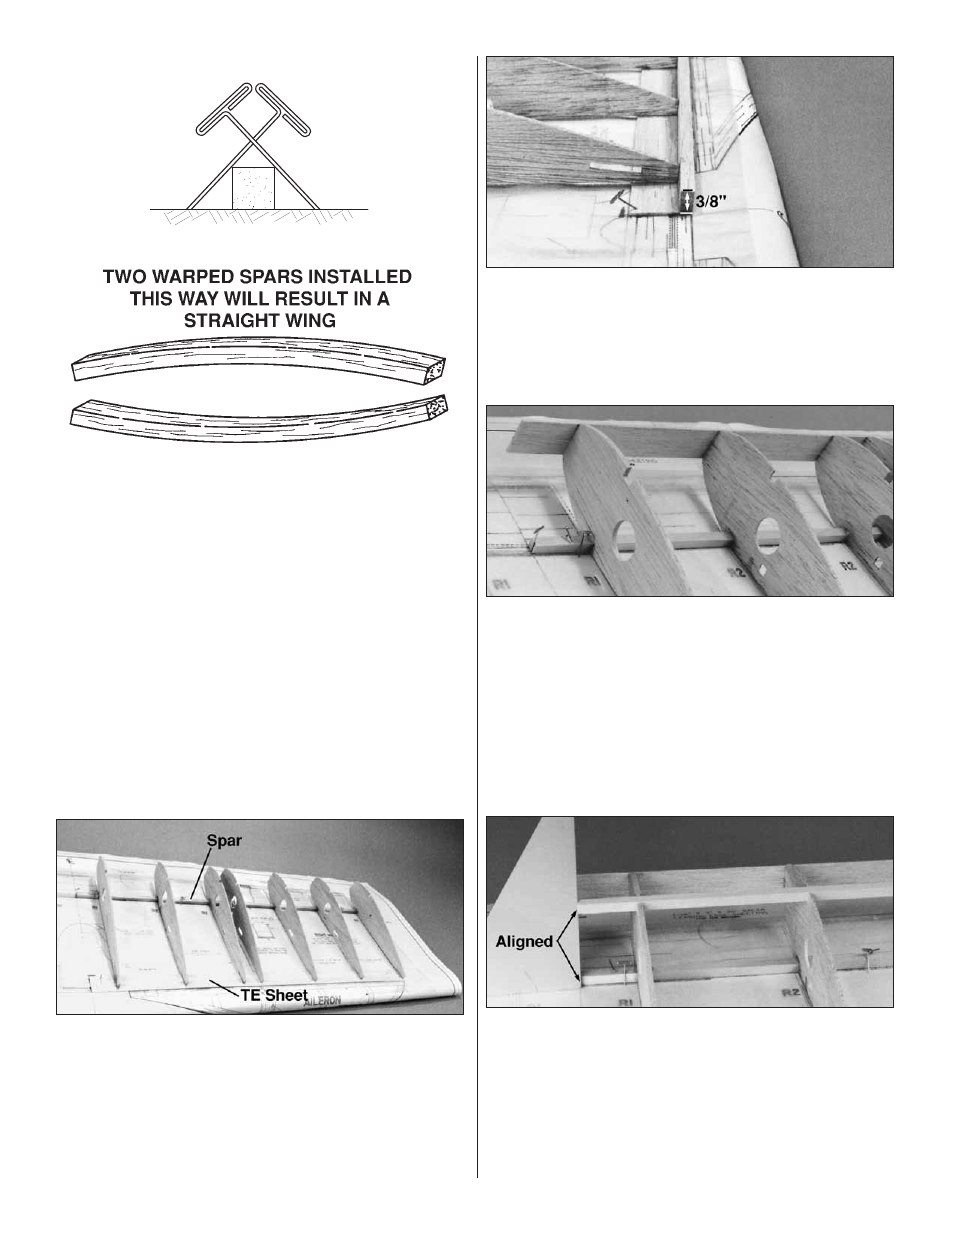
2. Cover the right wing plan with waxed paper. Use
cross-pinning (see illustration) to hold a wing spar in position
where shown on plan. The spar should be even with the
wing’s centerline and tip.
❏
❏
3. Cut the four 1/16" x 1-1/8" x 30" balsa trailing edge
sheets down to 24". Pin one sheet over the plan flush with
the trailing edge of the wing. NOTE: These sheets extend
past the aft edge of the ribs by 1/4".
❏
❏
4. Position the die-cut R1 (see note) through R3 wing
ribs on the spar at the locations shown. Be sure the flat
portion of the airfoil is toward the building board and the
ribs are fully seated on the spar. Use a small drafting
triangle to hold each rib vertical while you glue it in position.
NOTE: The main spar is centered in the spar notch in the
R1 rib to allow room for the spar joiners to fit on both sides
of the spars.
❏
❏
5. Cut a 24" trailing edge stick from a piece of 1/4" x
3/8" x 30" balsa. Glue the trailing edge (3/8" dimension is
vertical) to the ribs and bottom trailing edge sheeting. Sand
the top of the trailing edge (with a long sanding block) flush
with the top of the ribs at an angle that matches the slope
of the airfoil.
❏
❏
6. Cut two 24" sub-leading edges from the 1/16" x 1"
x 30" balsa sheets. Center the sub-leading edge vertically
on the front of the ribs (and flush with the wing’s centerline),
then glue it in position. Remove the wing from the plan and
sand the top and bottom edges of the sub-leading edge
flush with the top and bottom of the airfoil.
❏
❏
7. Cut two 5/16" x 1-3/16" x 30" balsa leading edges
to 24". Vertically center, then glue, a leading edge to the
sub-leading edge of the wing panel.
❏
❏
8. Glue the 1/4" x 1/4" x 24" top basswood spar in
position. Use a drafting triangle to be sure the root end is
even with the bottom spar.
❏
❏
9. Use the leftover 1/4" basswood spar material to
make two aileron servo rails 1-5/8" long. Insert the rails into
the notches between the closely spaced R2 ribs. Use a
servo of your choice to set the correct spacing between the
rails, then glue the rails securely in position.