Die-cut patterns, Get ready to build – Great Planes Dazzler 40 Kit - GPMA0480 User Manual
Page 5
5
Get Ready to Build
❏
1. Unroll the plan sheet. Reroll the plan sheet inside out
to make it lie flat. Place wax paper or Great Planes Plan
Protector over the area of the plan you are working on to
prevent glue from sticking to the plan. Use tape or tacks to
hold the plan and protector securely in place.
❏
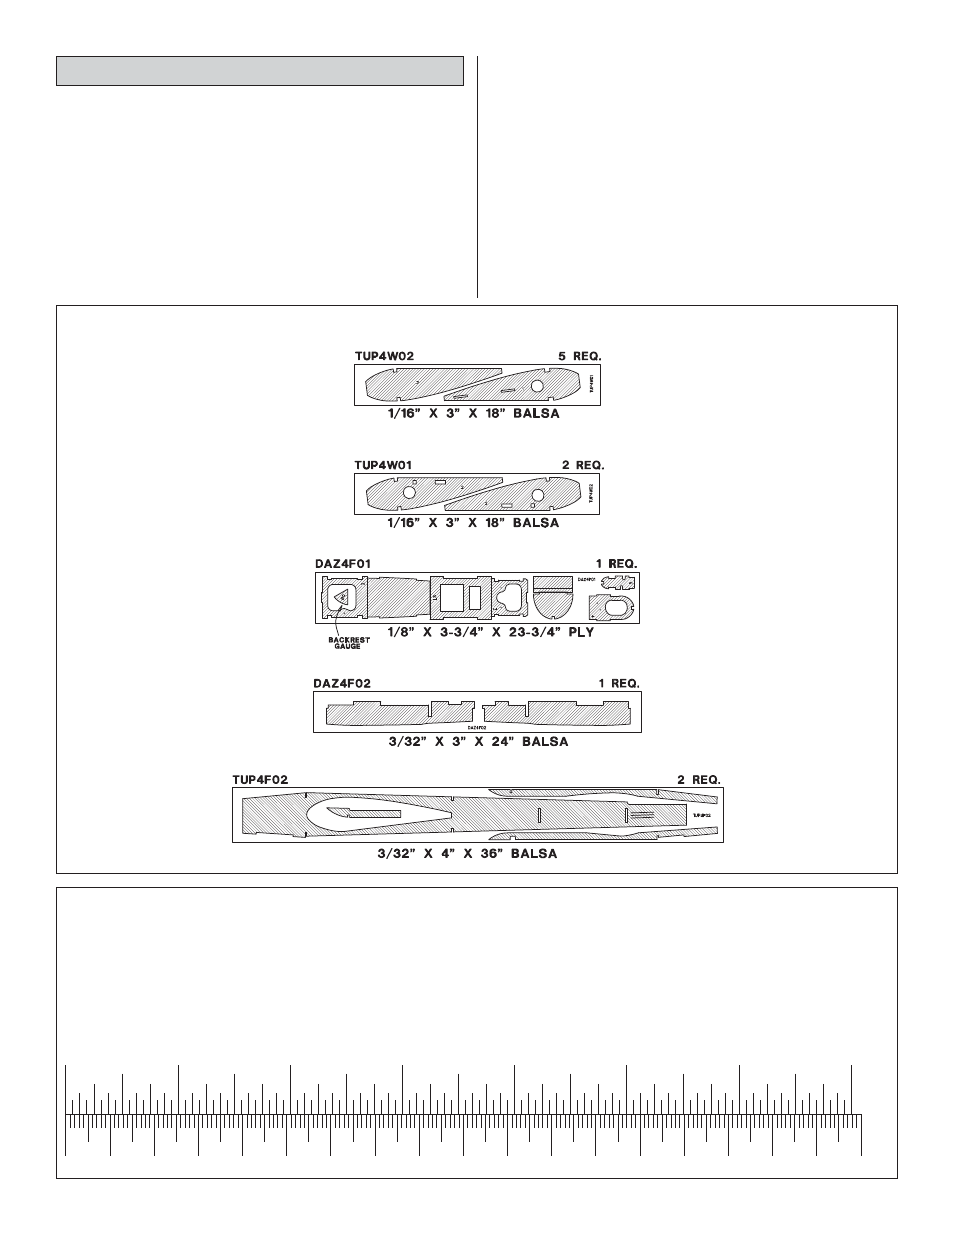
2. Remove all parts from the box. As you do, determine
the name of each part by comparing it with the plan and
the parts list included with this kit. Using a felt-tip or
ballpoint pen, lightly write the part name or size on each
piece to avoid confusion later. Use the die-cut patterns
shown below to identify the die-cut parts and mark them
before removing them from the sheet. Save all scraps. If
any of the die-cut parts are difficult to remove, do not force
them! Instead, cut around the parts. Use your Easy-Touch
Bar Sander or sanding block to lightly sand the edges to
remove any die-cutting irregularities.
❏
3. As you identify and mark the parts, separate them
into groups, such as fuse (fuselage), wing, fin, stab
(stabilizer) and hardware. Resealable food storage bags
are handy to store parts as you sort, identify and separate
them into subassemblies.
0"
1"
2"
3"
4"
5"
6"
7"
0
10
20
30
40
50
60
70
80
90
100 110 120 130 140 150 160 170 180
Inch Scale
DIE-CUT PATTERNS
Metric
Conversions
1/64" =
.4 mm
1/32" =
.8 mm
1/16" =
1.6 mm
3/32"
=
2.4
mm
1/8"
=
3.2
mm
5/32"
=
4.0
mm
3/16"
=
4.8
mm
1/4"
=
6.4
mm
3/8"
=
9.5
mm
1/2"
=
12.7
mm
5/8"
=
15.9
mm
3/4"
=
19.0
mm
1"
=
25.4
mm
2"
=
50.8
mm
3"
=
76.2
mm
6"
=
152.4
mm
12"
=
304.8
mm
18"
=
457.2
mm
21"
=
533.4
mm
24"
=
609.6
mm
30"
=
762.0
mm
36"
=
914.4
mm