Control surface throws, Channel radio set-up – Great Planes Dazzler 40 Kit - GPMA0480 User Manual
Page 17
over from the elevator and rudder), then install them using
faslink pushrod connectors.
❏
11. Hook up the radio and adjust the control throws. The
control throws are suggested as a starting point and may
be increased or decreased once you are familiar with the
flight characteristics of your particular model.
Control Surface Throws
Control throw adjustment: By moving the position of the
clevis at the control horn toward the outermost hole, you
will decrease the amount of throw of that control surface.
Moving it toward the control surface will increase the
amount of throw. If these adjustments don’t accomplish the
job, you may need to work with a combination of
adjustments by also repositioning the pushrod at the servo
end. Moving the pushrod toward the splined shaft on the
servo will decrease the control surface throw – outward will
increase it.
We recommend the following Control Surface Throws:
NOTE: Throws are measured at the widest part of the
elevators, rudder, and ailerons. If your radio does not have
dual rates, set the control throws halfway between the
specified high and low rates.
ELEVATOR:
High Rate
Low Rate
1/2" up [12.7mm]
3/8" up [9.5mm]
1/2" down [12.7mm] 3/8" down [9.5mm]
RUDDER:
1" right [25.4mm]
Same as high rates
1" left [25.4mm]
Same as high rates
AILERONS:
3/4" up [9mm]
3/8" up [9.5mm]
3/4" down [9mm]
3/8" down [9.5mm]
❏
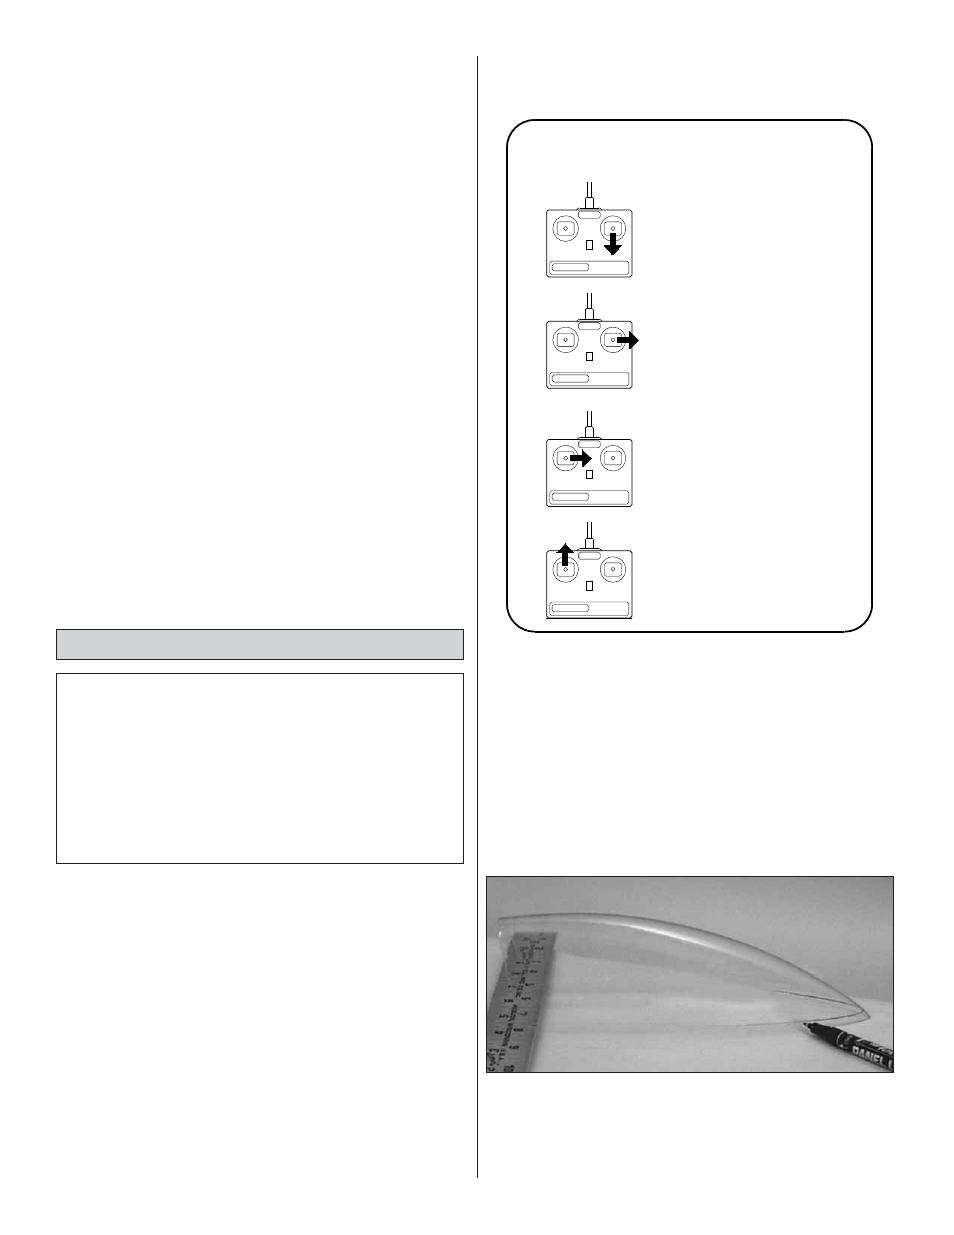
12. Make sure the control surfaces move in the proper
direction as illustrated in the following sketch:
4-CHANNEL
TRANSMITTER
4-CHANNEL
TRANSMITTER
4-CHANNEL
TRANSMITTER
4-CHANNEL RADIO SET-UP
(STANDARD MODE 2)
TRANSMITTER
4-CHANNEL
ELEVATOR MOVES UP
RIGHT AILERON MOVES UP
LEFT AILERON MOVES DOWN
RUDDER MOVES RIGHT
CARBURETOR WIDE OPEN
❏
13. Install the 2-1/2" main wheels (not included) and 1"
tail wheel (not included).
❏
14. Install the fuel tank, engine and muffler. Install the
propeller and spinner.
❏
15. Trim the canopy to size. It is best to cut below the line
to allow some excess material for final fitting. Once the
canopy is “rough” trimmed, block up the aft edge with your
ruler so it is level. Carefully draw a line around the front of
the canopy and trim it to this line.
17