Great Planes Dazzler 40 Kit - GPMA0480 User Manual
Page 13
13
❏
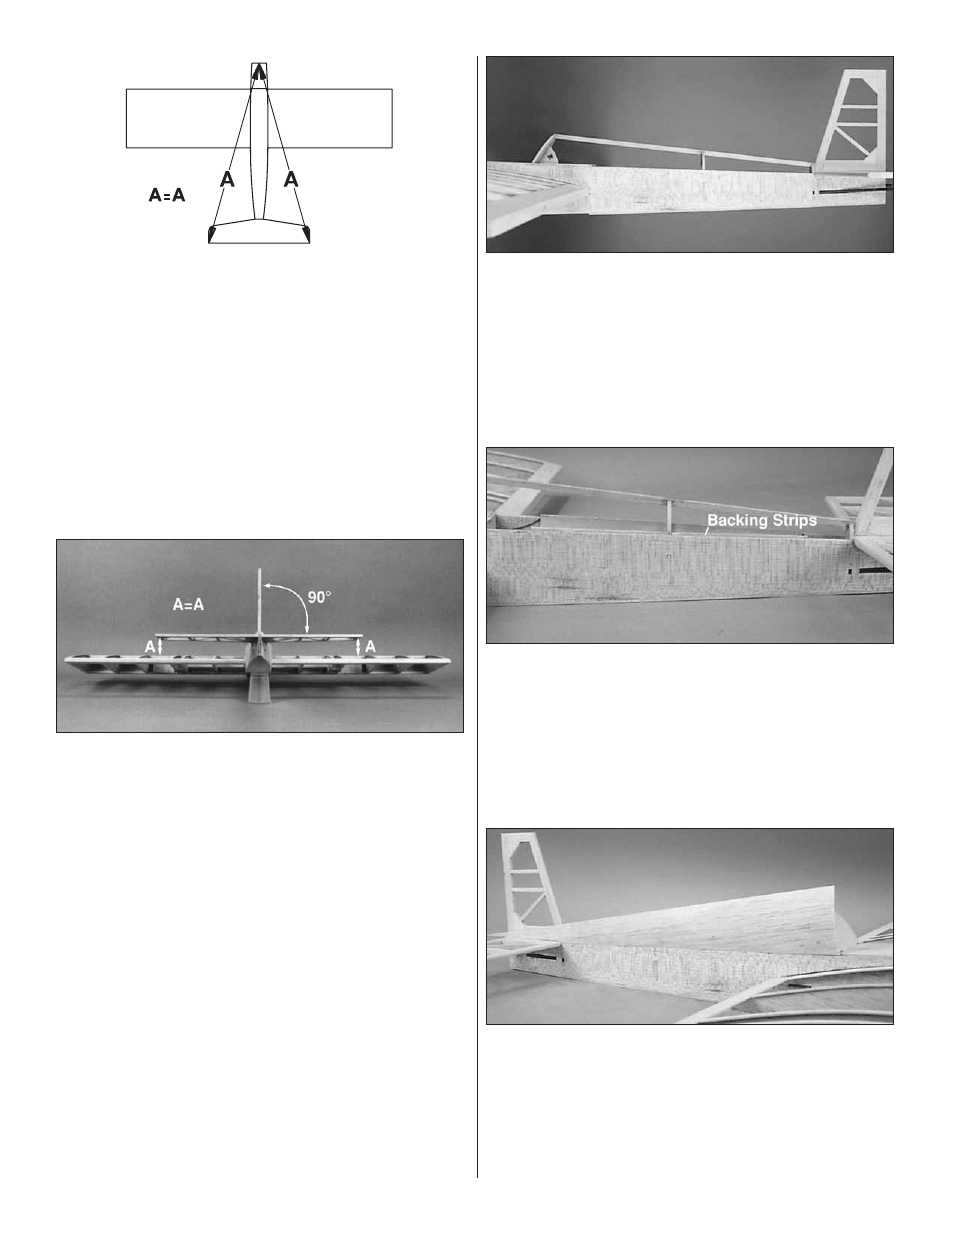
3. Center the stabilizer on the stab saddle and temporarily
pin it in position. Measure from each stab tip to the center
of the firewall to set the correct alignment. Draw a couple of
reference marks on the stab and fuse sides once it is in
position. Look at the rear of the model from several feet
away. The stab must be parallel with the wing. See photo at
next step. If not, lightly sand the high side of the stab
saddle to correct the problem. Once the stab is fully aligned,
use 30-minute epoxy to glue the stab in position. Hold it in
position with masking tape and pins until the epoxy has cured.
❏
4. Pin the fin on the centerline of the stab. Check its
alignment with the centerline of the fuse with a long
straightedge, then mark its aligned location. Glue the fin to
the stab with 6-minute epoxy. Make sure the fin is square to
the stab with a drafting triangle, then pin and tape the fin in
position until the epoxy cures.
❏
5. Finish sheeting the bottom of the fuse with 3/32" x 3"
balsa sheet from F2 to just past the front edge of the front
bottom hatch rail.
❏
6. Cut the bottom hatch cover from 3/32" x 4" balsa. Fit
the hatch, then drill 1/16" pilot holes through the hatch and
hatch rails. TIP: Use leftover balsa to reinforce the hatch
cover by applying two or three cross-grain strips to the
inside surface.
❏
7. Glue the 3/16" x 1/4" x 24" balsa stringer into position.
Sand an angle on the stick to match the angle of the fin.
Trim the opposite end of the stringer flush with the front of
the canopy backrest.
❏
8. The fuse sheeting backing strips are made from
excess 1/16" balsa. Glue the backing strips to the inside of
the fuselage so they are 1/8" above the fuselage sides.
❏
❏
9. Trim the remaining 1/16" x 3" x 30" sheet to a length
of 24". Cut the sheet diagonally to provide two triangular
pieces. Wet one of the sheets on one side to allow it to form
to the contour of the upper fuselage. Position the sheet so
the corner on the wider end is aligned with the canopy
former. Trim the rear of the sheet to allow clearance for the
stabilizer. Work slowly so it rests against the fuse side and
top of the stabilizer.