Great Planes Ultra Sport 60 Kit - GPMA0420 Pages 1-27 User Manual
Page 26
correct angle. NOTE: The gauge is used only for setting the
angle (do not glue the gauge in).
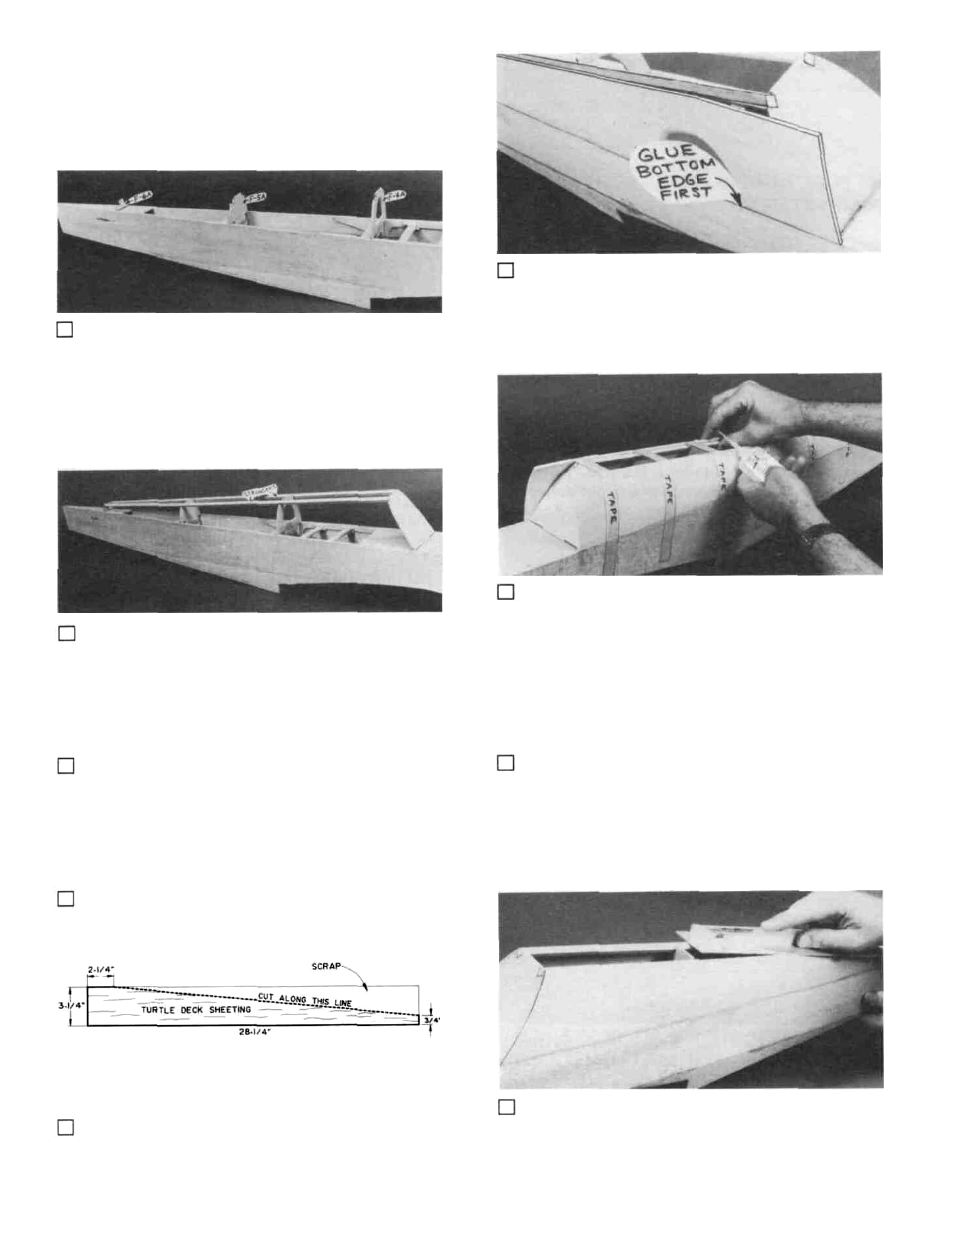
7. Glue the bottom edge of the sheeting to the top of the
fuse sides.
2. Glue F-4A to the front of F-4.
Glue F-5A to the front of F-5.
Glue F-6A to the front of F-6 (insert the F-6A tab
through the slot in the stab base).
3. Glue the 1/4" x 1/4" x 27" balsa stringers to the
formers. HINT: If F-3A is slightly warped, you may
straighten it during this step by twisting it straight while
gluing the stringers. Trim and sand the ends of the stringers
flush with the front of F-3A and the rear of F-6A.
8. Wet the outside surface of the sheering with a damp
rag to permit easier bending. Apply thick CA glue to the
edges of the formers and the stringers, then immediately bend
the sheeting around the formers and onto the stringers.
HINT: This requires about 5 sets of "hands," so use several
long pieces of masking tape to pull the sheering together;
then, working a small section at a time, add CA and press the
sheeting to the stringers.
4. Use a sanding block to sand the sides of the stringers
to blend with the formers (see the cross-section drawings on
the plan). Also use a long sanding block to sand the stringers
and the tops of the formers in a straight line from F-3A to
F-6A.
9. Trim and sand the sheering flush with the front of
F-3A and the rear of F-6A.
3/32" x 3-1/4" x 28-1/4" balsa sheets to the angle shown in the
following sketch.
5. Prepare the turtle deck sides by cutting the two
6. Trial fit one edge of the sheeting down onto the top
of the fuse side. Sand the edge of the sheering if necessary,
for a good fit
10. Using a long T-bar or sanding block with 80-grit
sandpaper, sand the sheering and stringers flush with the top
edges of the formers.
26