1/16" wing bolt plate drilling locations – Great Planes Ultra Sport 60 Kit - GPMA0420 Pages 1-27 User Manual
Page 24
meter" or by measuring down to the flat surface from the
center of the leading and trailing edges. The measurements
should be the same (zero degrees incidence). CAUTION: If
your flat surface is not level, you will get erroneous incidence
readings! If you are working on a flat surface that is not level,
you must set the wing incidence the same as your flat surface.
7. After making the necessary corrections to align the
wing, tack glue F-2A to F-2 with a couple drops of CA. Also
make alignment marks on the wing TE and the front ofF-4
so you may easily re-align the wing later.
8. Remove the wing and securely glue F-2A in place by
flowing thin CA into the wing dowel holes and around the
edges. Follow up with thick CA in any gaps around the edges.
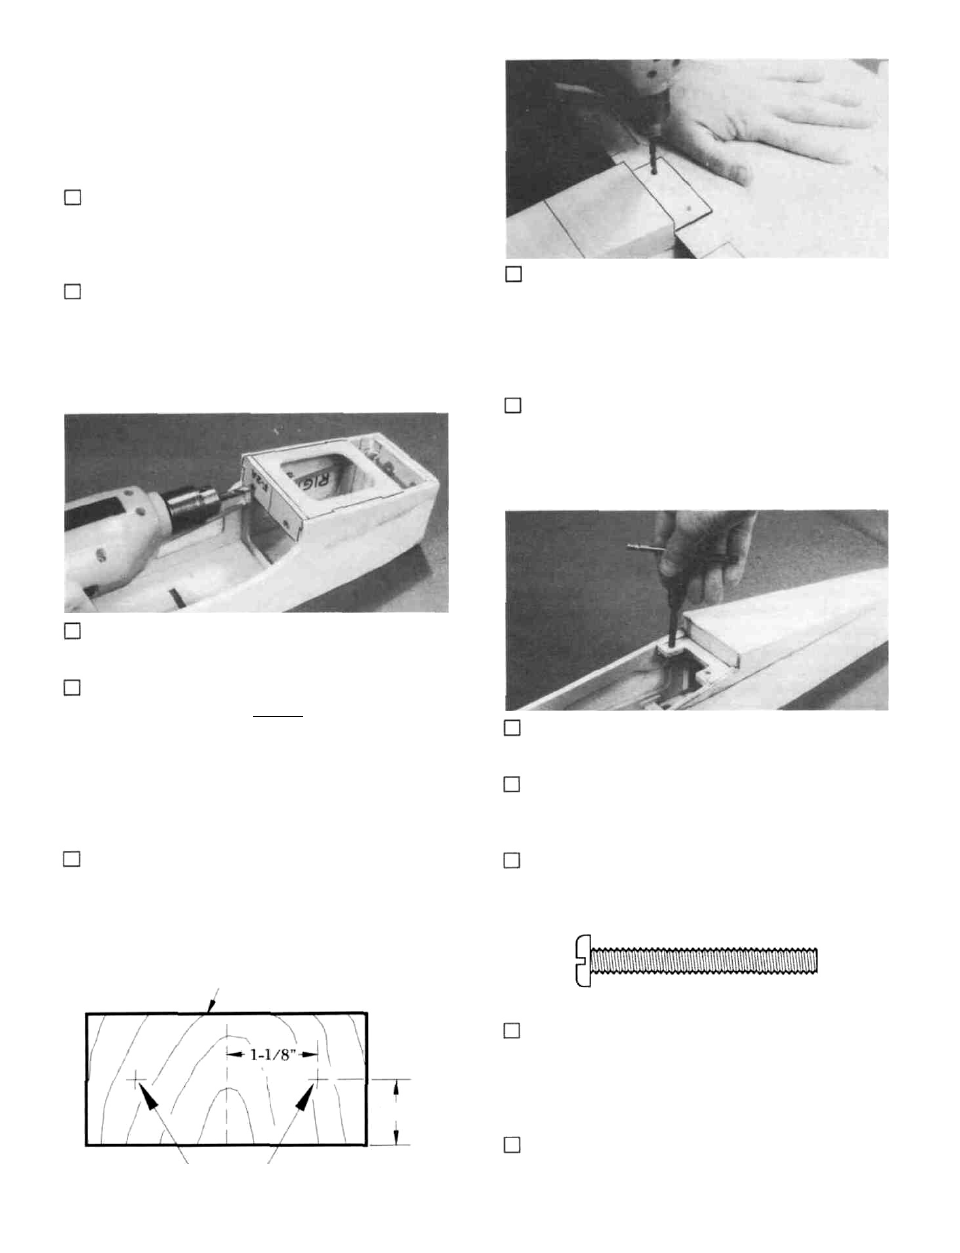
12. Holding the wing firmly in place, drill 13/64" holes
at the locations you marked in step 11, drilling down through
the 1/16" ply wing bolt plate and through the 1/4" ply hold-
down block in the fuselage. Try to drill straight in, perpen-
dicular to the 1/16" ply bolt plate. IMPORTANT!: Do not
allow the wing to move while drilling!
9. Drill 1/4" holes through F-2 using the holes in F-2A as
a guide.
10. Use a pliers to grasp the ends of the wing dowels and
pull them out. Now you may slightly round (or chamfer) the
ends of the dowels for easier insertion into F-2A. Mix up a
batch of 30-minute epoxy, use a long stick to work some
epoxy into the dowel holes, smear epoxy on the dowels, then
re-insert the dowels into the wing, leaving them protrude
3/8". Wipe away all excess epoxy, then allow the epoxy to
fully harden.
only to 1/4".
14. Use a 1/4-20 tap and a tap wrench to cut threads in
the ply hold-down block in the fuselage.
15. Harden the threads in the hold-down block with thin
CA glue, then re-tap the threads after the glue is completely
dry.
13. Remove the wing and re-drill the holes in the wing
11. Study the wing plan to determine where the wing
16. Trial fit the wing to the fuse using the two 1/4-20
bolt holes are to be drilled. By measuring, transfer the loca-
tions to the wing bolt plate on the bottom of the wing. After
marking the bolt locations, replace the wing in the saddle and
re-align it accurately, as in step 6.
1/16" WING BOLT PLATE
Drilling locations
nylon bolts provided. You may cut the bolts off to their proper
length, so they protrude about 1/4" below the hold-down
block in the fuselage.
1/4 - 20 Nylon Wing Bolt
17. Later you will apply foam wing seating tape or
silicone sealer to the wing saddle. To allow space for this
wing cushion material, you may sand the saddle slightly in
the areas where the wing touches the saddle, to provide a
small gap.
18. Sand off the bottom edge of F-2 and F-2A flush with
the bottom of the chin block base. And, while you're at it,
13/16"
24