Great Planes Ultra Sport 60 Kit - GPMA0420 Pages 1-27 User Manual
Page 13
IMPORTANT: The shape of the leading edge
will affect the way this airplane performs snap rolls
and spins. A blunt, rounded leading edge will
"soften" the stall, making the plane very docile
when flying slowly, enabling it to flare nose-high for
very slow landings; however, this may cause the
plane to be a little sluggish when trying to enter a
snap roll or spin. A sharper leading edge will help
the plane enter snap roll and spin maneuvers more
crisply, while sacrificing only a little of the low
speed stability. The leading edge has been approxi-
mately pre-shaped to the sharper cross-section, so
try to maintain the same LE radius when sanding to
blend with the LE sheeting. To avoid tip stalls,
make sure the leading edges of both wing panels
have the same shape.
NOTE: 30-minute epoxy is strongly recommended for the
wing joining process.
3. Mix up a batch of 30-minute epoxy and push some
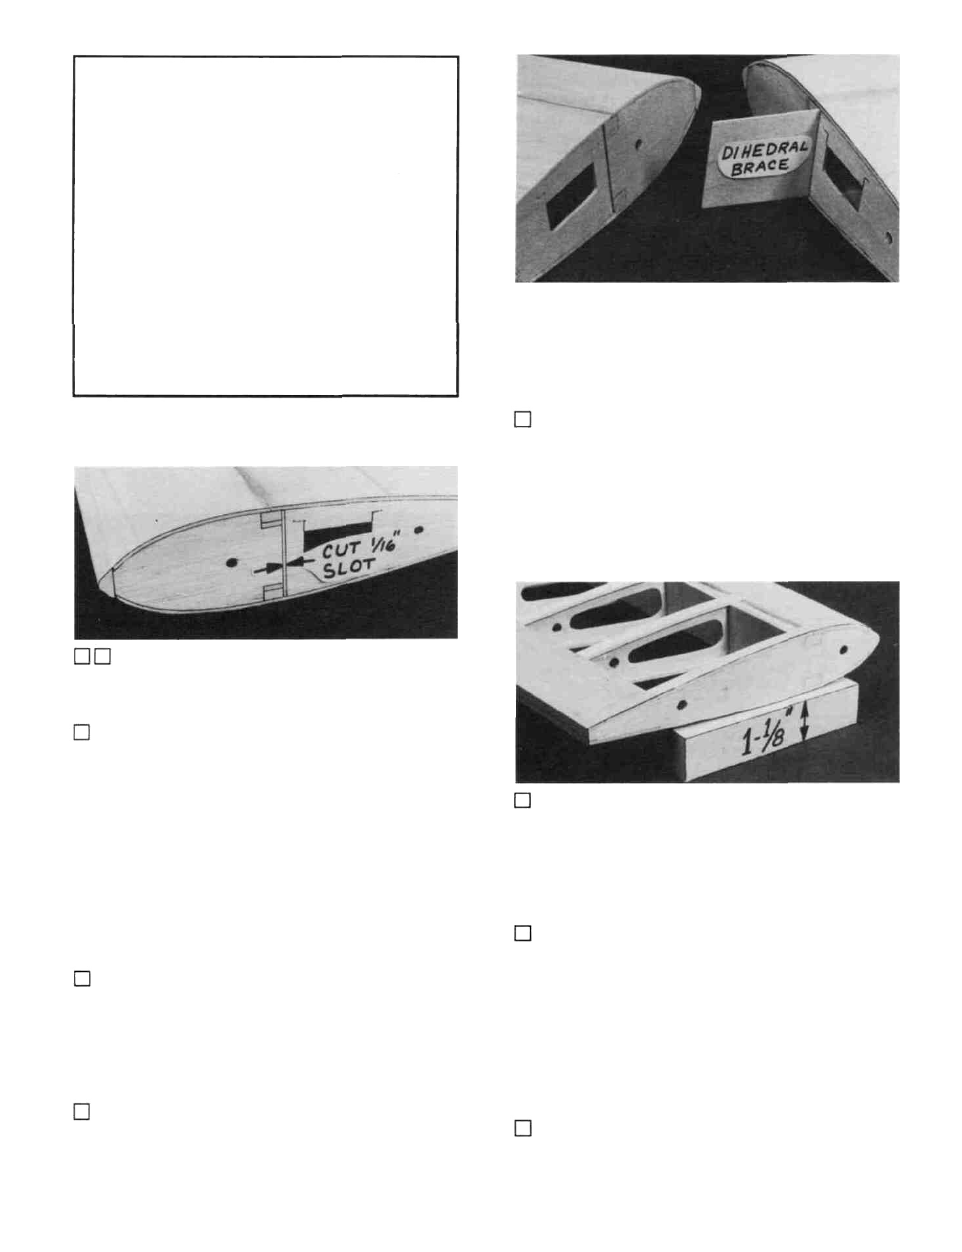
34. Mark and cut out a 1/16" slot in W-l just behind
the spars, for the dihedral brace.
the left wing panel.
into the dihedral brace slots. Smear epoxy on the spar ends,
and on both sides of the 1/16" ply dihedral brace. Slide the
dihedral brace in place, push the wing panels together and
immediately proceed to the next step.
35. Now go back and repeat Steps 9 through 34 to build
4. With the wing tips blocked up 1-1/8 inch, carefully
JOIN THE WING PANELS
align the LE and TE of both wing panels at the center and,
while holding them in correct alignment, apply thin CA glue
to "lock'' the panels together. Do not apply CA glue to any
area that is already coated with epoxy. Allow the epoxy to
fully harden before disturbing the wing.
NOTE: Read steps 1 through 4, then make a "dry run"
through these steps before actually proceeding.
5. Sand the wing joint smooth all around.
1. Lay a piece of waxed paper down and place the two
wing panels, right side up, so that the W-l ribs are together.
Using the 1-1/8" x 1-9/16" x 9-3/4" balsa wing tip blocks,
block up both wing tips 1-1/8-inch. Sand the wing panels at
the center so they will fit together without a gap.
INSTALL AILERON TORQUE RODS
2. Trial fit the 1/16" ply dihedral brace to make sure
it will readily slide into place. (The photo for this step is at the
top of the next column).
1. Roughen the short end of the aileron torque rods
with 100-grit sandpaper, and file the same end to a wedge
shape. (See sketch on next page).
13