Fuselage assembly – Great Planes Ultra Sport 60 Kit - GPMA0420 Pages 1-27 User Manual
Page 18
retract mechanism. Cut a clearance slot in rib W-3 for the LG
wire. Cut an opening in the bottom LE sheet and in rib W-2
FUSELAGE ASSEMBLY
for the wheel well.
3. lEnclose the wheel well by running vertical grain
1/16" balsa between the bottom and top sheeting; or you may
make the wheel well from an appropriately-sized styrofoam
cup.
of the spars) for your retract servo, and bend and fit a pushrod
to run between the servo and the retract mechanism. Run the
pushrod just under the top LE sheeting until it passes over the
wheel well, then make two 90-degree bends and connect it to
PREPARE FUSE SIDES
1. Lay one of the shaped 3/16" balsa fuselage sides in
place on the fuselage plan side view. Carefully position the
fuse side so the front edge lines up with the front ofF-1 on the
plan. Tape or pin the fuse side so it can't move. NOTE: The
fuse side may be a little longer at the rear than indicated by the
plan. This is as it should be.
the retract mechanism.
5. Temporarily mount yourretract servo and trial fit all
retract components. Test the operation of your retracts
making sure they operate freely and reliably. Also make sure
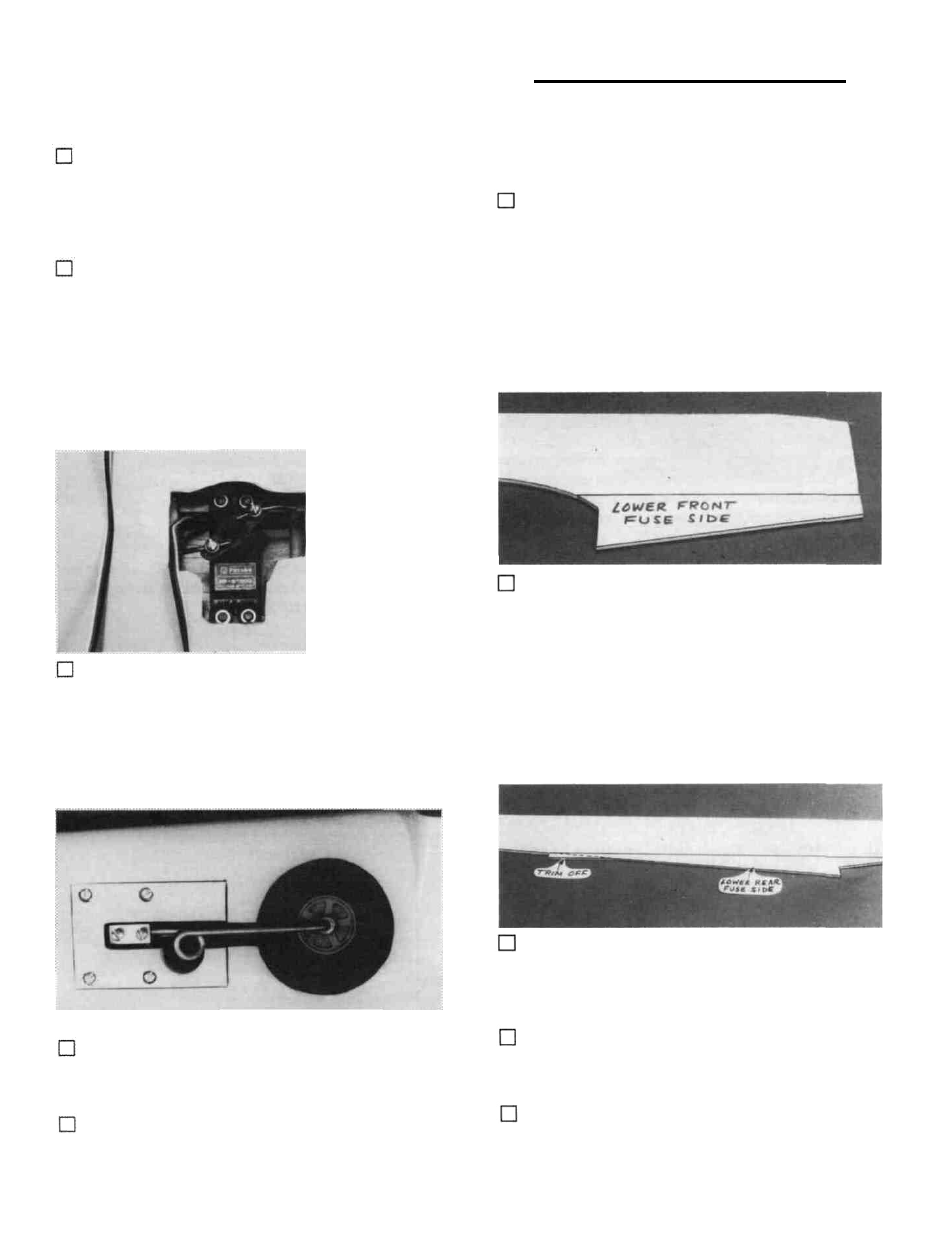
2. Carefully position the die-cut 3/16" balsa lower
front fuse side so the rear edge lines up with the front of the
wing saddle opening on the plan (the rear edge ofF-2A). You
may have to lightly sand the top edge of the die-cut 3/16"
balsa for a good fit against the bottom edge of the fuse side.
Edge glue the lower front fuse side to the fuse side. NOTE:
Use waxed paper under the balsa to avoid gluing to the plan.
they "lock" in both the up and down positions.
3. Carefully position the die-cut 3/16" balsa lower
rear fuse side so the vertical front edge lines up with the rear
of the wing saddle opening on the plan (the front edge of
F-4). Edge glue the lower rear fuse side to the fuse side.
Photo shows finished wing with retract installed.
6. Blend the bottom sheeting as neatly as possible
around the retracts.
4. Trim and sand off the die-cut "bumps" from the
front and rear portion of the lower rear fuse side, blending
with the upper fuse side.
1. Use polyester resin or 30-minute epoxy thinned with
alcohol to fuelproof the entire retract well area.
5. Sand the fuse side smooth on both sides using a T-
bar and 100-grit sandpaper, then repeat the above steps to
make the other fuse side.
18