Install the aileron servos & pushrods – Great Planes Super Stearman 1.20 ARF - GPMA1350 User Manual
Page 9
❏
9. Hold the wing together with masking tape while the
glue is curing. Excess epoxy can be cleaned away with
denatured alcohol and a paper towel.
❏
10. Glue the top wing together using the straight wing
joiner and following the same gluing procedure used on the
bottom wing. Note: There is no dihedral on the top wing.
After gluing the wing together be sure it remains flat on the
workbench while the glue cures.
❏ ❏
1. On the lower wing, install a 12" [305mm] servo extension
onto the servo lead. Secure the extension to the lead with tape, a
piece of shrink tube or some other method to keep them from
coming unplugged.
❏ ❏
2. Tie the string to the servo extension. At the root of
the wing the other end of the string is taped. Pull the string
and the servo lead through the wing. Untie the string from
the lead and insert the lead through the small hole you cut
the covering from. Tape the lead to the wing to prevent it
from falling back into the wing.
❏ ❏
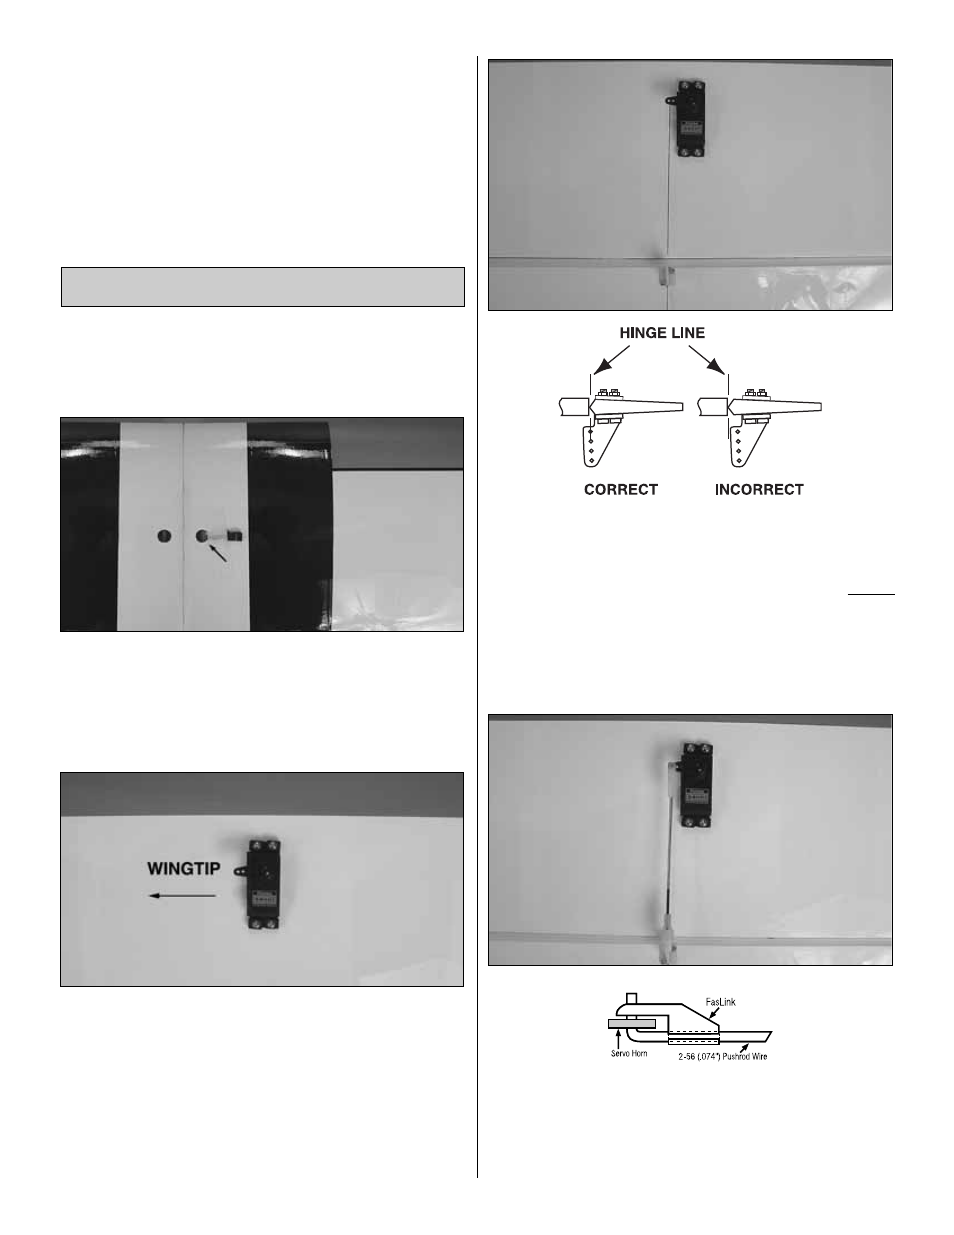
3. Install the servo into the servo opening. Drill through
the servo mounting holes with a 1/16" [1.6mm] drill bit.
Remove the servo from the servo opening. Install and then
remove a servo mounting screw into each of the holes you
have drilled. Apply a drop of thin CA into the holes to harden
the threads. Once the glue has cured install the servo into
the servo opening using the hardware included with your
servo. Center the servo, then install a servo arm as shown.
The arm should be pointing towards the wingtip.
❏ ❏
4. Place a nylon clevis in line with the last hole in the
servo arm. When positioned properly the control horn will
rest on a hardwood plate in the aileron. Mark the location of
the mounting holes onto the aileron. Drill a 1/16" [1.6mm]
hole on the marks, drilling through the plywood plate
but not
through the top of the aileron. Insert and remove a #2 x3/8"
[10mm] screw into each of the holes. Apply a couple drops
of thin CA into the holes to harden the threads. Once the
glue has cured attach the horn to the aileron with two #2 x
3/8" [10mm] screws.
❏ ❏
5. Thread a nylon clevis onto a .074 x 6" [152mm]
threaded wire 20 turns. Slide a silicone clevis retainer onto
the clevis. Install the clevis into the second hole from the
end of the control horn, then slide the silicone retainer over
Install the Aileron Servos & Pushrods
9