Install the front housing flange (optional), Prepare to run the fan – Great Planes HyperFlow Ducted Fan System - GPMG3910/3911 User Manual
Page 8
❏
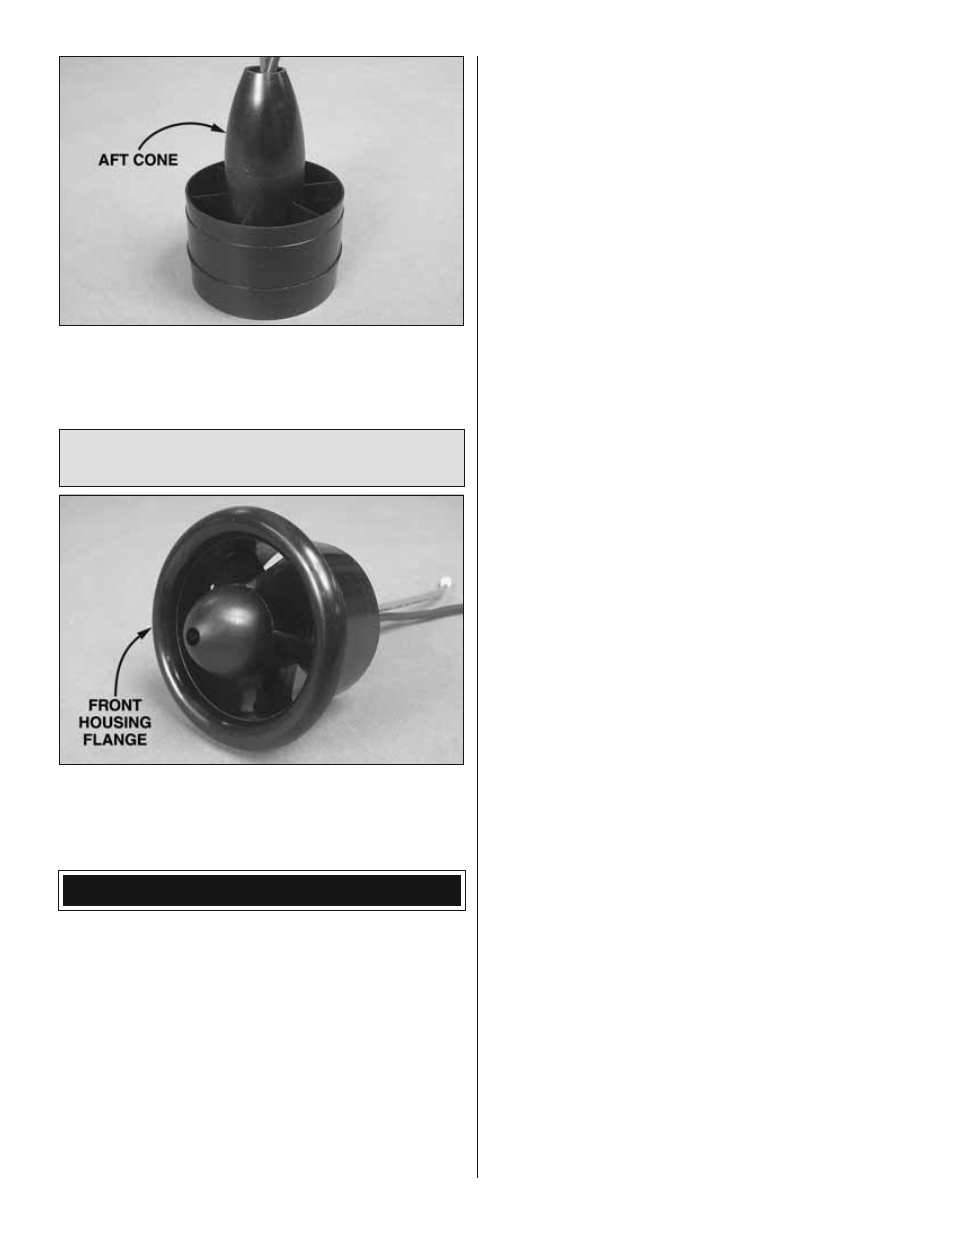
8. Attach the aft cone to the fan housing with a few drops
of CA glue. Excess glue will make it diffi cult to remove the
motor from the housing should it be necessary in the future.
Install the Front Housing Flange
(Optional)
❏
For a nacelle installation, secure the front housing fl ange
to the fan housing using a couple drops of thin CA. The front
housing fl ange is not used on most internal fan installations
PREPARE TO RUN THE FAN
Before you run the fan make sure that:
• The motor selected is one of the recommended motors.
• An appropriate ESC is being used.
• An appropriate LiPo battery is being used.
• All the screws and set screws are secured with
threadlocking compound.
• All the fan parts are properly attached to the fan and to
the airframe.
• If any part of this fan should become damaged, replace all
parts. Never attempt to repair damaged parts.
• Keep the fan away from objects as it will try to suck them in,
which can cause damage to the fan and/or bodily injury.
• Always use eye protection when operating the fan unit.
• NEVER look into the fan as it is running.
• Ensure all persons in the immediate area are using eye
protection while the fan is in operation.
• NEVER point the fan in the direction of anyone.
• Make sure you inspect the fan and all its parts before
each run.
• Never use motors larger than those recommended.
• Never run a fan that is damaged in any way.
• Never run the fan while holding it in your hands.
• NEVER run the fan above 50,000 rpm!
• Never run the fan rotor on any motor outside of the housing.
This is a device that runs at very high rpm and as such it
needs to be handled carefully. There is a very short “break-
in” period that needs to be followed to ensure that all parts
fi t well, everything is tight, and that no excessive vibration
is present when running the fan. Also, if the power system
chosen has a large power output, the fan blades will expand
as rpm are increased to the point of possibly touching the
housing. This is expected and it is within the “break-in”
procedures. The blades will get shortened slightly to fi t the
fan housing as they wear on the sides.
The procedure below must be followed carefully:
1. If the fan is properly installed on an airframe and everything
is ready to be tested, arm the speed controller and advance
the throttle slowly to approximately 1/4 power for three
minutes. Check for vibration and/or unusual noises. If there
is vibration or unusual noise present during the test, do not
proceed to step 2 until the problem is resolved. Inspect all
moving parts, being sure that motor screws and the rotor
adapter screws are tight. Confi rm that the fan blades rotate
smoothly within the housing and the rotor is not rubbing on
the mounting plate (Be sure to unplug the battery from the
ESC before handling the fan!).
2. If the fan operates smoothly, move the stick to 1/2 throttle
and repeat the test as described in step 1.
3. Slowly advance the throttle to 3/4 power. When using high-
power systems, the fan blades may rub a bit on the fan housing.
You can see this by powering down the system and checking
for marks or grooves in the housing. If this is the case, return
to 1/2 throttle and cycle between 1/2 throttle and 3/4 throttle
for three to four minutes. Doing so will adjust the length of the
fan blades as they slowly wear on the fan housing.
4. Repeat the procedure described in step 3 between 3/4
throttle and full throttle.
5. Unplug the battery from the ESC and check the fan for
rubbing, cracks, or missing parts.
If your fan appears damaged, vibrates excessively, or
makes unexpected noises, please return it to Hobby
Services for inspection.
Happy fl ying!