1648-ba2 installation instruction, Installation instructions, Warning! shut power off at fuse or circuit breaker – Golden Lighting 1648-BA2 BUS User Manual
Page 2
F
For Customer Service, please contact the place of purchase for replacements.
1648-BA2 INSTALLATION INSTRUCTION
INSTALLATION INSTRUCTIONS
Fixture Name: Olympia 1648-BA2 BUS
For Pendant Light Fixture
WARNING! SHUT POWER OFF AT FUSE OR CIRCUIT BREAKER
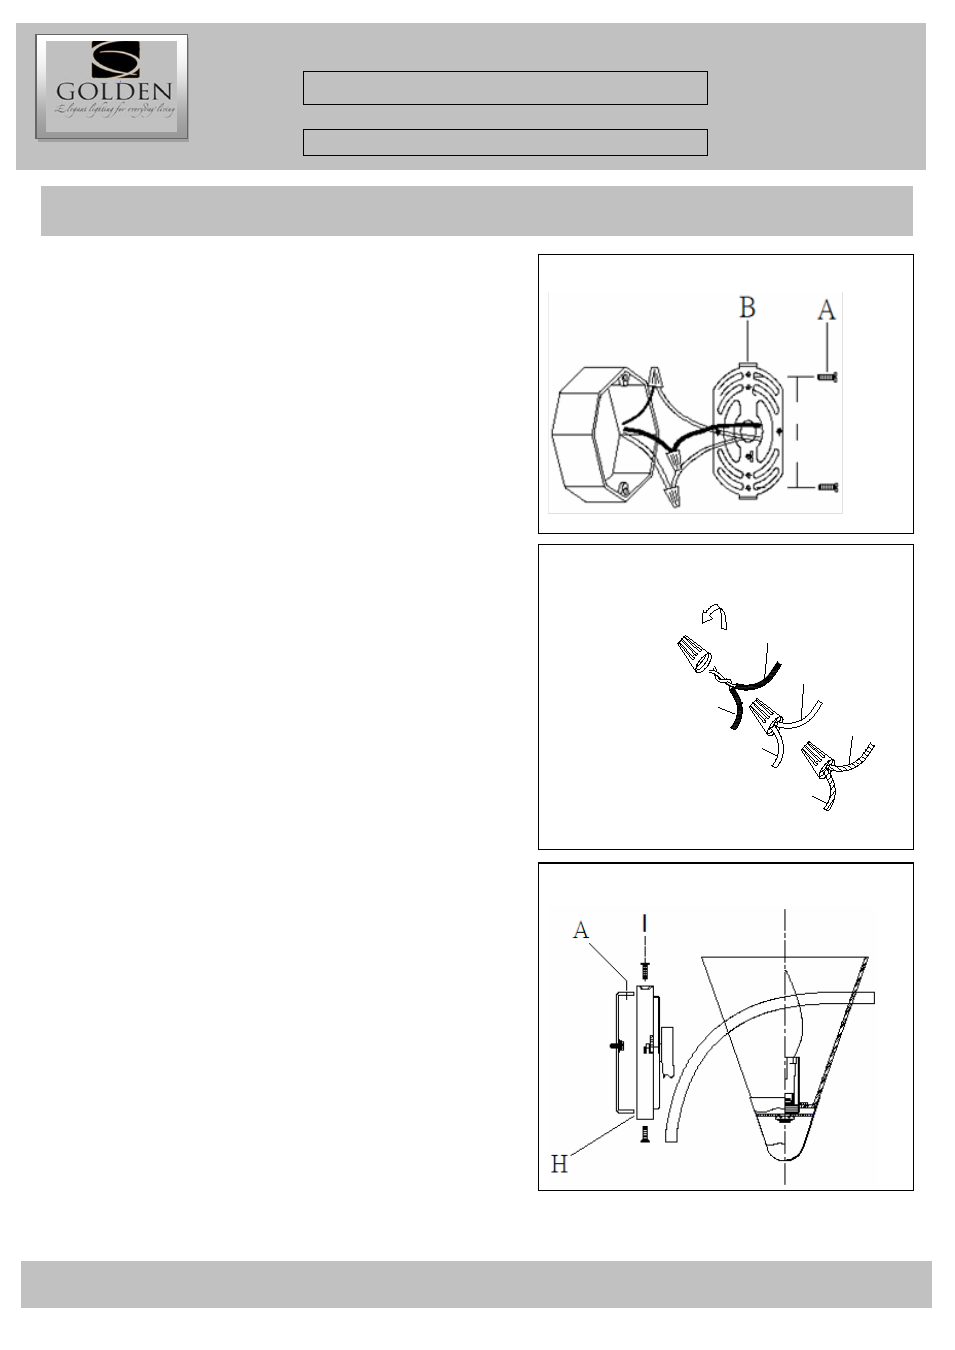
HANGING THE FIXTURE (Fig.1)
1. Carefully remove the new fixture from the carton along
with the yellow bag that holds all of the parts. Check that all
parts are included as shown in the illustration and the Parts
and Assembly Sheet.
2. Shut off the power at the circuit breaker and completely
remove the old fixture from the wall, including the old
mounting strap.
3. Place Mounting Strap (B) over the Junction Box.
4. Attach Mounting Strap (B) to the Junction Box using
Mounting Screws (A). Tighten the screws securely using a
screw driver.
CONNECTING THE WIRES (Fig.2)
5. Attach the power supply wires to the fixture lead wires by
connecting BLACK to BLACK (or SMOOTH) and WHITE to
WHITE ( or RIBBED) .
6.
Ground wire connection: Connect the fixture ground
wire to house ground wire, which usually has green or
copper insulation, with the correct size of wire
connector. If there is no house ground wire at ceiling
junction box then attach fixture ground wire securely
onto green grounding screw located on the mounting
bar.
NOTE: Twist the wires together in the same direction that you
twisted the wire connector onto the wires.
7. Tuck the wire connections neatly into the Junction Box.
FINISHING THE INSTALLATION (Fig.3)
8. Raise the fixture to the wall so that it covers the Junction
Box.
9. Align the holes at both sides of Mounting Strap (B) with the
holes in the Backplate. Secure the Backplate to the
Junction Box using Mounting Screws (I) and a screw driver.
10. Install the light bulbs and glass shade as per the Parts and
Assembly Sheet.
Fig. 1
Fig.2
BARE COPPER
(Ground)
GREEN
(Ground)
FIXTURE WIRES
SMOOTH (BLACK)
RIBBED (WHITE)
BLACK
WHITE
HOUSE WIRES
Fig.3