Install the propeller, Changing to the low wing configuration – Flyzone FLZA3300 User Manual
Page 8
8
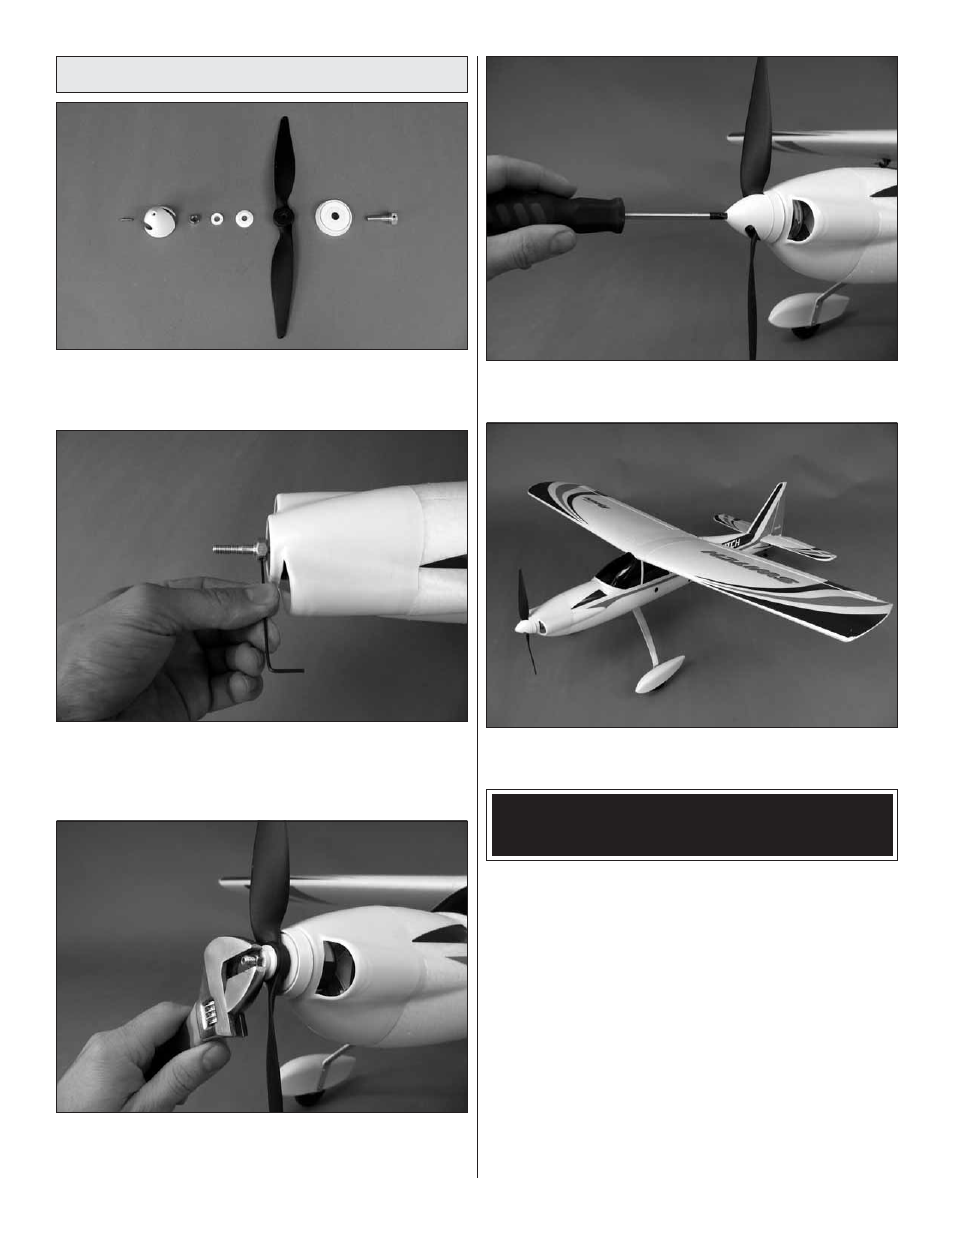
Install the Propeller
❏
1. Disassemble the spinner and prop adapter, making
note of how it is installed. You will need to reassemble it onto
the motor in the same order.
❏
2. Fit the prop adapter onto the motor shaft, aligning one
of the set screws in the adapter with the fl at spot on the motor
shaft. Tighten the set screws onto the motor shaft using the
included 1.5mm allen key.
❏
3. Install the spinner backplate onto the prop adapter
followed by the propeller, prop washer, prop spacer, and
prop nut. Tighten the prop nut thoroughly.
❏
4. Tighten the spinner cone onto the assembly using the
included screw.
❏
5. You have now completed the assembly of the high
wing confi guration of the Switch Trainer EP!
CHANGING TO THE LOW WING
CONFIGURATION
When you have mastered the high wing confi guration and
are ready for a more aerobatic fl ight experience, then it’s
time to convert your Switch Trainer EP into the low wing
confi guration. The low wing confi guration will be more agile
in the air, roll more axially, and perform inverted fl ight with
ease as well as many aerobatic maneuvers not possible
with a high wing model. The low wing confi guration will
NOT
,
however, possess any of the self-recovery characteristics of
the high wing confi guration. We strongly suggest climbing to
a high altitude after takeoff with the low wing confi guration
for your fi rst few fl ights to become accustomed to the
differences between the wing positions.
❏
1.
Remove the wing panels from the high wing
confi guration canopy hatch by disconnecting the aileron
Y-harness and sliding the panels off of the joiner tube.