Pièces de l’hélicoptère et du contrôleur, Hélicoptère contrôleur, How to trim – Estes 4600 - A816E User Manual
Page 3
10
3
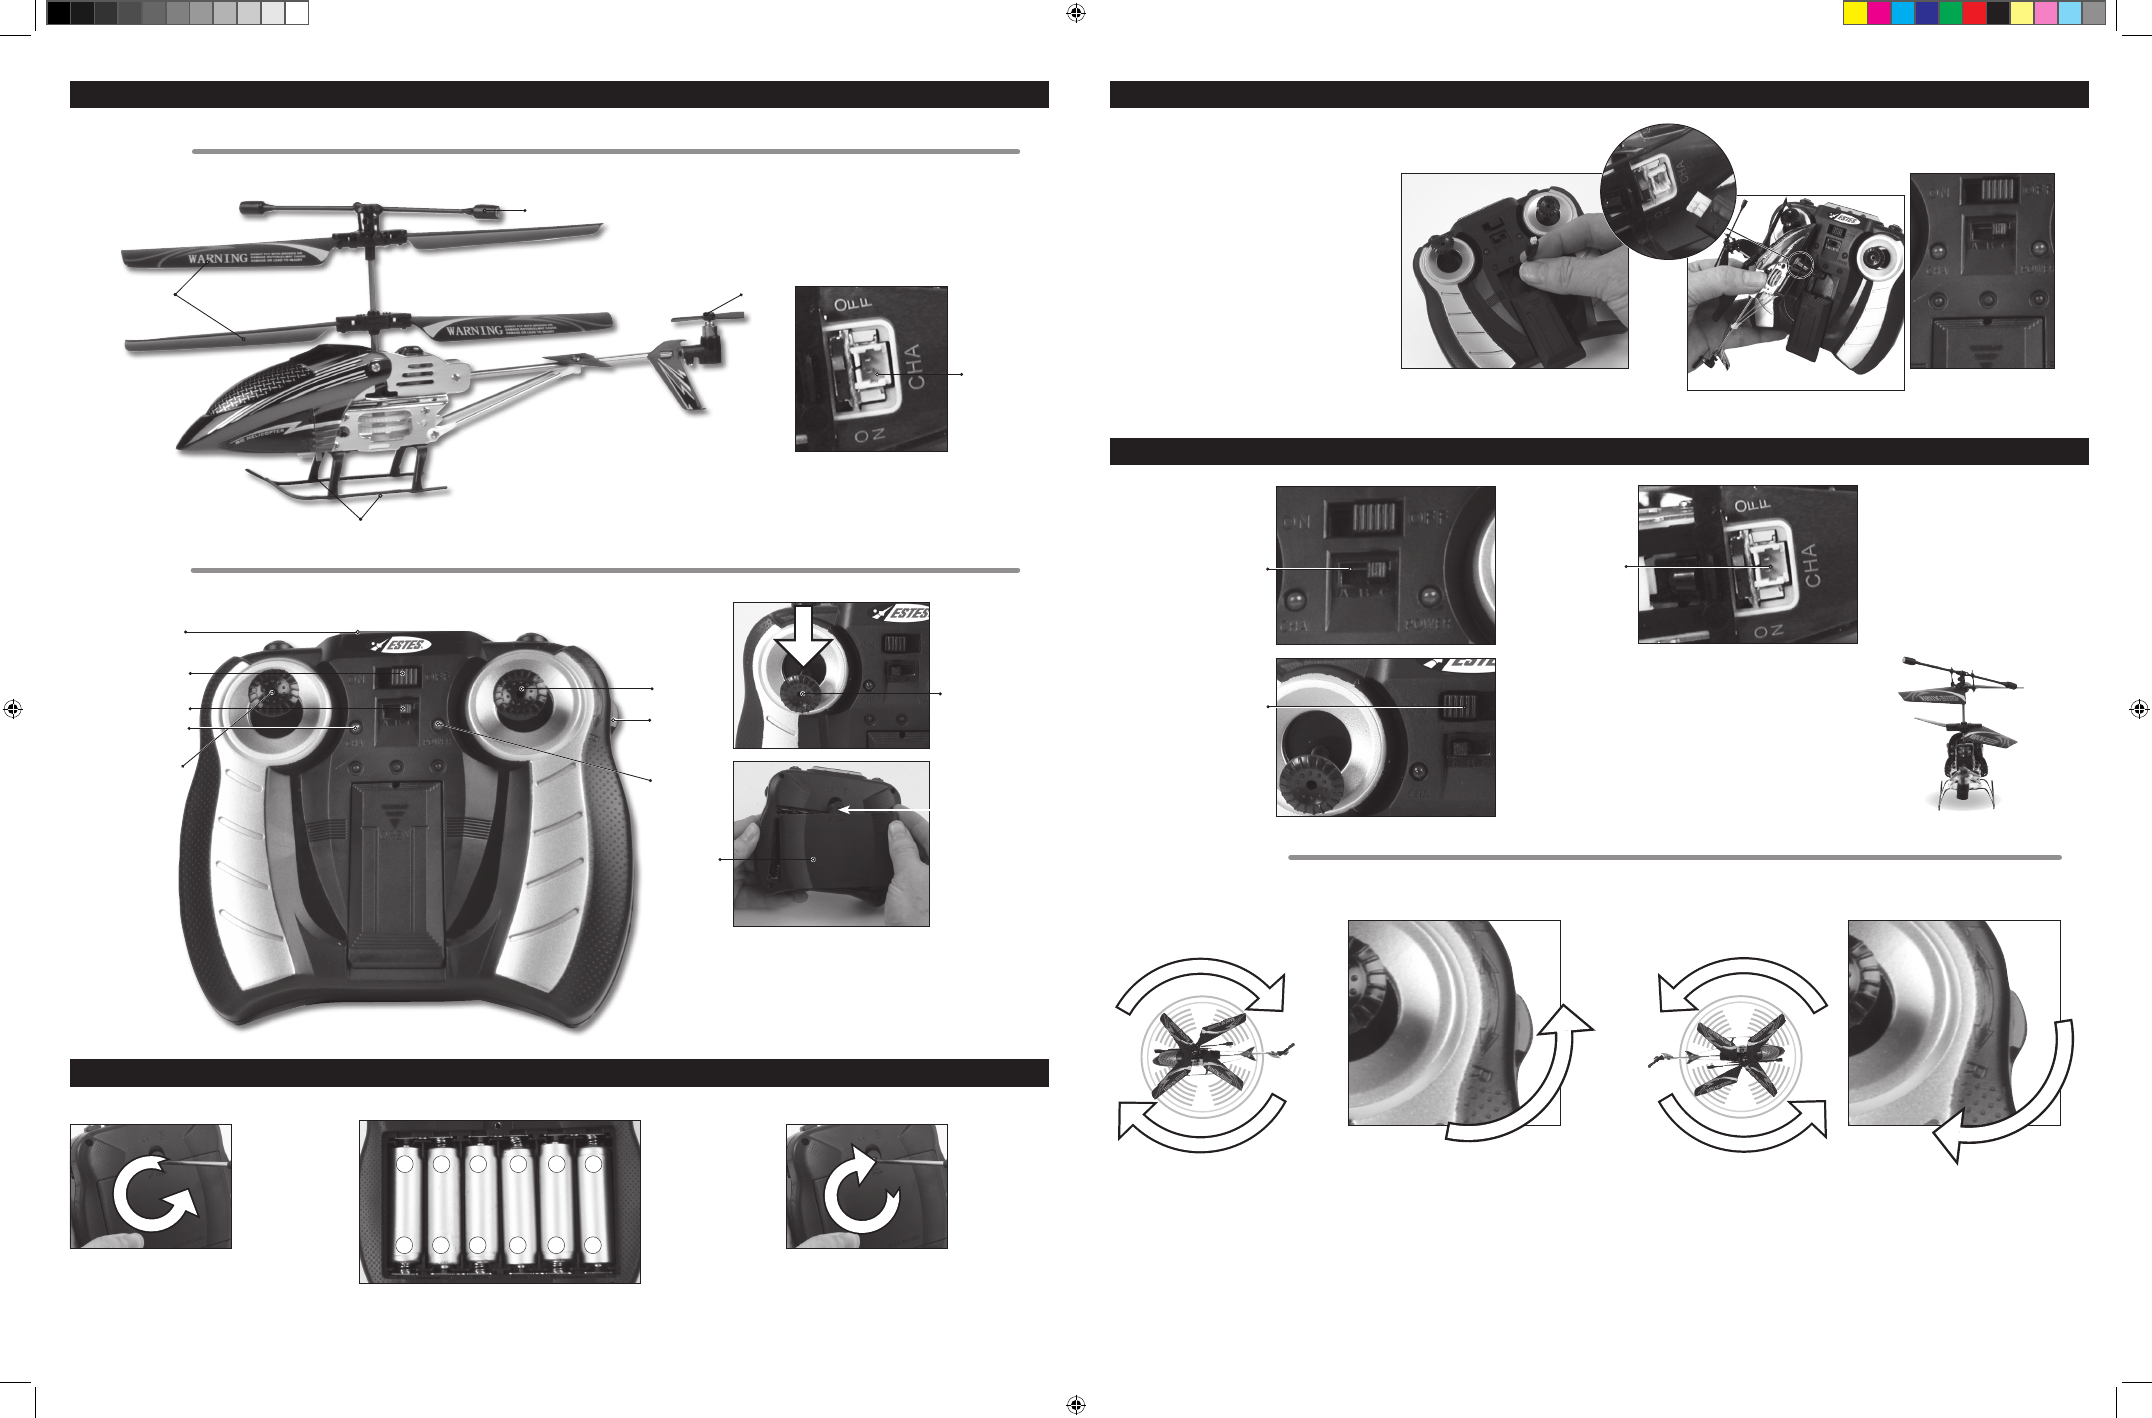
Pièces de l’hélicoptère et du contrôleur
Pales des rotors
contrarotatifs
Fiche de recharge
Hélicoptère
Contrôleur
Note: Before recharging helicopter’s 3.7V LiPo battery after flying, always wait 10-15 minutes for it to cool down.
1. Turn off both helicopter and Controller.
2. Pull out the charge cord from the center of the Controller.
(Pic 1).
3. Carefully plug the charging cord into helicopter. DO NOT
FORCE. When inserted properly, the charging cord should fit
easily in the charging port. Incorrect insertion of the charging
cord will damage helicopter and may create a hazard.
4. Make sure the throttle control stick is pulled down to the
throttle off position. (Pic 3).
5. Turn the Controller switch to the ON position on the
Controller. The Controllers yellow LED will illuminate.
6. Controllers red LED will illuminate during the charge cycle.
(Pic 3).
7. When the red LED goes out, charge cycle is complete.
8. Remove charge cord from helicopter.
1. Enlever la vis au-
dessus du couvercle
du compartiment des
piles en la tournant
dans le sens anti-
horaire à l’aide d’un
tournevis cruciforme.
2. Installer 6 piles de
calibre AA dans le
compartiment en
observant la polarité
indiquée à l’intérieur.
3. Remettre la vis en
place et la serrer
dans le sens
horaire.
4. Le voyant DÉL du
contrôleur indique
par un clignote-
ment rouge
quand les piles
sont déchargées
(moins de 7 V).
Pic 1
Pic 2
Installation des piles du contrôleur
Helicopter Charging Procedure
Flying Your Helicopter
• Gently push the throttle up to raise your helicopter about 1.5 feet (0.5 meter) to 3 feet (1 meter) high.
1. HOW TO TRIM:
Pic 3
LED
The helicopter can fly for about 5-6 minutes after 40-50 minutes of charging.
Then, set the
ON/OFF switch of
helicopter to ON.
With the throttle (or left) stick
of Controller in the down
position, move Controller’s
power/charge switch to ON.
Set the infrared band selector
switch on the Controller to
the same letter found on the
bottom of helicopter.
Place helicopter on
the ground with its tail
pointing toward you.
If helicopter spirals to the left or keeps turning left, turn the left and right trim
dial clockwise until helicopter no longer spirals.
If helicopter spirals to the right or keeps turning right, turn the left and right trim
dial counter-clockwise until helicopter no longer spirals.
Perche
Rotor
anticouple
Train d’atterrissage
Spirals right or
Keeps turning right
Spirals left or
Keeps turning left
Émetteur de signaux
infrarouges
Power DÉL
indicateur
Sélecteur de bande
Manche
d’accélération
Manche de
direction
Cadran
d’équilibrage
vers la gauche
et la droite
Commutateur
alimentation/charge
Enlever la vis afin de
libérer le couvercle
du compartiment
des piles pour leur
installation et leur
retrait.
Position basse
d’accélération
Couvercle du
compartiment
des piles
-
-
-
-
-
-
+
+
+
+
+
+
Power DÉL indicateur
4600 Heli Instruction AMC.indd 3
8/2/11 2:52 PM