Rocket preflight, Paint scheme, Engine prep – Estes 2053 - Paveway User Manual
Page 5: Attaching launch lug and apply fillets, Attaching parachute
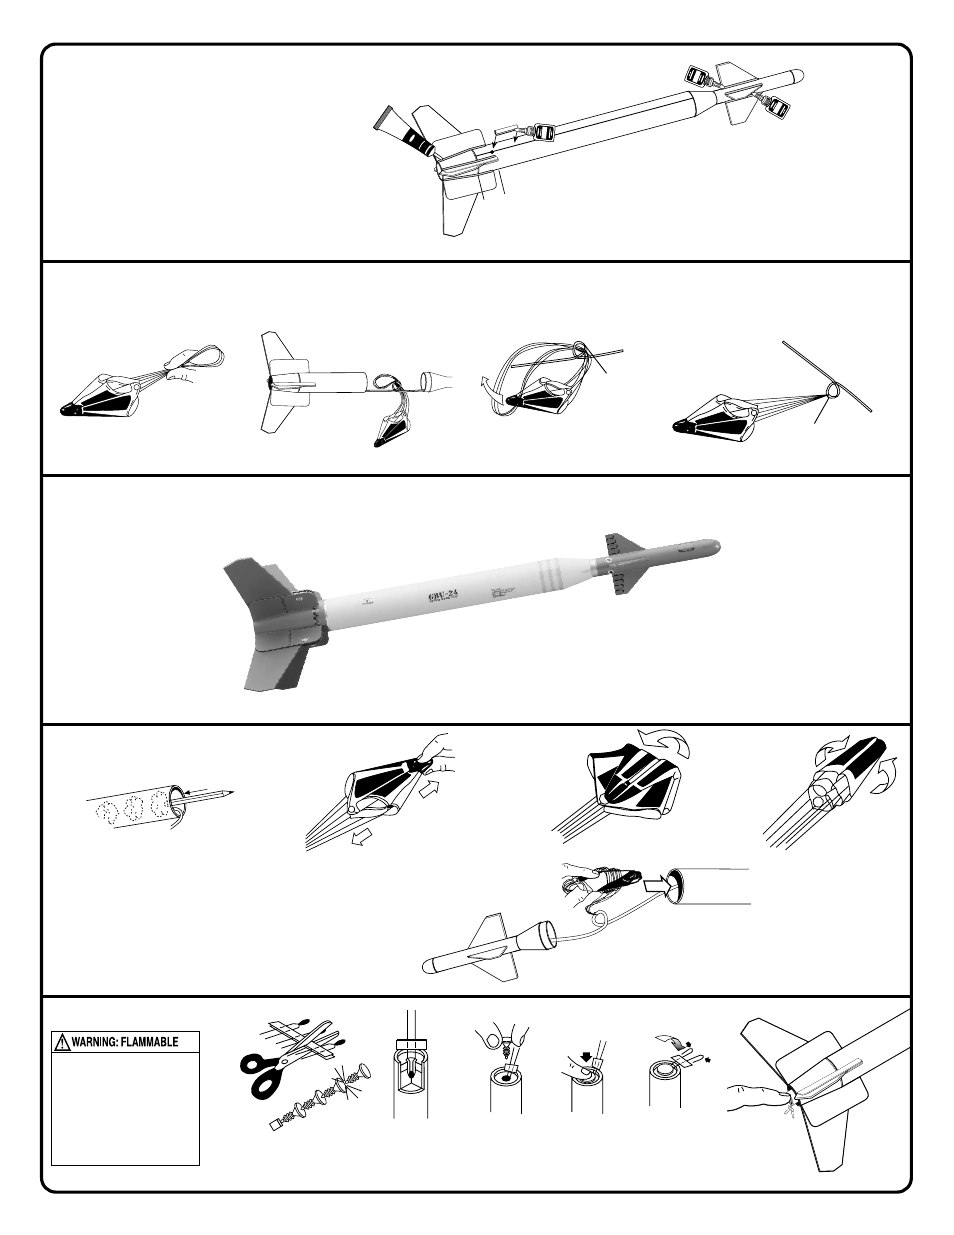
ROCKET PREFLIGHT
E.
Wrap lines loosely. Insert
parachute, shock cord,
then upper assembly.
A.
Insert four squares of loosely crumpled
recovery wadding into rocket body tube.
NOTE:
Use Estes wadding (EST 302274) only.
C.
Fold.
D.
Roll.
B.
Spike.
B.
Tip must touch
propellant.
E.
F.
Insert engine.
D.
C.
A.
PAINT SCHEME
First spray rocket with white primer, let dry
and sand. Repeat until rocket is smooth.
Follow the paint scheme on the package.
When paint is dry, peel decals one at a time
from backing sheets and apply where shown.
Rub down to remove bubbles.
*Optional - Spray a dull coat over
the entire rocket when complete.
ENGINE PREP
To avoid serious injury,
read instructions & NAR
Safety Code included with
engines.
PREPARE YOUR ENGINE
ONLY WHEN YOU ARE
OUTSIDE AT THE LAUNCH
SITE PREPARING TO LAUNCH!
If you do not use your prepared
engine, remove the igniter before
storing your engine.
9
.
ATTACHING LAUNCH LUG AND APPLY FILLETS
A
.
Measure 3/4" (19 mm) from end of body tube and
mark. Glue launch lug on the launch lug line "LL".
B
.
Apply glue fillets to all launch lug and fin/body
joints. Smooth with finger. Let dry.
C
.
Apply fillets to main fins/ body tube using plastic
cement. Smooth with finger. Let dry.
A.
Loop shroud lines.
B
. Push through shock cord loop.
C.
Loop parachute through shroud lines.
D.
Pull tightly.
10
.
ATTACHING PARACHUTE
3/4"
(19 mm)
"LL"
GLUE
GLUE
GLUEGLUE
GLUE
GLUE
A
.
B
.
C
.
P
L
A
S
T
IC
C
E
M
E
N
T
Shock Cord loop.
Shock Cord loop.