COMP Cams 5492 Camshaft Phaser Locking Plates For 2011 Ford 5.0L Modular V8 User Manual
Page 3
COMP Cams®
3406 Democrat Rd.
Memphis, TN 38118
Phone: (901) 795-2400 Fax: (901) 366-1807
www.compcams.com
Part #COMP4-136
Revised 4/25/13
17. Using a Torx T-30 loosen the six perimeter phaser bolts. Note: Before the sixth and final
perimeter bolt is removed sit the phaser on a flat work surface and do no handle it any
more than is necessary after it is loosened. Without the perimeter bolts holding the phaser
together it can potentially fall apart into many pieces if not handled with extreme caution.
18. Carefully remove the OEM front phaser plate. There are two pieces that will come off. A
smaller center plate that has the three cam bolts and a larger outer plate that has the six
perimeter bolts.
19. As soon as you remove the phaser front plate you will see a small round metal gasket. Remove
this gasket and do not install.
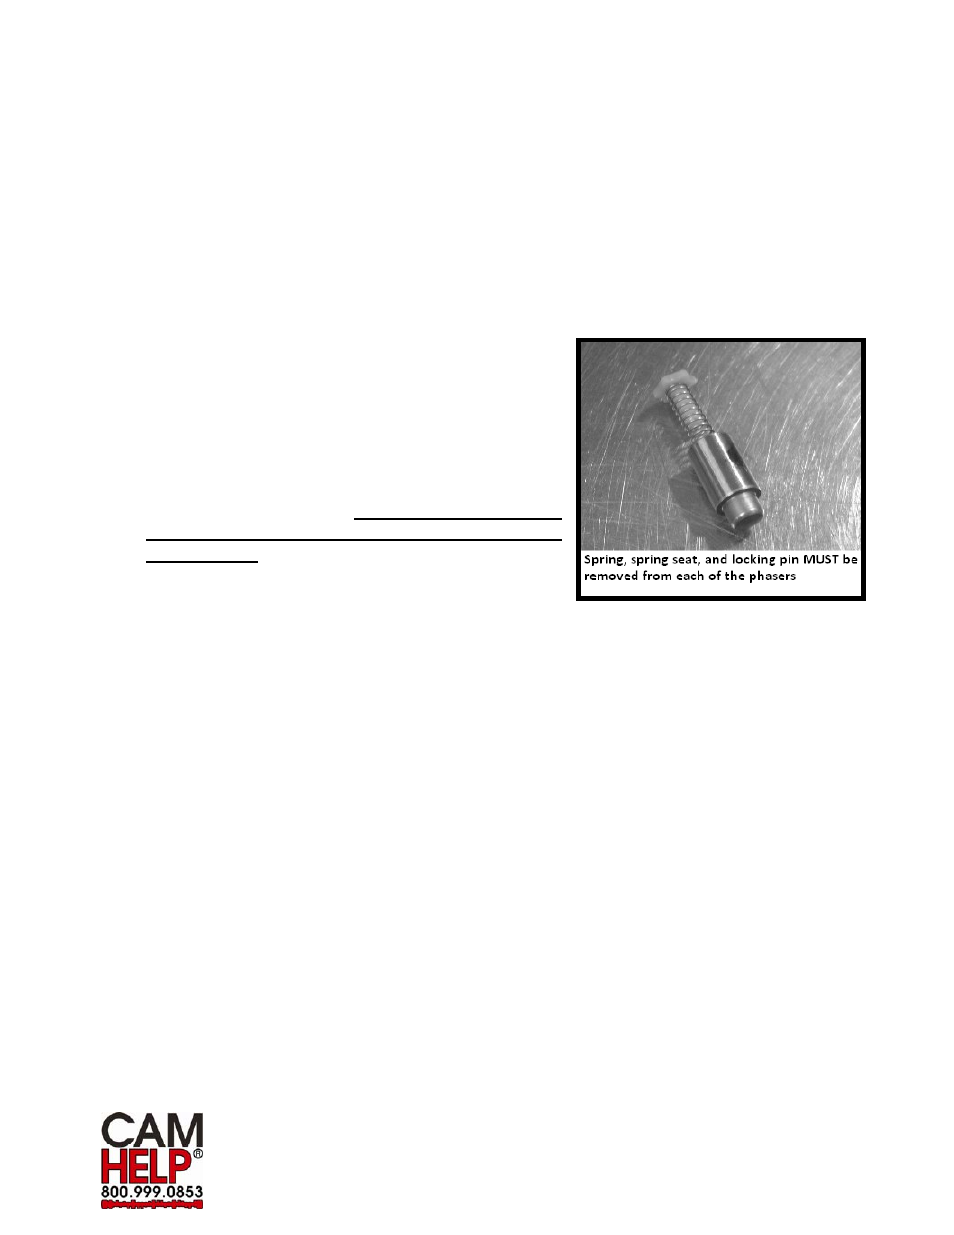
20. Notice that when you remove the front cover there will
be a small spring and small star shaped plastic spring
seat that will be visible. Remove these two parts, they
are not used with the COMP Cams
®
adjustable locking
plates.
21. Beneath the spring, in the previous step, is a locking
pin that must be removed. If you do not remove this
pin, the phaser will remain locked and not be able
to be adjusted.
22. Install COMP Cams
®
phaser locking plate. To align
the adjustable locking plate correctly, set the plate on the phaser so the COMP Cams
®
logo is
directly above where the locking pin was removed in step 21. Ensure that small alignment pin
fits correctly in place and the phaser plate sits flush without interference. Also ensure the three
camshaft bolt holes line up correctly for reassembly.
23. Install washers onto the six upgraded phaser perimeter bolts (both supplied).
24. Install the six perimeter phaser bolts through the adjustable locking plate and into the phaser
body, only tighten until finger tight.
25. Reinstall each phaser without the rear chain. Ensure the phaser pin will engage the pocket on
the camshaft fully. Tighten one perimeter phaser bolt to hole the phaser in alignment and
remove. Note: The phaser is made of many pieces and can be reassembled slightly
misaligned. Without this step the phaser may look complete, but it may not engage the
camshaft.
26. Reinstall the intake and exhaust phasers on both banks of the engine, with the small rear
camshaft chains. Use the OEM instructions for reinstallation along with procedure for lining up
the OEM timing marks. Make sure all of the phaser dowel pin seats firmly in the camshafts.