COMP Cams 5492 Camshaft Phaser Locking Plates For 2011 Ford 5.0L Modular V8 User Manual
Page 2
COMP Cams®
3406 Democrat Rd.
Memphis, TN 38118
Phone: (901) 795-2400 Fax: (901) 366-1807
www.compcams.com
Part #COMP4-136
Revised 4/25/13
7. Remove front drive accessories and front cover of the
engine.
8. Remove front tensioners and guides.
9. Remove engine main timing chains.
10. Remove the three camshaft bolts using a 10mm (12
point) socket from all four camshafts.
11. Remove two phasers from one bank of the engine at a
time. To remove intake and exhaust phasers press
down on the tensioner, to release tension, so the small
cam phaser chain can be slid over the tensioner.
12. Start camshaft removal; remove camshaft caps and
camshafts following the OEM instructions sequence.
All caps MUST be reinstalled in the same place, note
their position. The OEM numbers them and also has an
arrow pointing toward the front of the engine.
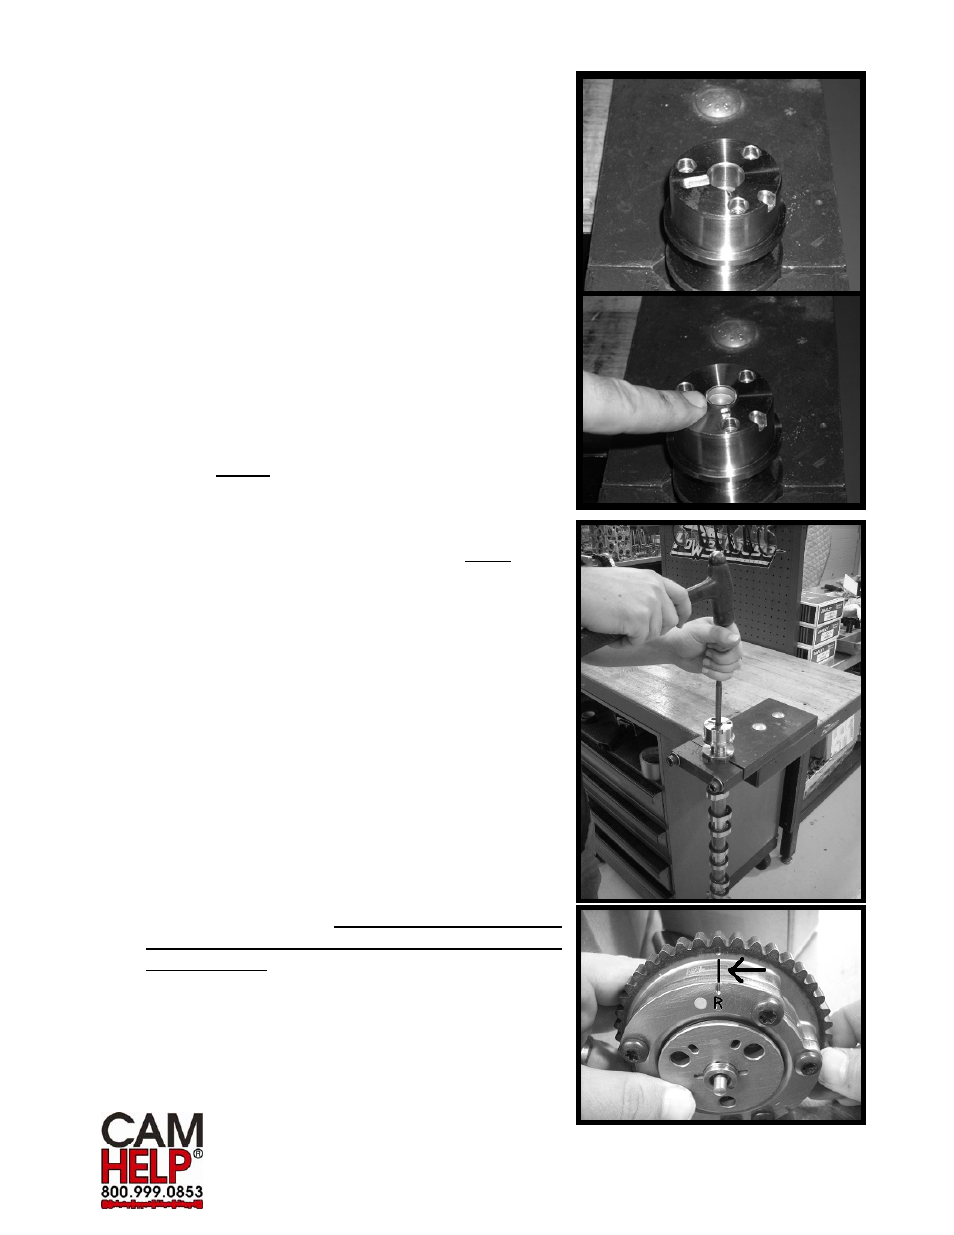
13. After the camshafts have been removed, gently tap in
supplied oil plug into the front of the camshaft with a
properly sized blunt faced punch. Press the plug down
until it bottoms out in the counterbore.
14. Install new camshaft bearing cap bolts. Camshaft
bearing cap bolts are torque to yield and can not be
reused. (Ford part #N806183-S437, 20 required per
cylinder head). Step 1. Torque to 4.4 lb./ft. (53 lb./in.).
Step 2. Tighten an additional 45°. Following the Ford
camshaft cap torque sequence. (See camshaft
installation instructions)
15. Mark a point of reference on your Phaser body. You
will see an “R” marked on the front of your phaser.
Scribe a permanent line directly above the “R”. This
will be your permanent point of reference when later
adjusting the camshaft. This same point will on all
four camshafts regardless of bank or
intake/exhaust.
16. Using snap ring pliers remove the small snap ring from
in front of phaser.