Pioneer SX-209RDS User Manual
Page 6
Attention! The text in this document has been recognized automatically. To view the original document, you can use the "Original mode".
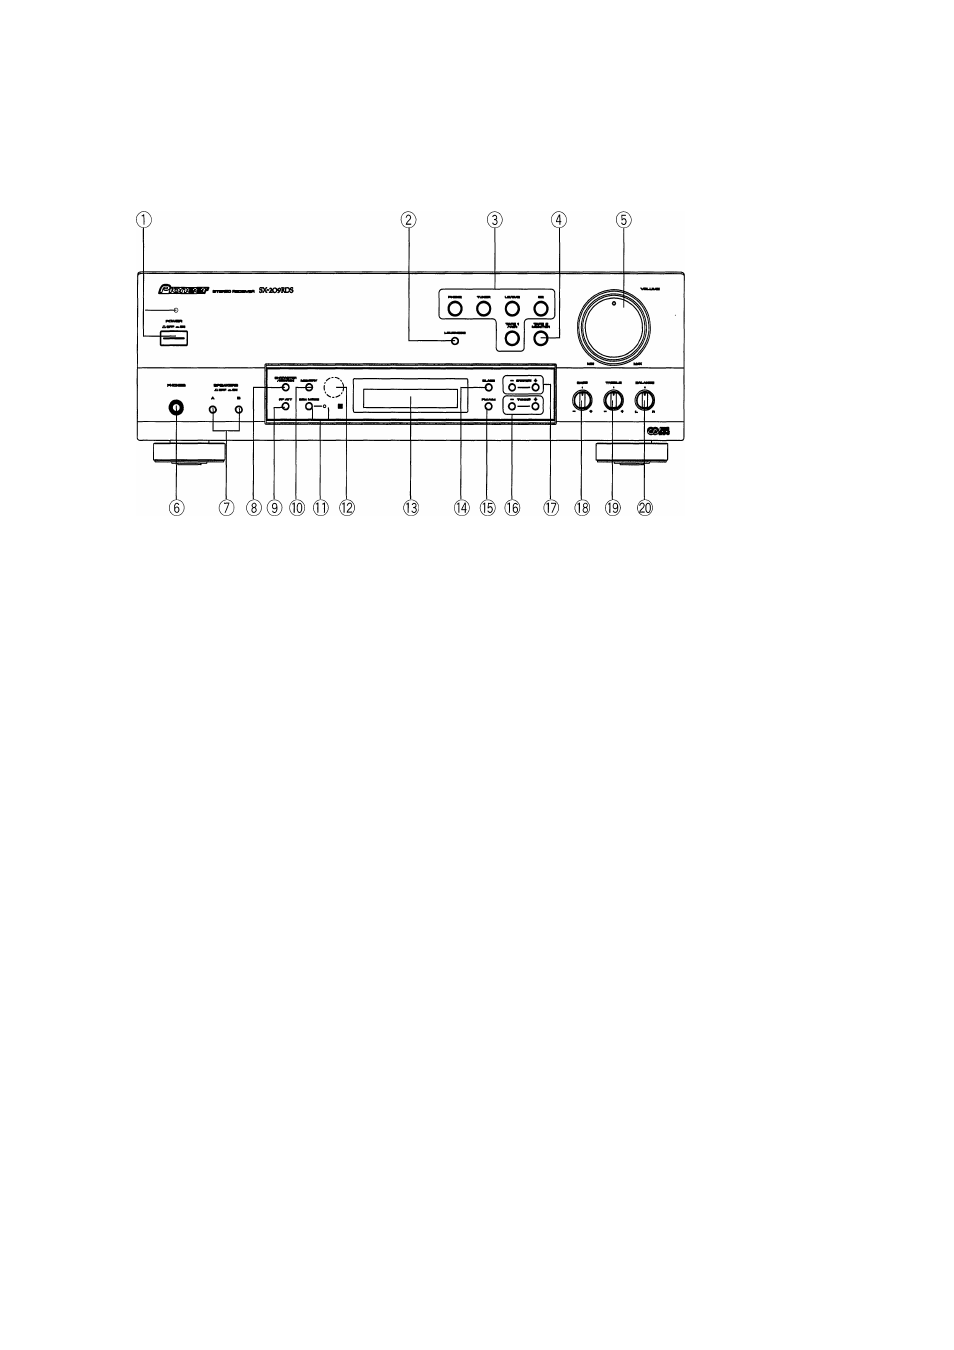
® POWER switch/STANDBY indicator
This is the switch for electric power,
ON:
When set to the ON position, power is supplied and
the unit becomes operational.
OFF:
When set to the OFF position, no power is supplied
to the unit.
(REMOTE CONTROL ONLY)
STANDBY: When set to the STANDBY position, the STANDBY
indicator lights and the main power flow is cut so the
unit is no longer fully operational.
A minute flow of power feeds the unit to maintain
operation readiness.
NOTE:
When the power is initially turned ON, muting will be applied to
prevent sound from being output for approx. 5 seconds.
©LOUDNESS button
Use when listening at low volume levels.
ON: Boosts low and high frequencies to produce a fuller sense
of sound, particularly at low volume levels.
OFF: Normal position.
NOTE:
Cannot be used when the DIRECT function is ON.
The DIRECT function can be turned ON/OFF using the remote
control unit.
@ Function buttons
Use to select playback source.
[PHONO] — Press when listening to record playback on a turn ta
ble.
[TUNER] — Press when listening to AM or FM broadcasts with a
tuner.
[LD/DVD] — Press when listening to LaserDiscs played back from
a LD player or Digital Video Discs played back from
a DVD player.
[CD] — Press when listening to compact disc playback with a
CD player.
[TAPE 1 A/CR] — Press when listening to tape playback with cas
sette deck 1 or a video cassette recorder.
®TAPE 2 MONITOR button
Press when listening to tape playback with cassette deck 2.
©VOLUME control
Use to adjust the volume level.
©PHONES jack
Connect the plug on your headphones to this jack. To listen to a
program through the headphones, set both SPEAKERS A and B
switches to the OFF position.
©SPEAKERS (■ OFF, ON) buttons
These are used to select the speaker through which you wish to
listen.
A: When the speakers connected to the A terminals are in use.
B: When the speakers connected to the B terminals are in use.
• Turn both A and B speakers to the OFF position when only
headphones are in use.
©CHARACTER/SEARCH button
When receiving an AM broadcast, or when in the FM RT, FM PS
modes:
Press the button, 'INPUT" is displayed, and the mode switches
to manual station name input.
When in the FM PTY mode:
Press the button, "SEARCH" is displayed, and the mode switches
to program type search.
• This button does not function when the frequency is displayed
(FM broadcast only).
© RF ATT button
Set this button to ON when receiving strong FM signals (near-by
stations) to reduce sound distortion. (RF ATT indicator lights.)
Normally, this button should be set to OFF.
This button has no effect on reception of AM broadcasts.
©MEMORY button
Pressing this button will result in the memorization of the current
broadcast band, reception frequency, RF ATT (FM reception only)
and FM AUTO/MONO mode.
This button is also used to select characters during station name
entry and to clear memory during ERASE PI operation.
6