Suprafresh crispers with tilt-out compartment, Crispers with tilt-out compartment, Crisper humidity control – Kenmore Elite 79575559400 User Manual
Page 18: Crisper with tilt-out feature, Tilt-out compartment, To remove tilt-out compartment, Removing crisper, Using your refrigerator
Attention! The text in this document has been recognized automatically. To view the original document, you can use the "Original mode".
USING YOUR REFRIGERATOR
SUPRAFRESH CRISPERS WITH TILT-OUT
COMPARTMENT
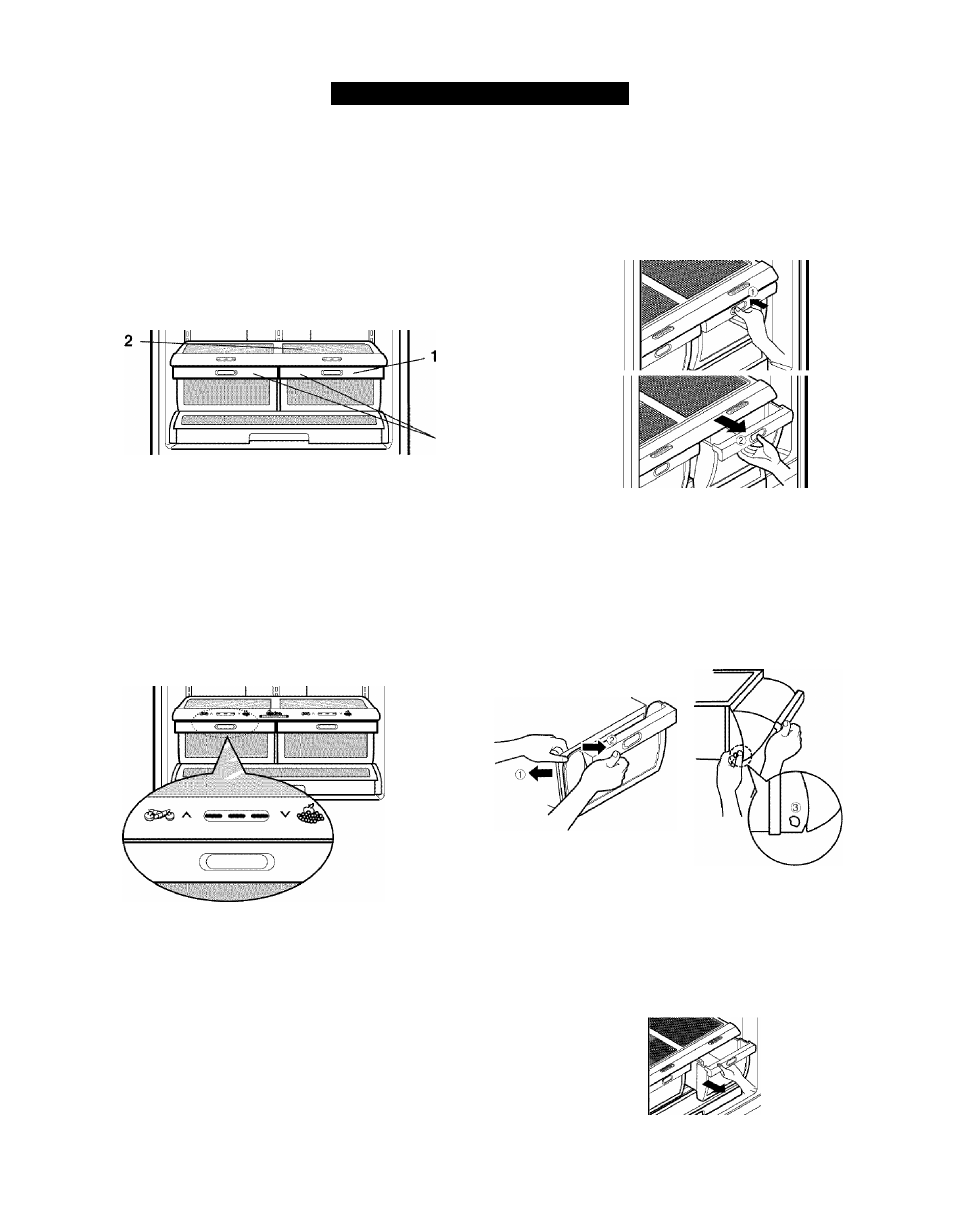
Crispers with Tilt-Out Compartment
The crispers provide fresher-tasting fruit and vegetables
by letting you easily control humidity inside the drawer.
The crispers include:
1. A crisper drawer humidity control switch.
2. A lattice on the underside of the cover to efficiently hold
or release moisture.
3. A tilt-out compartment on the front of the crisper drawer.
CRISPER HUMIDITY CONTROL
You can control the amount of humidity in the moisture-
sealed crispers. Adjust the control to any setting between
^ A and V ^ .
• A keeps moist air in the crisper for best storage
of fresh, leafy vegetables.
lets moist air out of the crisper for best storage
of fruits.
CRISPER WITH TILT-OUT FEATURE
Tilt-Out Compartment
The tilt-out compartment on the front of the crisper is for
items stored best in low humidity such as apples and
oranges. The front of the compartment is transparent to
allow you to see compartment contents. Push the button
on the front of the compartment to open it.
To remove tilt-out compartment:
1. Pull crisper drawer out to the stop.
2. Open the compartment.
3. Grasp side of drawer and pull outward to release tab at
compartment base. Pull compartment toward you to
remove.
4. To replace compartment, insert compartment base tab
into one side of drawer. Pull slightly outward on
opposite side of drawer to insert other base tab.
REMOVING CRISPER
► Crispers without rails
To remove crisper drawer:
1. Slide drawer straight out to the stop.
2. Lift the front of the drawer, then pull it out to remove.
3. Replace the drawer by sliding it back in fully past the
drawer stop.
18