Kenmore 911.46565 User Manual
Page 3
Attention! The text in this document has been recognized automatically. To view the original document, you can use the "Original mode".
Ё€^П
ё
ЖШ€РГ^
SAVE THESE INSTRUCTIONS
Read all instructions''before using, this _appllance.:;.When usinP'
gas or'-electrical appliances, basic, sa.fety precaution's';.sliouid
be '.followed» fncfudlng -'.theTollowingi;:;';''?;:x,. •.
1. Decide on a
location that has
no electricai ; ^
wiring or
plumbing. :
2. With the long
STABfUTY OBVICE
• All Ranges Can Tip
• Injury to Persons
Could Result
• instal! Anti-Tip
Deyicé Packed With
CHAIN _____
9
WASHER M
AND Jr
SCREW Я ^
........
• See Installation
instructions
bag attached to the back of the
range and save packaging tape.
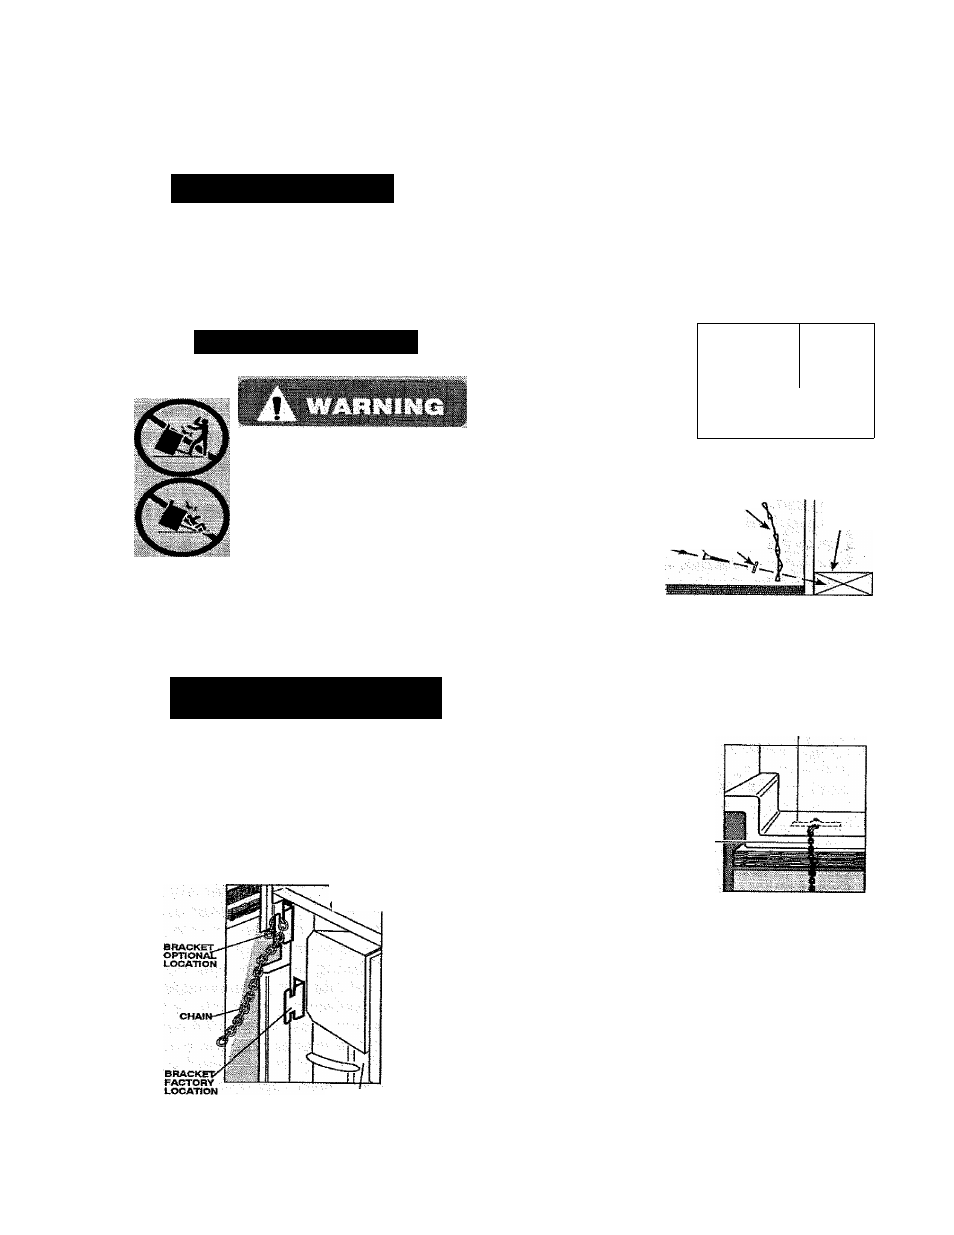
INSTALLATION OF THE
ANTf^TIP BRACKET
Before placing range in the counter,
check the factory location of the stability
bracket oh the back of the range. For
convenience you can hook the stability
chain in the upper set of holes. Make
sure there is no structural interference
vyhen using the upper set of holes.
BACKQUARD
[some models)
screw provided, anchor the chain to
IheTloor orwal'i:
CHAIN
LONG
SCREW
^ WASHER
WALL
PLATE
3. Make sure
the screw
is going
': into the
wall plate
'' or stud at
. ............ ... ,, , „ ...
the base of the wall at least 3/4“.
4. Attach the stability chain so that it lines
up with the bracket on the back of the
' range. ;' T', . ■ .
5. Tug the chain to make sure it is
securely fastened.
6
.
Take the
packaging tape
and temporarily
attach the loose
end of the chain to
the rear of the
countertop.
7. Slide the range v::
into the counter leaving enough space
behind to attach the chain to the
bracket.
8
.
Slip the nearest link of the chain onto
the bracket. Puli to make sure it is as
snug as possible.
; ; :
9. Slide the range all the way back. It is
normal to have some slack in the
chain, but it should not be excessive.
MAINBAÇK