CITIZEN S4000DCM User Manual
Page 36
— 33 —
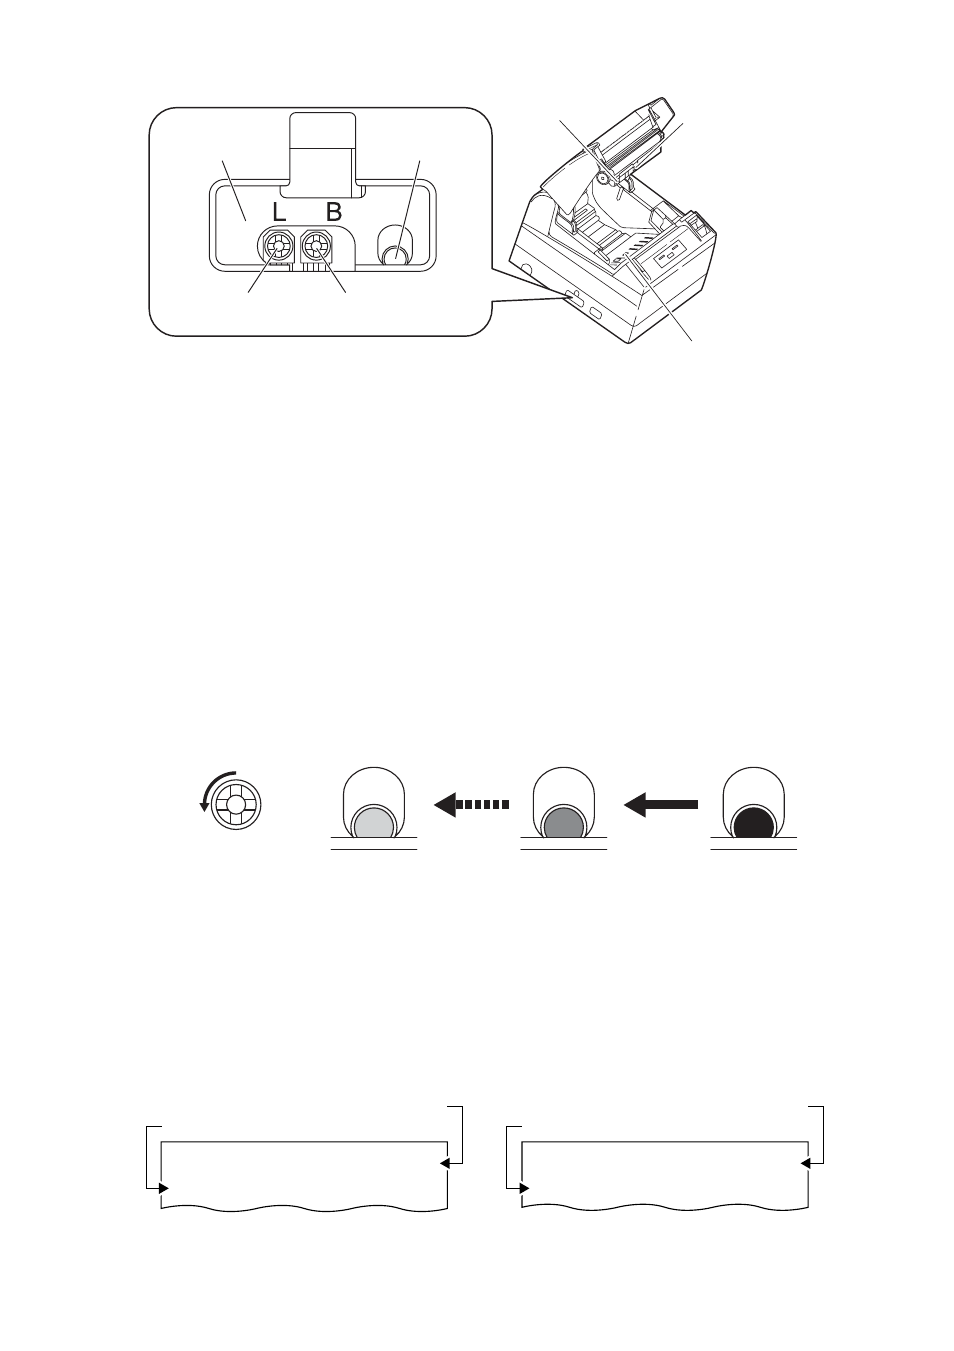
Level indicator
LED
Label paper sensor
adjuster *L
Black Mark paper
sensor adjuster
1 Enter Adjusting Paper Sensor mode.
Open the printer cover, remove paper, and then set the printer power switch
to ON. Here, POWER LED and ERROR LED go on with the buzzer sound.
Then close the printer cover while pressing the FEED button. The ERROR
LED starts blinking with the buzzer sound.
2 Set Paper to be adjusted to the Printer.
This printer has three types of built-in paper sensors.
In case of label, set it so that label is positioned on the label light receiving
sensor and label light emitting sensor. In case of Black Mark paper, set it so
that the printable portion (other than black mark) is positioned on the Black
Mark sensor. With this state kept, closing the printer cover causes ERROR
LED to blink with the buzzer sound.
3 Adjust Paper Sensor.
Turn the corresponding adjuster counterclockwise by using a tapered flat
screwdriver. Set the adjuster at the position where LED begins to change
from orange to green.
Metal frame
Label light emitting sensor *L
Label light receiving
sensor *L
Black Mark sensor
* While turning the adjuster by the screwdriver, do not let the part of the
screwdriver touch the metal frame. Otherwise proper LED light color
will not be displayed while touching.
4 Perform Paper Measuring operation
When the FEED button is pressed, label is fed and paper measuring is carried.If
the FEED button is presed during the paper measuring, the result will be
printed out as follows, and the printer memory switch will be initialized.
* The measuring result is a reference value
< Example of label measuring result*L >
Turning the adjuster
counterclockwise
Green
Orange
Red
showing a label length
showing a gap between labels
< Example of black mark paper measuring result *M>
showing a black mark pitch
showing a black mark height