Carl Goldberg GBGA1053 User Manual
Page 9
2.
Locate the pre-cut hinge slots and, using a
hobby knife, make sure all slots in the stabi-
lizer, elevators, rudder, and fin are cleanly
cut.
Test the size of each slot by sliding a hinge
halfway into the opening. Then set the rud-
der and elevators aside until later.
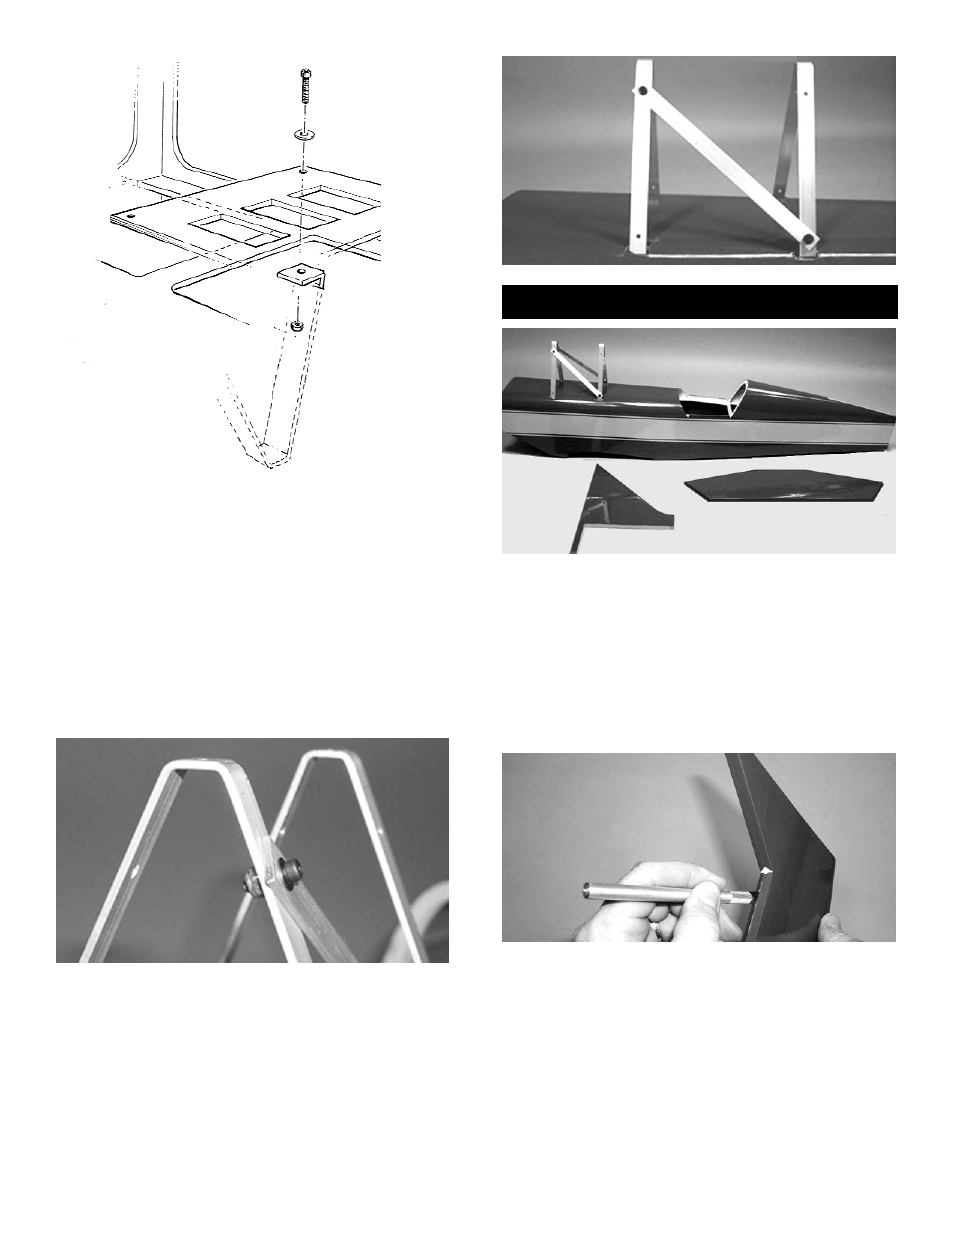
8.
Turn the fuselage over and, working from
the inside, insert a 4-40 x 1/2” screw with
a #4 x 7/16” washer into the fuselage hole in
the cabane doubler and then through the
cabane hole. This is somewhat tricky, so
have patience.
When the screw protrudes through the
cabane hole, cap it with a 4-40 locking nut
and tighten.
Repeat these steps at each of the three
mounting points to complete the cabane
installation.
9.
Insert a 4-40 x 3/8” screw and washer into
the cross brace in the top side hole of the
front cabane and secure with a 4-40 locking
nut.
Then, mount the other end of the cross
brace into the rear cabane, as shown below.
Repeat with the other cross brace.
Stabilizer/Fin Installation
1.
Collect the following items.
(1) Fuselage
(1) Horizontal stabilizer
(1) Vertical fin
(2) Elevators
(1) Rudder
(1) 5ft. Length of string (not included in kit)
9