Carl Goldberg GBGA1053 User Manual
Page 5
8.
Place the servo door on the wing and drill a
1/16” hole on each corner. Screw the door to
the plate, using the #2 x 3/8” screw and the
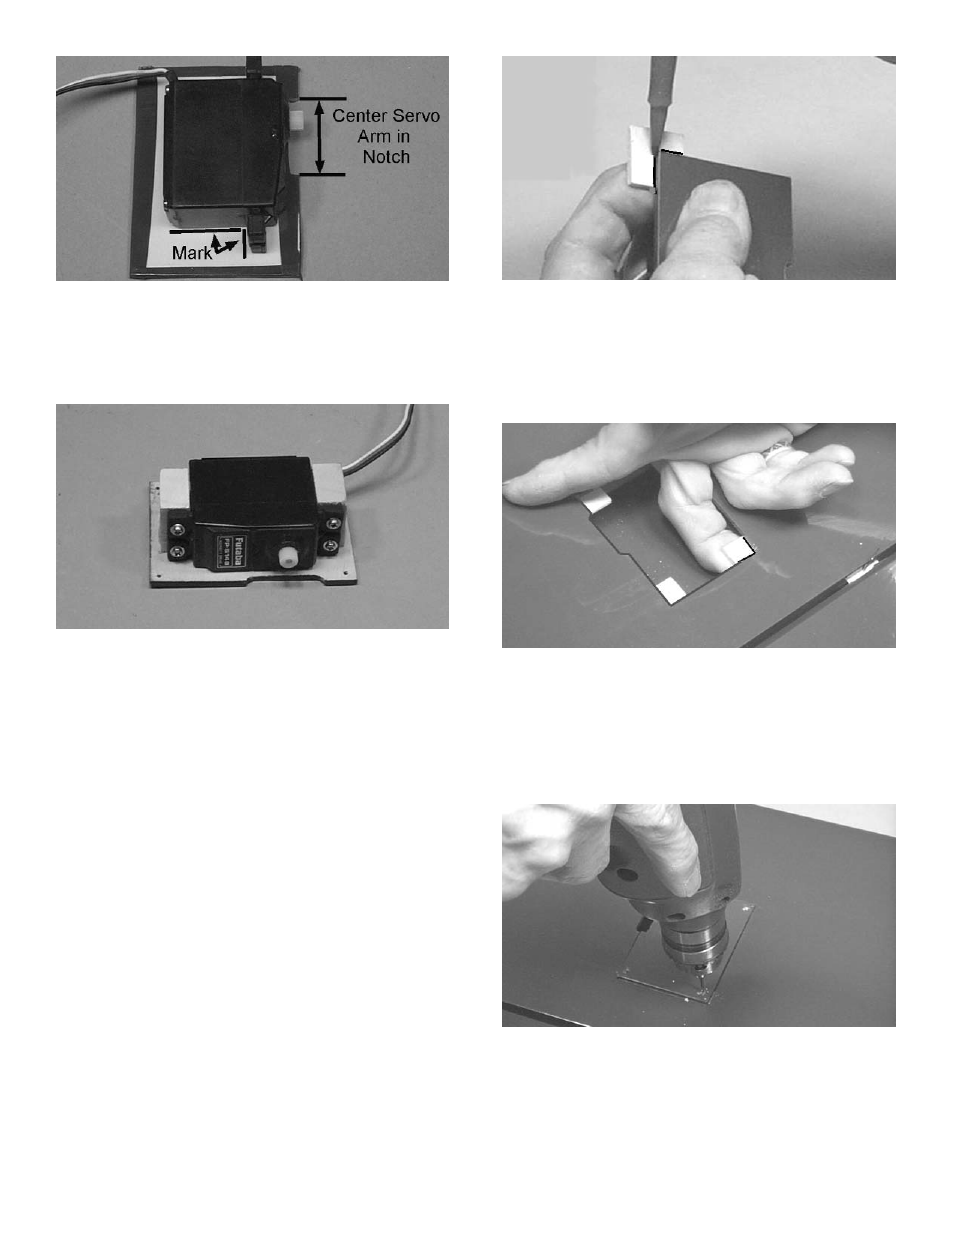
#2 washer supplied with the kit.
Repeating the above steps, mount the sec-
ond aileron servo.
3.
Remove the servo from the door. Spread
epoxy on the servo mounting blocks and
glue them in place along the line just drawn,
making sure the wood grain runs vertically.
4.
When the epoxy is dry, drill 1/16” holes and
mount the servo onto the blocks with the
mounting screws supplied with the radio.
Repeat these steps to mount the other
aileron servo.
2.
With the servo door upside down on the
work surface, place the servo on top of the
door with the servo arm post centered verti-
cally and horizontally with the servo door
notch. Mark the location of the servo, as
above.
6.
Hold one of the servo plates in place against
one corner of the servo door, locating it in
such a way that the tab does not interfere
with the servo.
Mark the servo door-edge location on the
plate.
7.
CA glue the plate to the corresponding cor-
ner of the servo hole in the wing.
Follow the same procedure with each of the
other three plates.
NOTE: Plates will fit into the corner differently,
depending on the servo used.
5