Canopy and battery hatch – Carl Goldberg GBGA1040 User Manual
Page 10
10
ALLEN
WRENCH
5.
Align the spinner cone with the prop/backplate
and press pins firmly into the holes. One way to
do this is to have the cone pointing downward on
a table and press until all pins are seated.
Install the prop/spinner assembly on the motor
shaft and securely tighten the set screw with a
.050 Allen wrench.
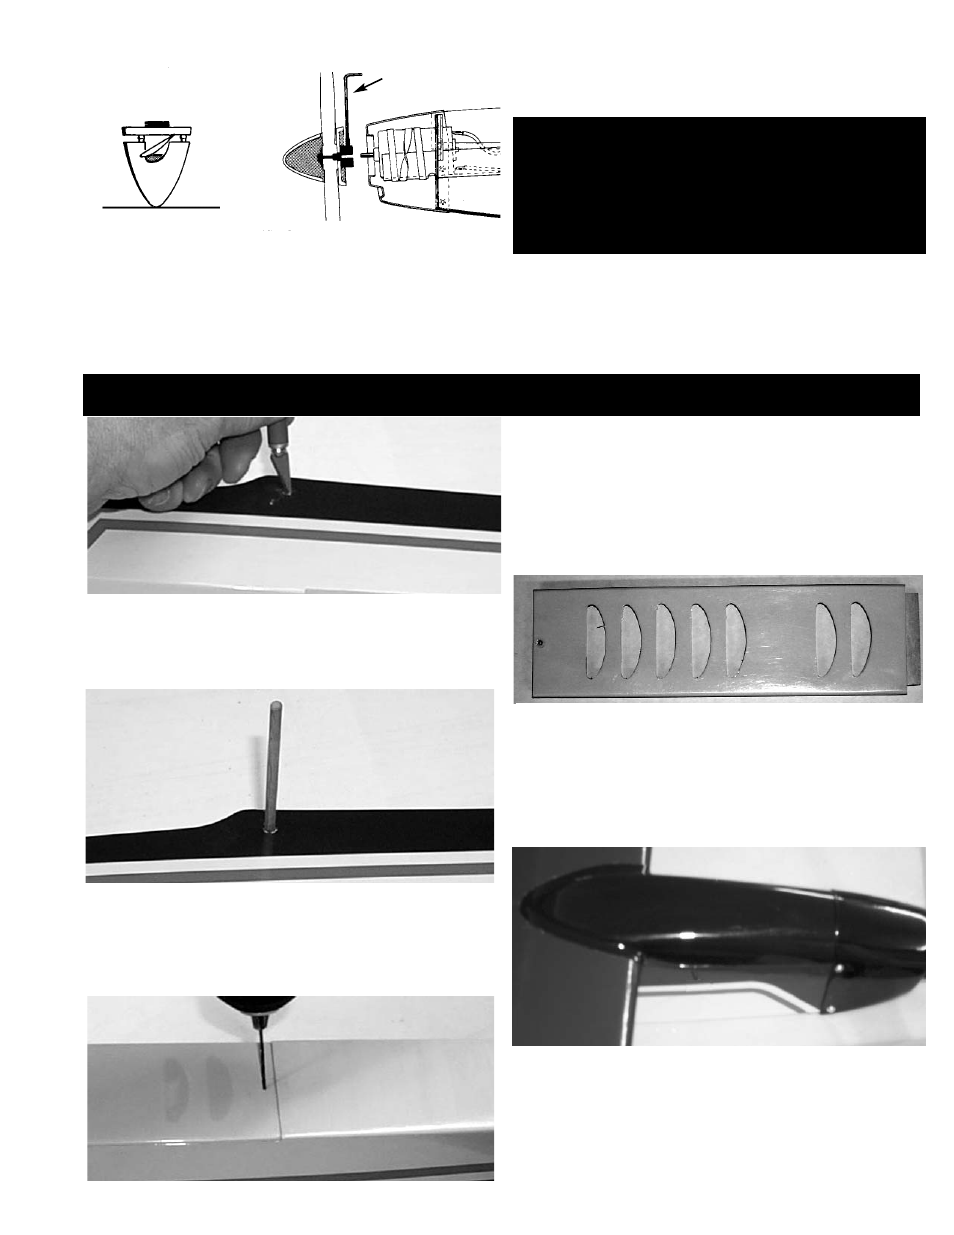
Canopy and Battery Hatch
1.
Find the holes on the side of the fuselage and
cut a “X” pattern in the covering over the holes.
You will find two holes on each side of the
fuselage.
2.
Insert a dowel into the front and back hole till
equal amounts are showing on both sides of
the fuselage.
When satisfied glue the dowels in place.
3.
Insert the battery hatch into the bottom of the
fuselage. The tongue on the hatch goes for-
ward.
In the rear of the hatch drill a 1/16” hole in the
middle.
Screw the hatch to the fuselage by using a #2
x 3/8” screw.
4.
Remove the hatch from the fuselage and care-
fully cut out each of the air holes
Note: Reinforce the hatch with small sticks if
using 7 cell batteries
NOTE: The air holes let the battery cool for better
performance.
5.
Slide the canopy under the cowl. The rear of
the canopy will sit on top of the wing with the
rubber bands holding the wing will also hold
the canopy.
Warning: A spinning propeller
can cause injury. Wear safety
glasses and operate away
from spectators.