Die-cut sanding tool – Carl Goldberg GPMA0963 Cub User Manual
Page 6
6
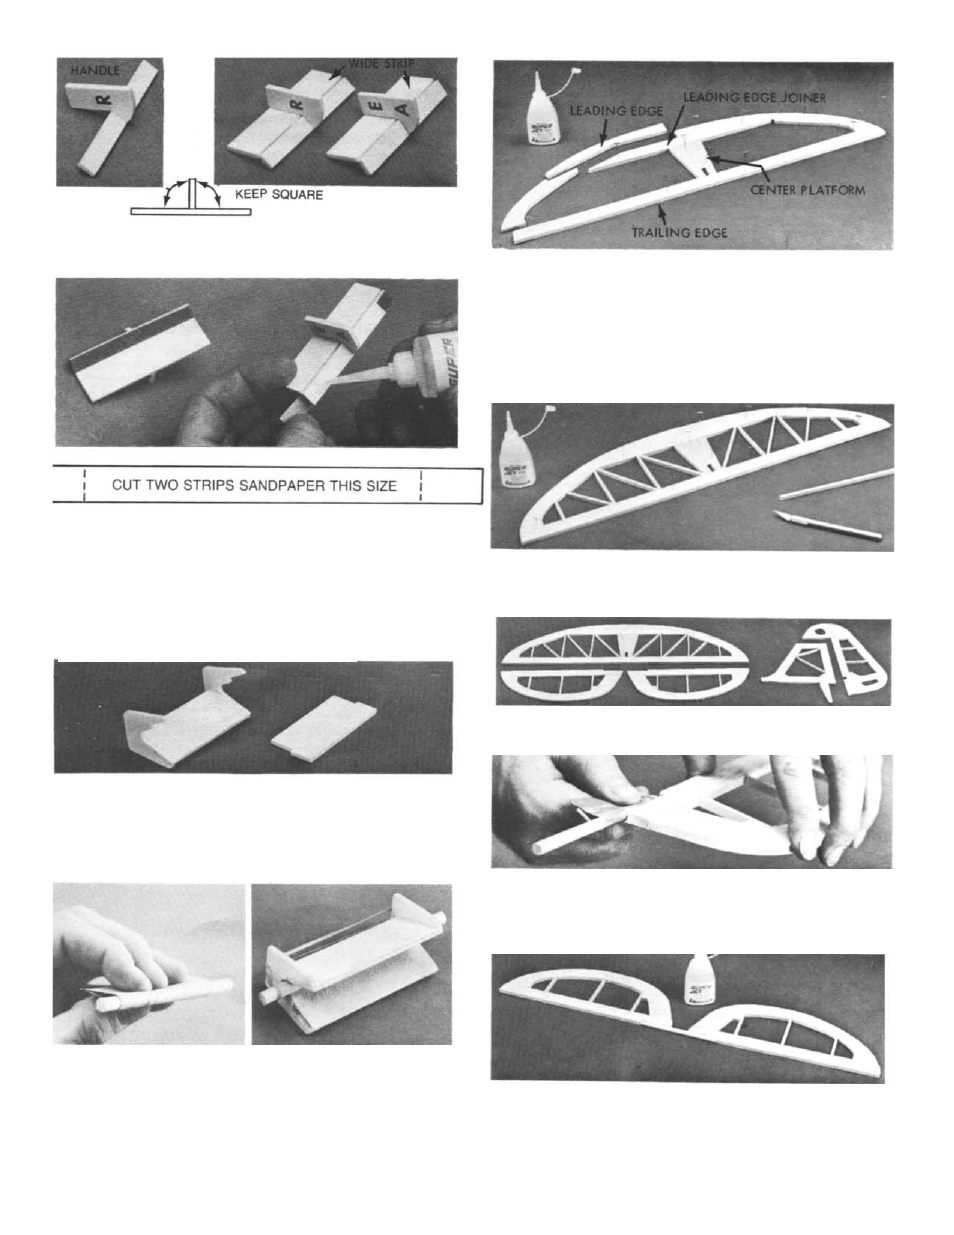
1.
First, glue narrow strip to handle, keeping them
square, as shown above left. Then glue wide strip to
handle and narrow strip, again keeping things square.
2.
Cut two strips of 100-200 grit sandpaper to size shown
above. Tack-cement sandpaper to tools as shown.
Die-Cut Sanding Tool
1.
Glue one strip into handles notches keeping them
square. Then glue remaining strip to other half of handles.
2.
Cut one piece of 100-200 grit sandpaper to size of
2-1/4” x 3”.
Center 1/4” dowel over grit side of sandpaper. Roll
sandpaper around it as shown above left.
Slide dowel and sandpaper into tool and hold with
rubber band as shown at right. Glue sandpaper to tool.
1.
From 1/4” x3/4” balsa stick material, make stabilizer
(stab) trailing edge (T.E.). Cut balsa carefully to match
with plan at ends. Pin in place.
Position and pin die-cut center platform over plan. Cut
stab leading edge (L.E.) joiner from 1/4” x 3/4” balsa to
match with plan and pin in position.
Assemble die-cut curved L.E. segments to form stab
outline, glue all parts together.
2.
From 1/8”x 1/4” strip balsa, cut all trusses to size over
plan. Trim to fit well-don’t force into place. Glue in place.
Let dry thoroughly.
3.
Assemble elevator halves, fin and rudder in same
manner as stab, using die-cut and stick parts.
4.
Wrap 100-200 grit sandpaper around 1/4” x4-1/2”
dowel. Carefully sand recessed area in elevator L.E. so
dowel will fit flush with front of elevator.
Repeat for other elevator half.
Carefully align L.E.’s of elevators over plan and pin in
place. Join them with the 1/4” dowel, glue it securely in
place! Let dry thoroughly.