Carl Goldberg GPMA0963 Cub User Manual
Page 21
21
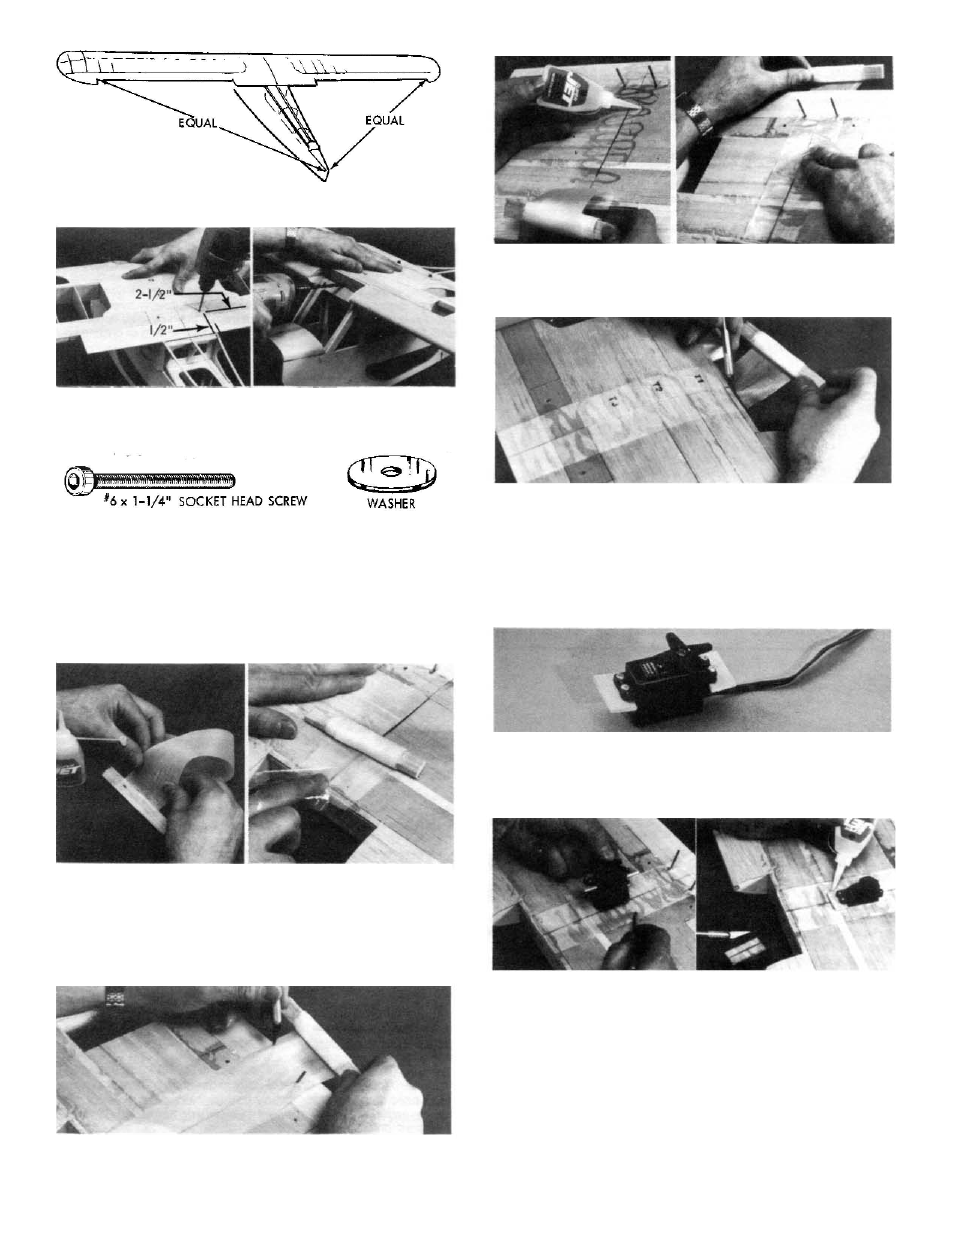
19.
Set wing in place on fuse, then check and adjust until
wing tips are equidistance from rear end.
Measuring carefully 2-1/2” from, wing T.E. and 1/2” in
from fuse sides, drill two holes 5/32” dia. down through wing and
bolt mounting blocks.
Remove wing from fuse. Install blindnuts in bottom of
mounting blocks, pulling them up in place using screws and
washers.
Install bolts. Check alignment of wing and fuse at front.
At hole in former C, drill a 1/4” dia. hole about 3” deep into
wing.
Cut remaining 1/4”x4-1/2” dowel to 2-7/8” length. Glue
this dowel securely into wing, leaving about 1/4” protruding.
20a.
Glue one end of 2-1/2” wide nylon fabric to scrap
wood. Let dry until the nylon is glued solidly to the balsa.
Then roll up nylon on to wood.
Apply a line of CA across center joint on wing tip and
stick one end of 1-1/2” wide nylon to it. Let dry until the
nylon is glued solidly to the balsa.
21b.
Cut openings in nylon for aileron horns.
Apply a squiggle of glue to wing and pull nylon fabric
down into it. Rub nylon into glue with your finger (cover fin-
ger with plastic bag or similar).
20c.
Repeat gluing procedure and apply nylon around
T.E., across top of wing and out past the L.E. spar (do not
apply nylon to front of joiner). Trim nylon flush with joiner.
After entire center joint has been wrapped with
nylon, apply another coat of glue and force it down through
the nylon. Let dry thoroughly.
21a.
Temporarily mount servo on die cut rails. See wing
side view on plan for added details of aileron servo installation.
21b.
Position servo behind bottom main spar and mark size
for opening.
Cut out bottom sheeting as required to suit your servo.
Glue servo rails to wing. Avoid getting glue on servo.
The servo should be removed before covering,
THIS COMPLETES THE WING ASSEMBLY.