Carl Goldberg GPMA0963 Cub User Manual
Page 19
19
7.
Glue top sheeting in place, trimming to fit as required.
Glue L.E. to filler pieces in place.
8.
Install die-cut L.E. sheeting at wing tips (Note: parts are
marked for top and bottom).
Trim excess sheeting flush with T.E.
Flat sand T.E. along its entire length.
9.
For short wing only, cut 7-3/8” long nylon tube to 3-
1/8” long. Repeat for other tube.
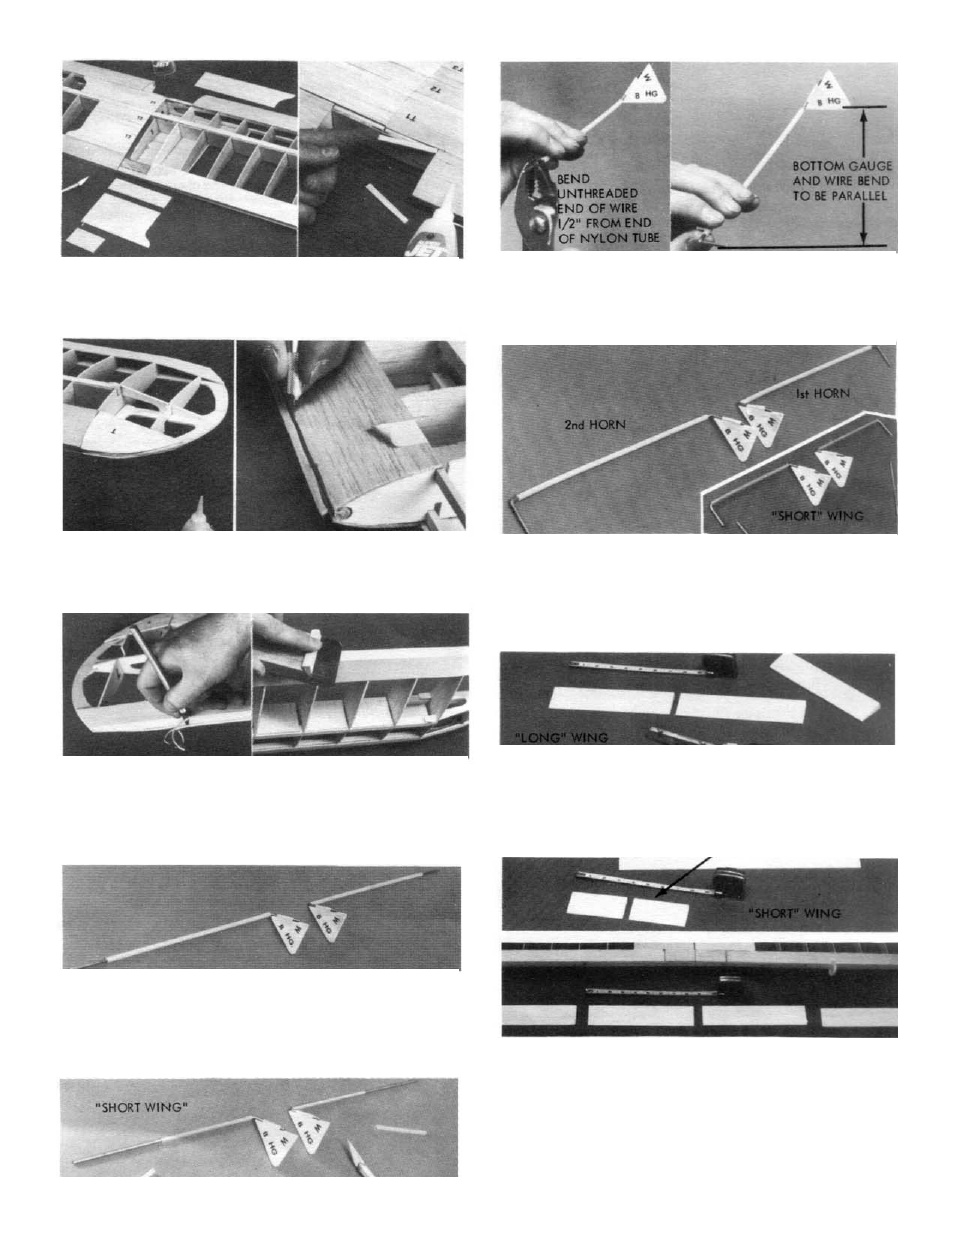
10a.
Slide brass tube onto aileron horn wire. Repeat for
other tube and wire.
10b.
Tape horn angle gauges securely to THREADED
ends of strip aileron horns as shown (corner stamped “B” at
bottom).
10c.
Make one aileron horn as shown above. Place wire
over wing plan to get correct length.Hold wire so bottom of
gauge is horizontal. Firmly grasp UNTHREADED end of wire
at bend location on plans (see above) and bend wire horizontal-
ly 90degrees, Check on table, adjust as necessary.
10d.
Make 2nd aileron horn opposite to first one by bend-
ing UNTHREADED end as shown above.
For short wing, after bending, measure and cut wires
so only 3/4” length remains.
10e.
File bent ends of wire to a pointed shape for easier
mounting of ailerons later on.
11.
From the three 24” ailerons provided, choose the better
two for the ailerons, the remaining one to be cut up for inboard
and wing tip T.E.s.
For long wing-cut aileron into two 8” pieces (as shown
above) for short wing-cut into two 3-5/8” pieces. These are the
inboard T.E.
12a.
Using the center-line marker, make a center line
along entire lengths of T.E. inboard section, and ailerons.
For long wing only; mark each T.E. 9” from center
joint.
For short wing only; mark each T.E. 4-3/4” from cen-
ter joint.
Mark front of ailerons about 1” from inner ends.