Carl Goldberg GPMA0963 Cub User Manual
Page 11
11
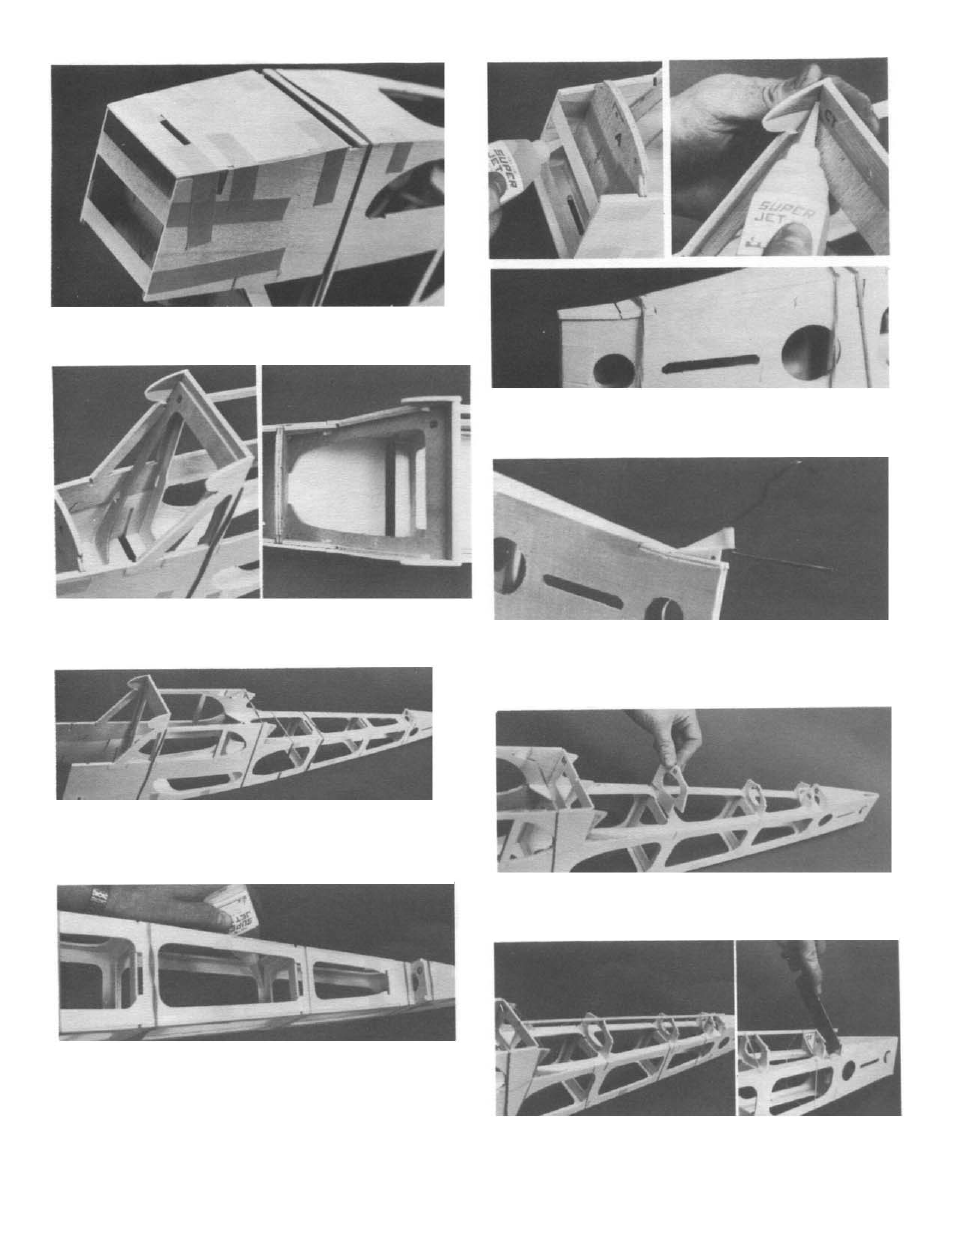
15.
Complete installation of bottom sheet, holding with
tape as shown.
16.
Install former B, gently compressing legs to fit into
fuse. Lock top tabs in place, then plug lower legs in posi-
tion.
17.
Place fuse over TOP VIEW on plan sheet. Viewing
from above, carefully align the fuse to match plan out
line. If an area of the fuse is off, adjust that portion in the
direction required. Tape parts to hold in position.
18.
When satisfied with alignment, permanently glue
sides, formers and sheet parts in place. Apply a bead of
A along all joints inside and outside, or from
both sides in the case of formers-it will penetrate the
joint and leave a slight reinforcing fillet.
At tail end, glue bottom sheet to conform to slight
bend in fuse sides.
19.
Trial fit the tail wheel bracket at die-cut separation in
bottom sheet. The bracket flange will probably not fit the
slot. Using a small saw, enlarge slot as required for correct
fit. DO NOT GLUE bracket in place at this time.
20.
Install top formers “DT”, “ET”,”FT”, and “GT” in
their respective slots in fuse top (braces DT and GT must face
each other).
Install a 3/16” diameter x 18” dowel in top center slots.
Flush dowel with former DT. Glue in place.
Cut rear end of dowel flush with back of former GT.