Cassette system installation – Blinds Chalet EcoGreen Solar Screen Shades User Manual
Page 2
2.
4) Use the Control Cord to Operate the Shade
Pulling gently on the cord in one direction raises the shade; pulling it in the other direction
lowers it.
On shades where the fabric rolls against the window, the front cord does the raising.
On shades where the fabric rolls toward the room, the rear cord does the raising.
5) Attach Stops to a Control Cord that’s made of Bead Chain
On metal bead chain, attach a metal stop ball that is at least 5/16" in diameter, so that it
touches the mouth of the clutch when the shade is in the all-rolled-up position.
For metal or plastic bead chain, lower the shade to sill or floor height, and attach the
appropriate metal stop or plastic connector next to the clutch, this prevents the shade
from being lowered beyond that point.
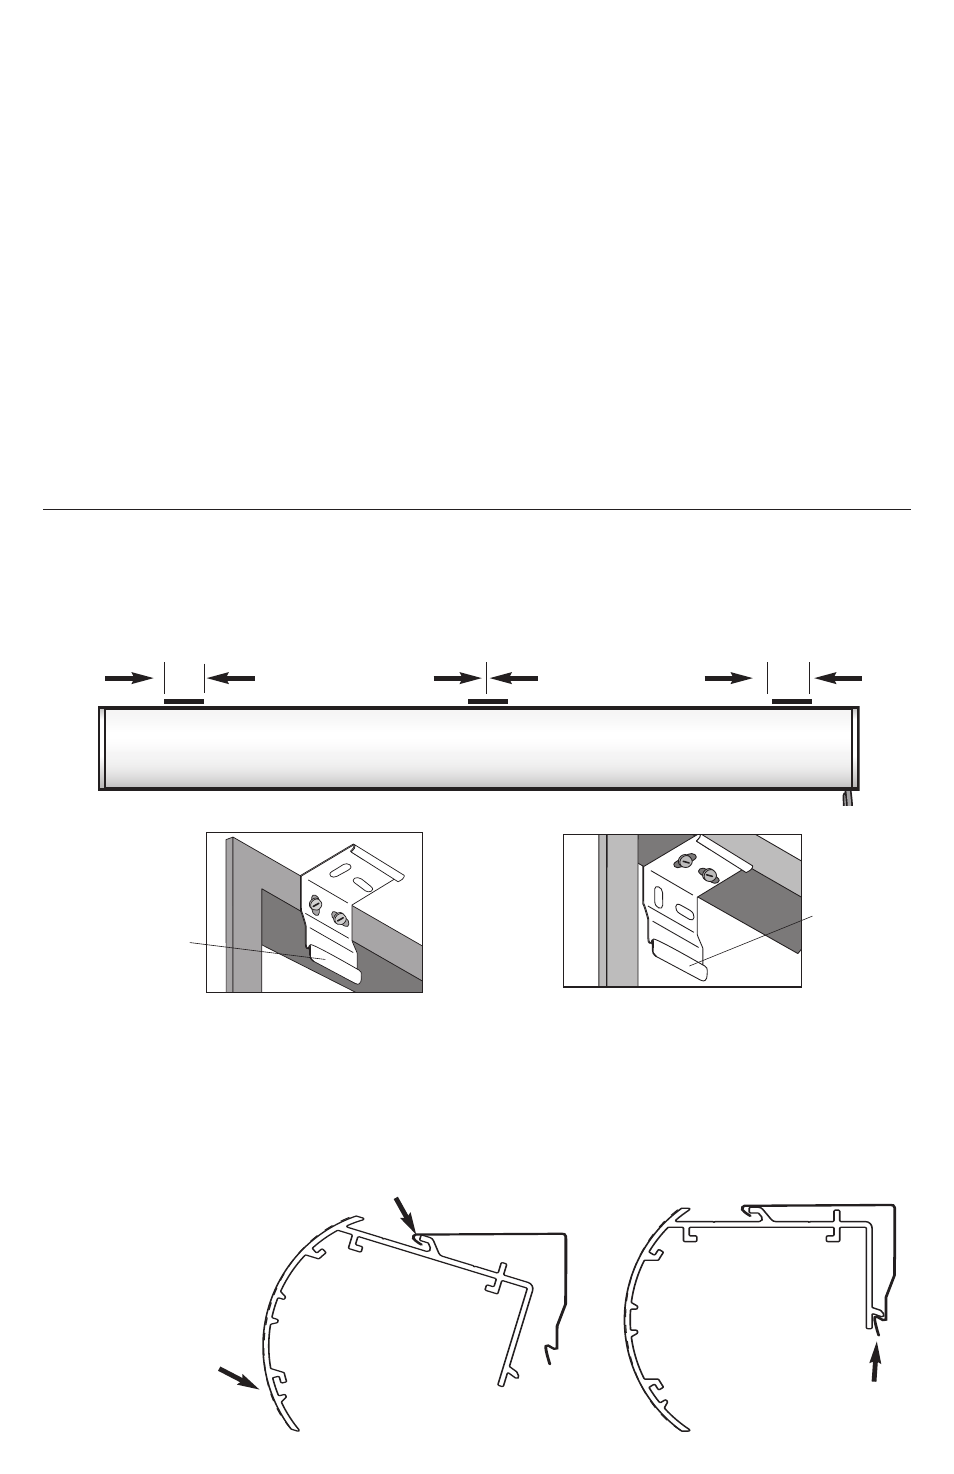
1) Mount the Brackets
Mount the brackets to the wall or window frame, with the outside brackets no further
than 2” (5 cm) from the ends of the headrail. On wide shades, space the additional
bracket(s) at equal intervals.
2) Mount the Headrail
Position the headrail with the front panel (A) resting on the top lip of all brackets. Push
the bottom front of the headrail firmly backwards and toward the window until the lip on
the rear of the headrail engages the bracket and snaps into place, (B) as shown.
Cassette System Installation
2 "
(5 cm)
Max.
Space Evenly
Space Evenly
2 "
(5 cm)
Max.
For wall or outside
mounts, use the
rear bracket holes.
For inside
or ceiling
mounts, use
the top
bracket
holes.
Make sure
the release
tab is always
mounted on
the bottom.
Make sure the
release tab is
always mounted
on the bottom.
Push here
backwards and
toward the window.
A
B