Chapter 3 – paper & ribbon, 1 media installation – Citizen Systems CLP 6002 User Manual
Page 16
E
N
G
L
I
S
H
Chapter 3 – Paper & Ribbon
3.1 Media Installation
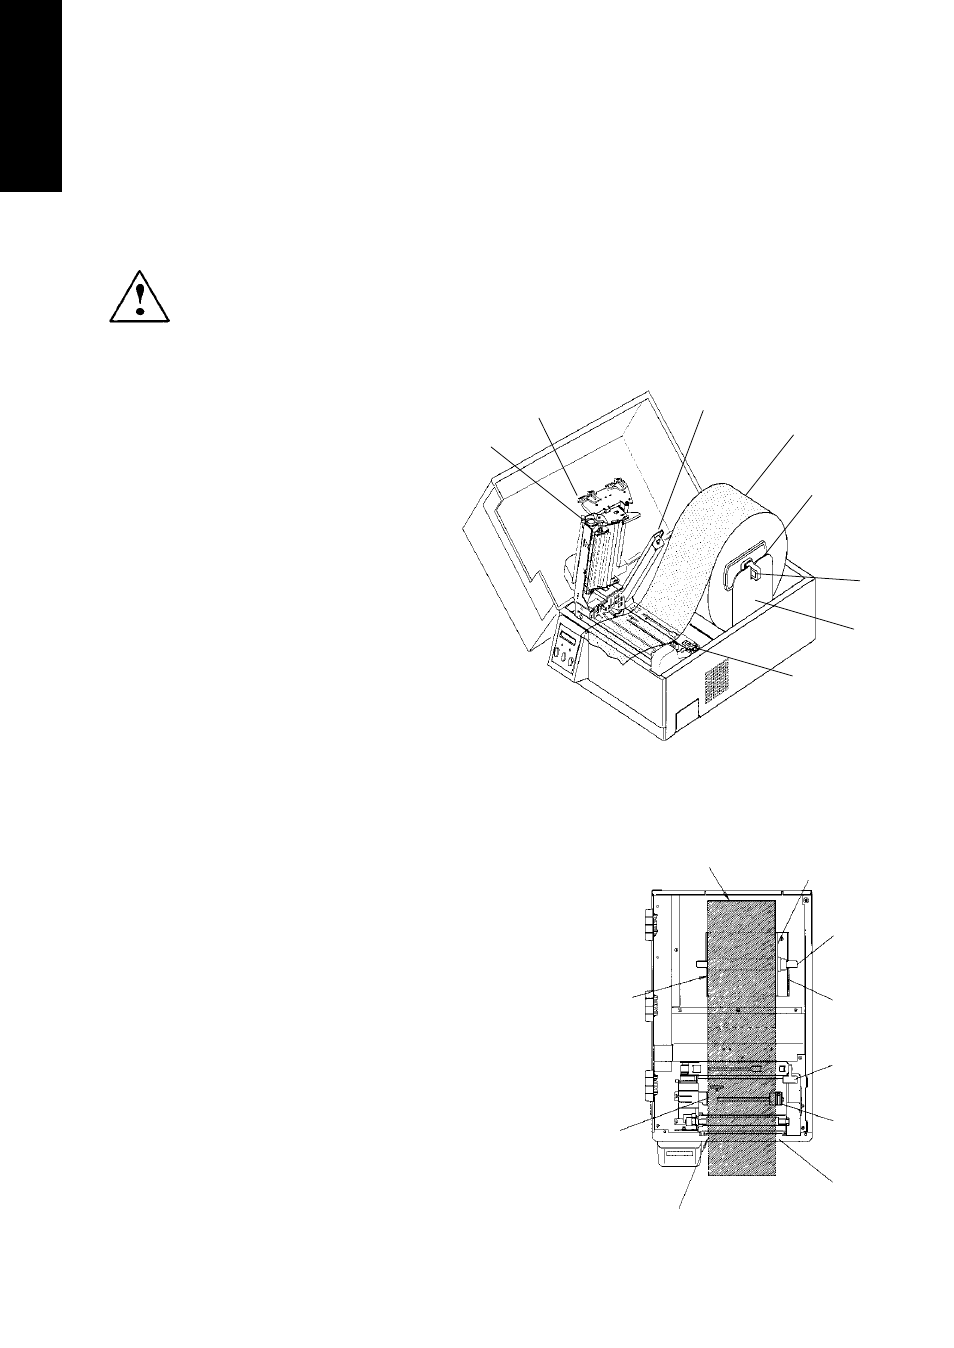
CAUTION
Take care not to trap lose clothing in the mechanism of the
printer when it is closed!
The printer is designed for easy loading of paper and ribbon. However, here is a
detailed guide for first-time users:
1 Push down the open lever ①
to release the print head and
lift it out of the way
2 Push down the sensor arm
lever ③ to move the sensor
arm ② out of the way (not
present on the CLP 1001)
3 Slide the black plastic media
guide ⑤ over the media
support bar ④ and insert the
support bar through the roll of
media being installed.
4 Rest the media support bar in
to the paper holder ⑥ and
slide the roll guide ⑤ to the
width of the roll paper. The
paper roll should be pushed
against the side nearest the top cover hinges ⑥*, but should still be free to
move easily.
5 Place the media on the main printer chassis, with the left side of the media
against the fixed paper guide ⑧. Slide the small moving paper guide ⑦ to
maintain the correct media width slightly in
contact the right edge of the media so that
the paper does not skew.
6 Push down the sensor arm ② until the lever
hook is locked (not CLP 1001).
7 Roughly align the leading edge of the paper
with the tear-off plate ⑨.
8 Close the top mechanism by pressing down
the ribbon bearing flat ⑩ to close the print
head. The mechanism will lock closed.
9 Close
the
cover.
10 Turn on the power to the printer. The LCD
screen on the control panel will display "On
line." Press the Feed key. The paper will
advance to the next label and stop there.
⑤
④
⑥
③
⑦
⑨
Notch for
alignment
⑧
Roll paper
⑥
Roll
⑤
④
⑥
③
②
⑩
①