Kistler-Morse KM Load Stand II User Manual
Page 24
97-1100-01 Rev. H
20
www.kistlermorse.com
Scale Factor Counts
= S x Excitation Voltage (V) x Counts/mV
= 26.7 mV/V x 12 V x 699.05 Cnts/mV
= 223,975 Counts
Zero_Cal = current live load = 50,000 lbs
note: Some installations have ‘dummy’ Load Stands under one or more legs. This does not affect the manual
calibration parameter calculation. Use the total number of supports, not the total number of Load Stands, in the
calculation.
aLternate MethoD For checKinG outPut
If you do not have a Kistler-Morse Test Meter, use a Digital Multimeter (DMM) and the Load Stand II junction box
to monitor the voltage output of each Load Stand before and during installation. Set up the DMM as described
below.
1.
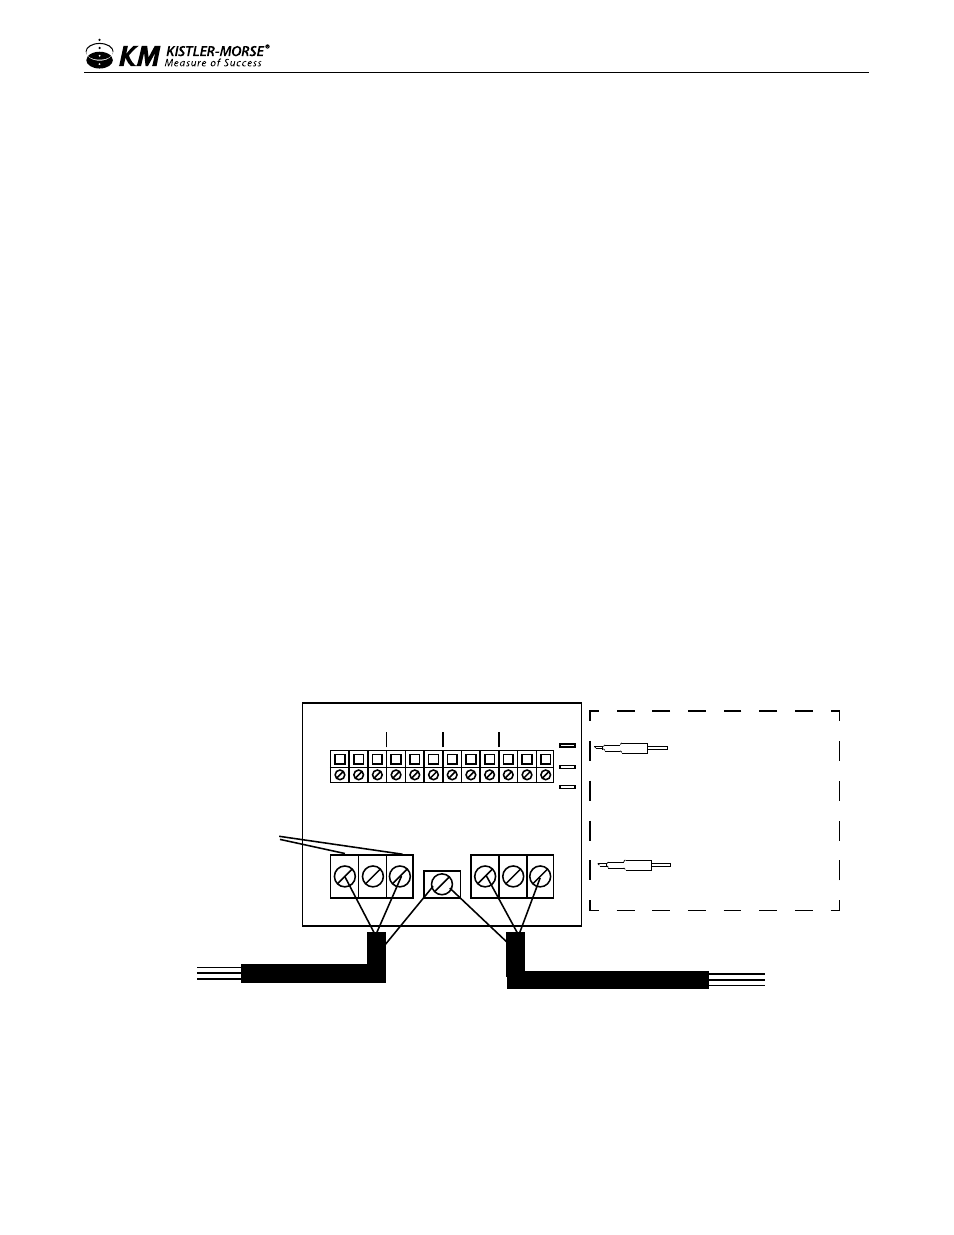
Disconnect the white wires from the W terminals on TB1 and TB2 in the junction box, see Figure below.
2.
Connect the DMM (+) probe to the W terminal on either TB1 or TB2 (See A).
3. Connect the DMM (-) probe to TP1 in the junction box (See B).
4. Set a voltage range on the DMM that will accommodate a measured range of ± 1 volt.
5. See Pre-Check Procedures, for details on checking the voltage output before installation. See Leveling
Vessel, Hardware Installation, for details on monitoring the voltage output to determine if the vessel
weight is evenly distributed among the Load Stands.
6. Once output is verified, reconnect the white wires on the W Terminals on TB1 and TB2 in the junction box.
12 VDC Excitation Voltage from
Signal Processor connected
across Black and Red Terminals
B W R SHLD B W R
TB1 TB2
B W R B W R B W R B W R
SENSOR A SENSOR B SENSOR C SENSOR D
LOAD STAND STANDARDIZATION
TB3
TP1
TP2
TP3
Cable from Previous Junction Box (if
applicable)
Cable to Next Junction Box or Signal Processor
(A) Connect DMM (+) probe
to either W Terminal (TB1
or TB2)
(B) Connect DMM (-) probe
to TP1
Using DMM and Junction Box to Monitor Voltage Output