Trac tor set-up 8, Tractor set-up – Cub Cadet C-155G User Manual
Page 8
This owner’s manual covers various models of
lawn tractors. The units illustrated may vary
slightly from your unit. Follow only those in-
structions which pertain to your model lawn
tractor.
IMPORTANT: This unit is shipped WITHOUT
GASOLINE. Check oil before starting en-
gine. Do not overfill. After assembly, service
engine with gasoline and oil as instructed
in the separate engine manual packed with
your unit.
NOTE: Reference to right or left hand
side of the unit is observed from the
driver’s seat, facing forward.
Tools Required For Assembly
(1) ½" socket wrench (for steering wheel)
(1) 9/16" wrench or socket wrench (for seat)
(2) 7/16 wrenches or socket wrenches
(for battery)
TRACTOR SET-UP
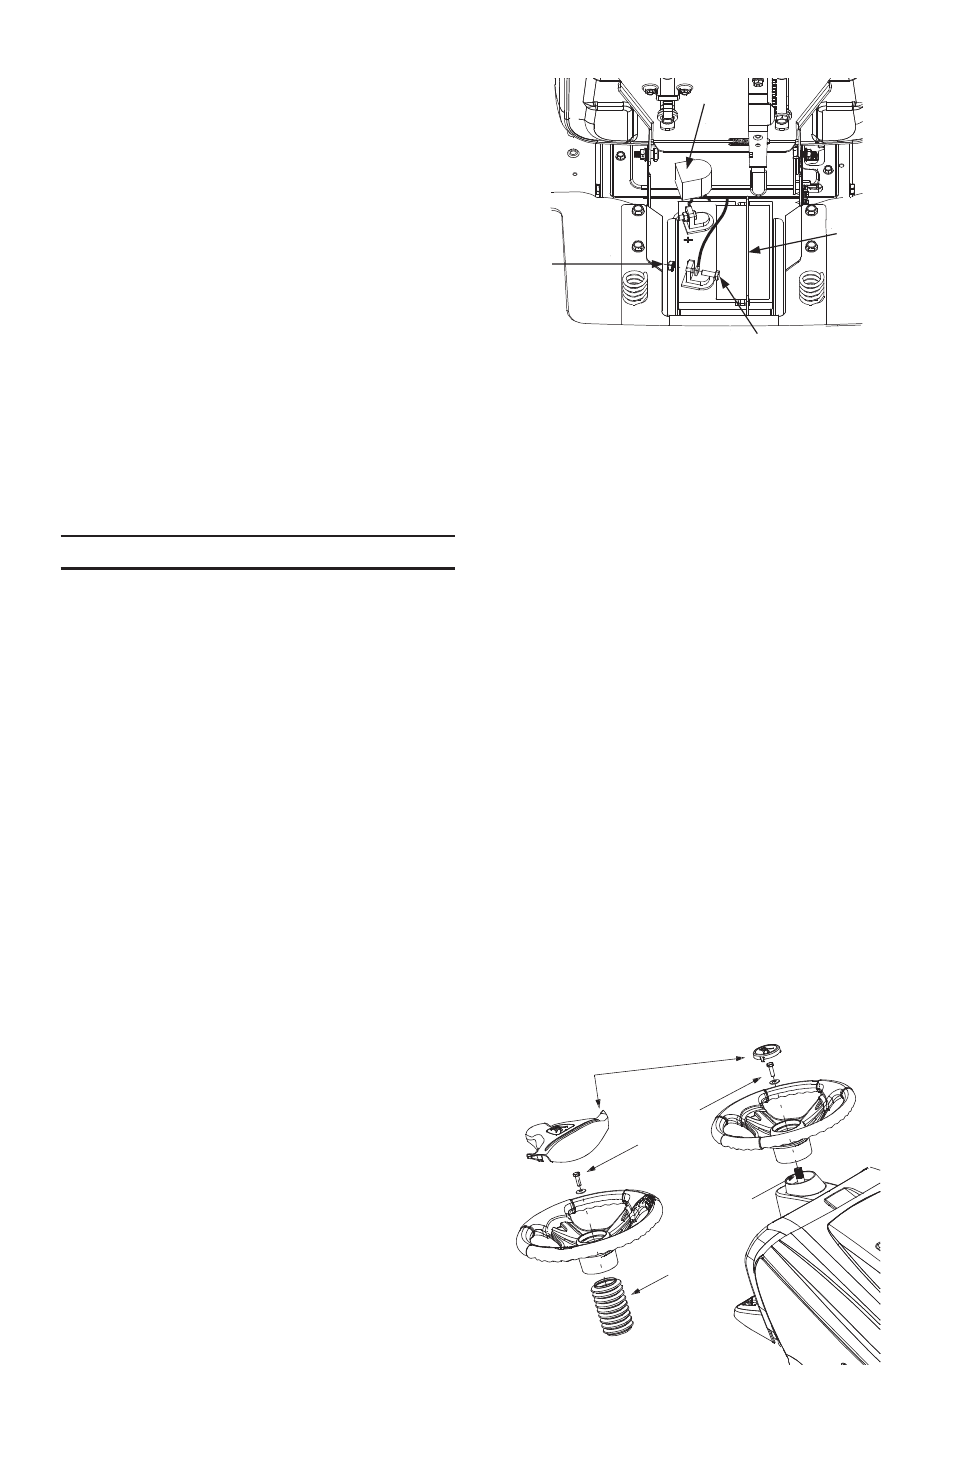
ATTACHING THE BATTERY CABLES
NOTE: The positive battery terminal is
marked Pos. (+). The negative battery
terminal is marked Neg. (–).
•
The positive cable (heavy red wire) is se-
cured to the positive battery terminal (+)
with a hex bolt and hex nut at the factory.
Make certain that the rubber boot covers the
terminal to help protect it from corrosion.
•
Remove the hex bolt and hex nut from the
negative cable.
•
Remove the black plastic cover, if present,
from the negative battery terminal and attach
the negative cable (heavy black wire) to the
negative battery terminal (–) with the bolt
and hex nut.
•
Make certain the hold-down rod is in posi-
tion over the battery, securing it in place.
See Figure 1.
CHARGING THE BATTERY
If battery is put into service after date shown
on top of battery, charge the battery with a
battery charger before using your unit. A
charger with an output of six amps should
be used and the battery should be charged
for one hour. This charging will help extend
the life of the battery.
If a charger with a six amp output is not
available, a lower output charger may be
used for a longer period of time. Do not
charge the battery at a rate higher than six
amps as it can damage the battery and re-
duce its useful life.
If a charger is not available but the battery
will start the lawn tractor, the battery can be
charged by mowing for a minimum of one
hour using the engine’s charging system.
The lawn tractor should be ran at full throttle
during this process.
NOTE: More than one hour of mowing
may be needed to fully charge the bat-
tery since the output of the engine’s
charging system is typically less than
six amps.
ATTACHING THE STEERING WHEEL
•
The hardware for attaching the steering
wheel is located under the steering wheel
cap. Carefully pry off the steering wheel cap
and remove the hardware.
NOTE: There are two different styles of
steering wheel caps. See Figure 2.
Styles vary by model.
•
Remove the steering bellow (not required
on all models) from the lift lever on the
right hand side of lawn tractor. Place steer-
ing bellow over the steering shaft
extending through the dash.
8
FIGURE 1
Rubber
Boot
Hex
Nut
Hold-
Down
Rod
Hex Bolt
FIGURE 2
Steering Wheel
Cap/Insert
Hex Bolt
and
Washer
Steering
Bellow
Steering
Shaft