0 operation, Zero clear mode avg, Figure 3 sample display – Checkline CTM User Manual
Page 5: 1 typical operation
Typical operation of the CTM is covered below, followed by explanations of
the various display modes, how to change wire size, how to change the unit
of measure, etc.
To perform a typical tension measurement, see the Tip in the left column and
follow these steps:
1. Turn the unit on by pressing the ON/OFF key. . .
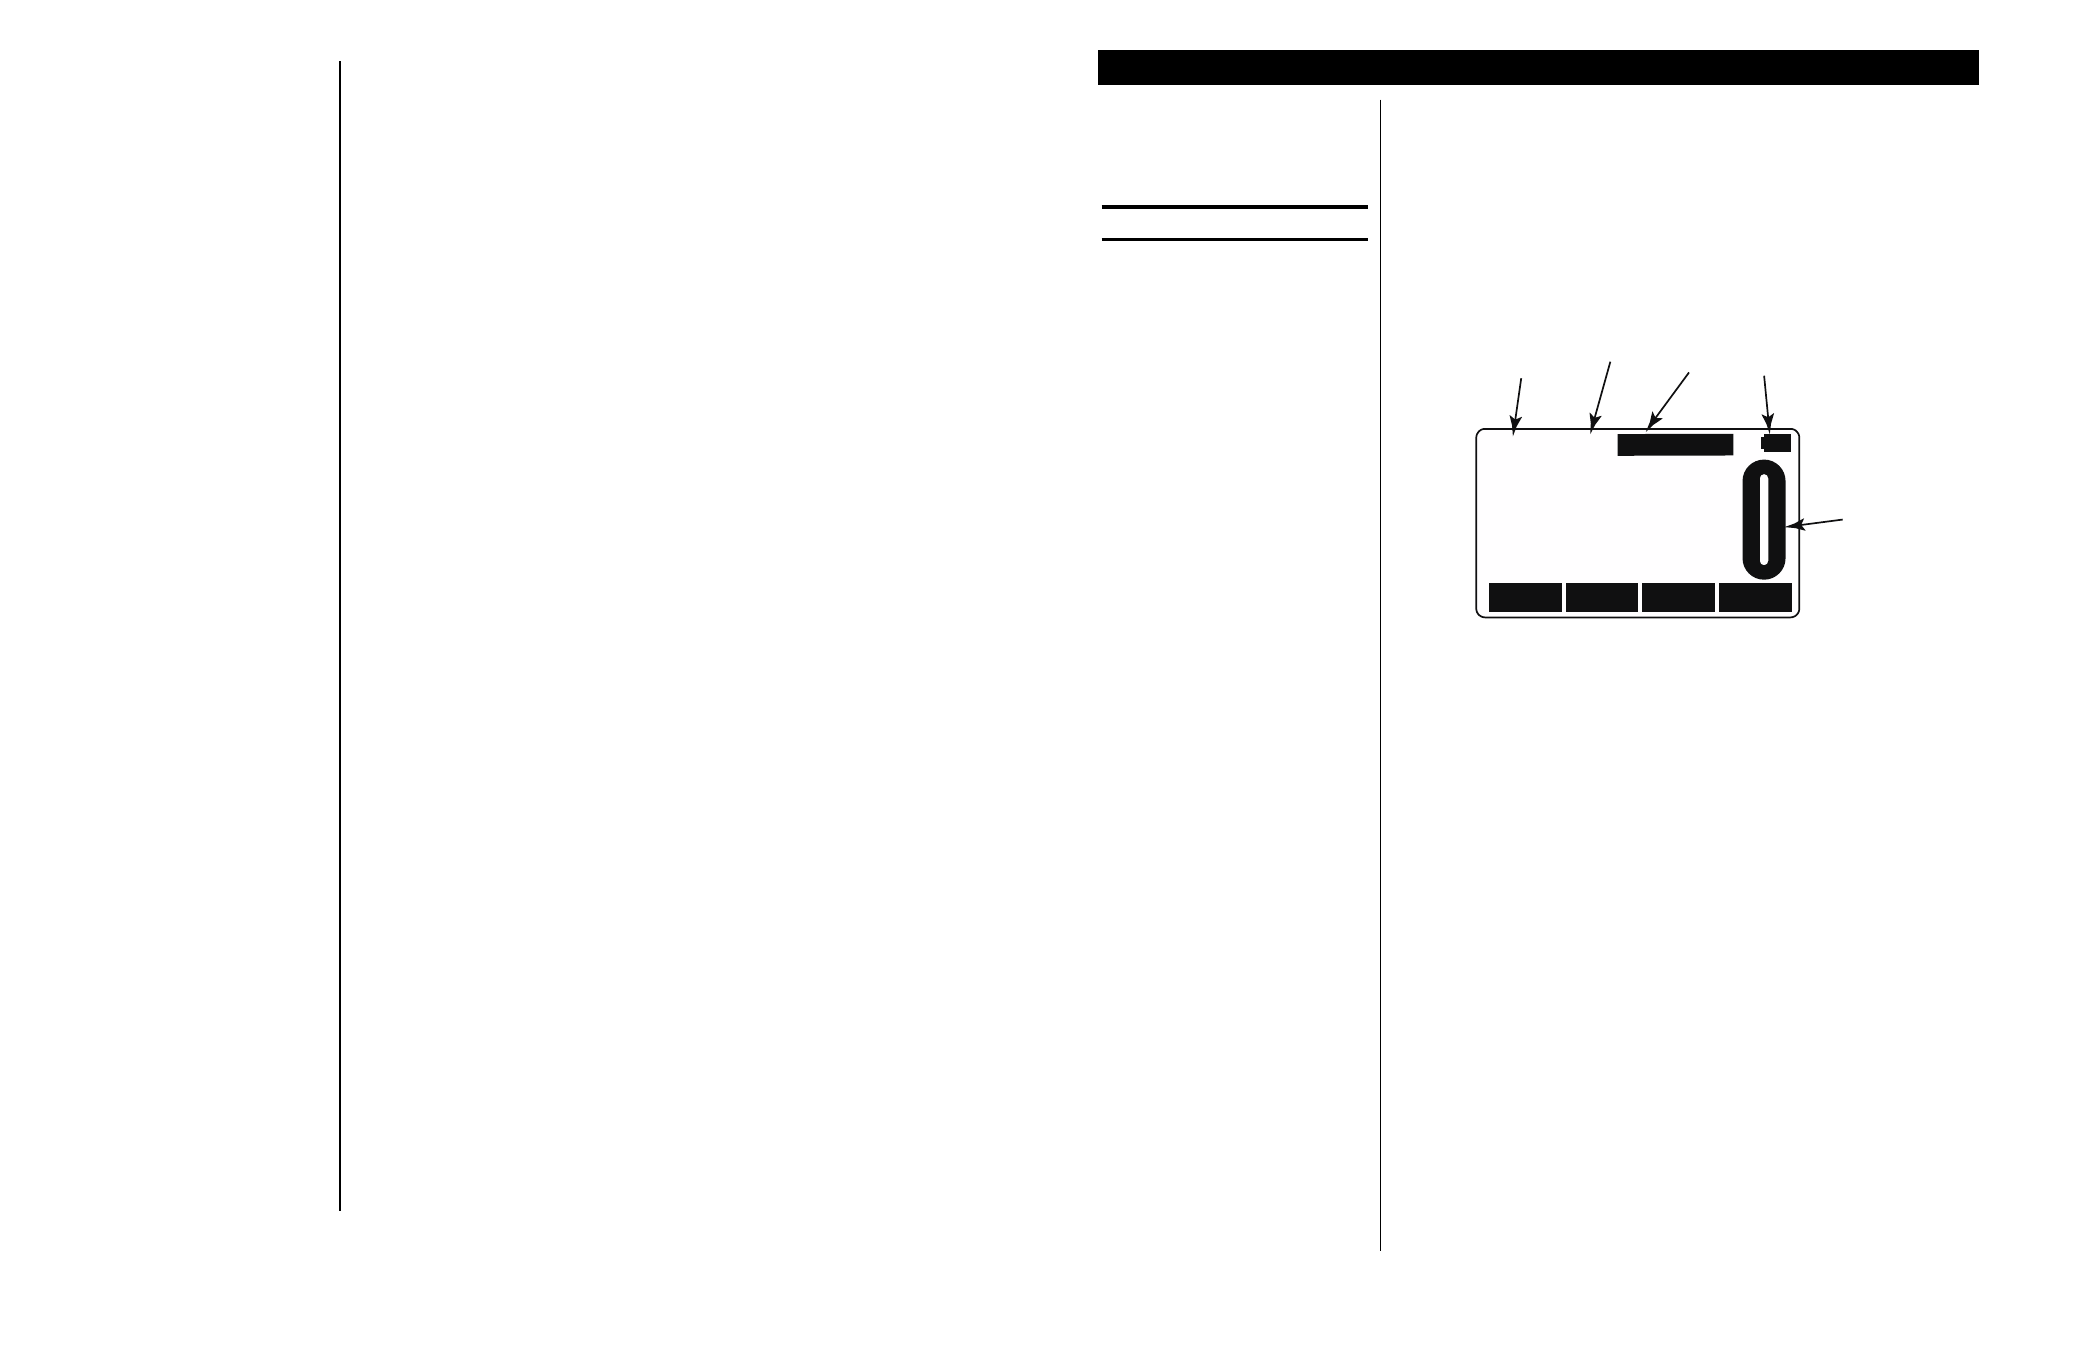
The screen shows the following:
Te ns ion lbf
7/16 6X 19
Zero Clear Mode
Avg
Mode
Wire
size
Battery
level
Force
reading
Unit of
measure
Figure 3
Sample display
2. This example shows the wire is a 7/16”, 6X19 stranded cable and the
unit of measure is lbf. Place the CTM so the two outside sheaves hang
on the wire. Insure that the wire rope is riding in the groove of all three
sheaves. See Figure 4. Press the Zero softkey to zero the display.
0 should be displayed.
3. Raise the lever arm until it locks in the upright position to apply tension
to the wire. Read the line tension on the display.
4. Release the lever arm and you are ready to perform another measure-
ment.
2.0 Operation
2.1 Typical Operation
Press the WIRE key to list the
stored calibrations.
Take readings at three different
places along the cable, moving
the tension meter at least four
inches for each reading. Take
the average of the readings.
The built-in average function is
ideal for this task.
The handle quick release pin
should be used when the CTM
is attached to a cable that will
be de-tensioned and reten-
sioned. The pin prevents the
handle from opening once the
tension falls to a small level.
The pin should also be used if
the CTM will be installed for a
prolonged period.
5
The softkeys in the Confi guration mode are Wire, Setup, Reso, Comm,
Mode, Units, Power, ChPwd, and Reset. These are described below:
Wire
Press this softkey and the wire selection screen is displayed.
Choose an existing wire to change its defi ning characteristics.
You have the choice of changing the Range, which is used to
set the check-tensioning function, or the Rating, which is the
maximum rating of the cable.
Range - Use this item to set the parameters for the check tension-
ing display. Follow the prompts to set the following:
Lower tension limit - This is the lowest acceptable force
Upper tension limit - This is the highest acceptable force
Units - Unit of measure used in defi ning the tension limit
Rating
-
Press this softkey and you are prompted to set the ulti-
mate rating for the cable being used and the unit of measure for
that rating.
Setup Press
the
Setup softkey to view the Setup softkeys. This is
the same as the Setup softkey described in 2.31 Top Level
Softkeys.
Reso Press
the
Reso softkey and you are prompted to enter a
display, or count-by, resolution. Choose from Low, Medium or
High.
Low resolution provides the best stability and makes the
display easiest to read. High resolution provides the fi nest
graduations, but sees greater drift from wire creep and non-
repeatability. If the reading is decreasing over time or differ-
ing between measurements on the same line, lowering the
resolution will reduce these effects.
Comm Communication output not supported at this time in the CTM
Mode
Press this softkey to set the display mode on power up.
Choices are Last*, Temp, Check, Avg, Peak, and Force.
Use the Sel keys to display your choice and press Enter to
accept it.
Units
Press this softkey to set the following:
• Unit of measure on power up. Choices are Last*, C2, C1, N, kgf,
and lbf. Use the Sel keys to display your choice and press Enter
to accept it. C2 and C1 are custom units. If you choose to have
custom units, you are prompted to enter the number of pounds in
each custom unit. The CTM will then automatically calculate cor-
rect display for the applied force.
• Enable lbf - Enable or disable the pound-force unit of measure.
• Enable kgf - Enable or disable the kilogram-force unit of
measure.
• Enable N - Enable or disable the N unit of measure.
• Enable CUST1 - Enable or disable the Cust1 unit of measure.
• Enable CUST2 - Enable or disable the Cust2 unit of measure.
Custom units of measure are
handy when working with multi-
part lines.
12